Trust me, a chicken and any other poultry are not worth a vet bill. But whether you are raising chicks or have a a sick hen, there are some basic things you can do that may save their lives. Although I’m writing this for chickens, most of this is also applicable to turkeys, ducks and geese.
Chicken Breeds And Different Types of Birds
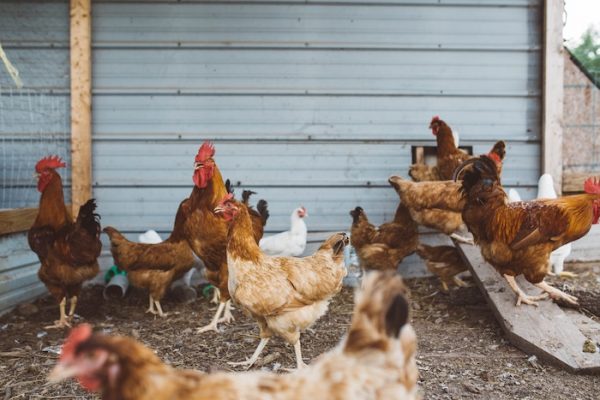
So, what kind of chickens do you have (or will you be getting)? Maybe we should have a word here about breeds of chickens and personalities. The breed of birds that you keep has a lot to do with their requirements, as well as the care and potential health issues involved.
Chicken Fryers and Meat Birds
From hatch to the table in 6 weeks as a fryer. Personally, I take them to 8 to 12 weeks and go for roasting as I have made the investment of almost $4 a chick and the more meat I can get, the better.
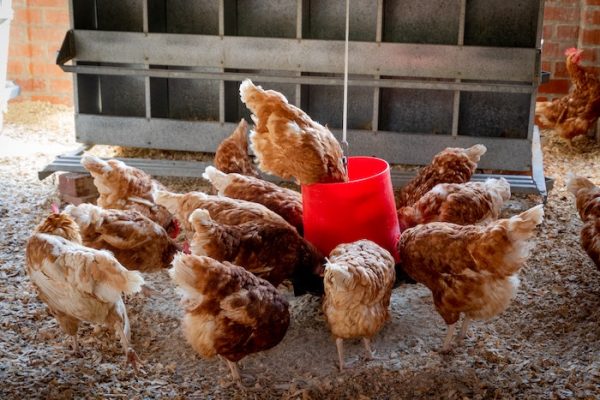
These birds go under a variety of names, the last ones I purchased were something like Hy5s. White, ugly and all they do is eat, drink and poop (a little animal husbandry tip here, put the food on one side of the pen and the water on the other side, so they at least have to get up and move to do one or the other). It also helps if you order in a few other breed chicks at the same time to keep these creatures moving.
The problem with these birds is their legs. They are absolutely notorious for their legs going on them and now you have just lost not only your investment in the chick, but also everything they have eaten to date – did I say they EAT! These are the birds you are eating at KFC and from almost all grocery stores.
Not suited to organic raising as they need those antibiotics and medicated feed. However, you can raise a winter’s worth of chicken over just two months in the summer. They are suited to warm weather.
The Egg Layers
Leghorns are the factory farm white egg laying chicken – they can have them! They start laying early at 4 to 6 months and usually killed at their first molt when they stop laying. Very aggressive hens and roosters – as a breed; individuals can be just fine. This is the reason that every hen is kept in her own cage and the roosters are just butchered.
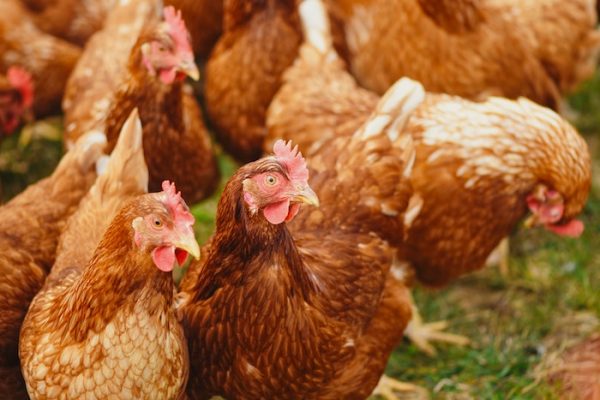
The brown egg layers, like say the Red Stars, are usually a bit more docile personality wise, but still quite aggressive. Aggressive – what does that mean? They are prone to attacking their flock mates and even you!
Usually minimum chick orders are 25 birds. Many people, me included, don’t want 25 birds of just one breed, so we order a mix. The egg layers will be the dominants in that mix. They will kill more docile (almost everyone else) chickens by pecking them to death.
Egg layer breeds are suited to different climates as they are meant to live 1 to 3 years. FYI, the average chicken can live up to 30 years.
The Heavies and More Versatile Breeds
I see these as the homestead breeds as you will find one or more that you will fall in love with. These birds are bred by caring breeders for the most part who cull the mean ones. This is not to say that you won’t still have problems – they are small dinosaurs after all – but far fewer problems.
Lots and lots of breeds from the heritage breeds like the Dominikers that traveled with the settlers across the plains in Conestoga wagons (Barred Rocks are descendants of these hardy chickens.) to the heavies that are suited to cold climates and laying eggs for several years and being an excellent roasting or stewing hen after that like the Austolorp and Cochin *feathered legs, anything, to the half-naked hot weather breeds (read about them but I’m in Minnesota) to the Easter Eggers that lay blue and green eggs sometimes termed Americunas.
The Fancies
Oh, are there fancy breeds of chickens! Any color or look you can imagine including the Polish Top Hats! These birds are usually gentle but flighty. DON’T expect meat or eggs from them.
Banties
Banties are basically miniature chickens of every breed. What banties are really noted for are being very good mothers. Put your fertile eggs under your banties! FYI, of all the chickens banties are noted for doing very well on their own and often roost in the trees. Excellent to have under horses to keep them (the horses) from being flighty when a grouse or turkey flies up in front of them. Super for picking out worms from the manure. A few banties running wild around the farm is what every homestead needs – IMHO. :)
So, the bottom line is that the breed of chicken you choose will often determine how many problems you will have with your flock.
Care for Baby Chicks
So, you order in or buy some baby chicks and one or more start looking sickly.
Here is your basic checklist:

- These need plenty of water and will literally spurt water out of the back of their beaks as they drink. DO NOT however, put a little pool in with them when young as they need mother’s wing oil for babies to be waterproof and will drown if in “deep” water without it.
- Have an isolation cage/container handy. That could be a single cardboard box off to the side, perhaps a cat carrier, etc. Preferably it should be able to be safely rigged with a clip on light (incandescent so that it throws off heat) or some source of heat. A simple heating pad can often do wonders. Why an isolation cage? Because chickens are notorious for being cannibalistic and just plain running over the weaker one(s) until it does die.

- A hard boiled egg chopped finely is the most compatible high protein food you can give an ailing chick. I just make a practice of boiling up some eggs and feeding them to the chicks for the first day or so when ordered in.


Chickens That Have Poopy Butts
Yes, between day 3 and 10 you will likely have some chicks with a poopy butt – manure stuck to its anus blocking any more excretions. This is certain death for a chick.
Grab a shallow pan and fill it with warm slightly soapy water – think of water suitable for bathing a baby. Gently hold the afflicted chick in the pan for several minutes, sometimes that is all that is needed to GENTLY pry off the manure.
Sometimes you need to add a little drop of liquid soap to your finger and massage it into the manure and attempt to pick pieces of it off. Sometimes you need a long soak and baby oil.
Wet a wash cloth in warm water, rub baby oil over the afflicted area and either sit with the chick for 20 minutes or so or figure out a way to keep it from moving out of the wash cloth, perhaps wrap another cloth around it with the head exposed or even prop it between stuffed animals or give it to a child to hold. I have never seen this NOT work.
Sore butt? Gently massage it with baby oil. You can also use your favorite diaper rash lotion if you have some around. Preparation H on a raw butt can really help. ISOLATE any chick that doesn’t seem perky after this treatment (or group of chicks). Be sure not to allow them to catch a chill after being wet.
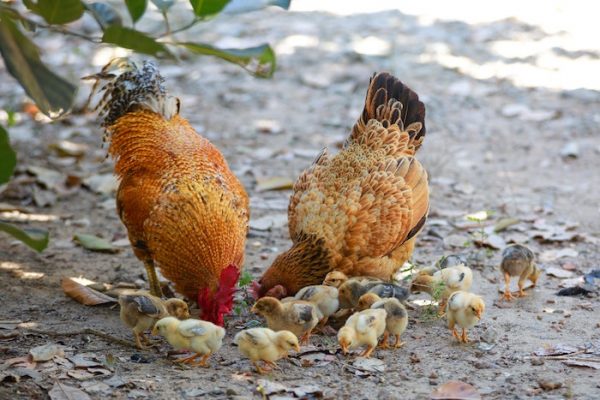
Remember, Keep Baby Chicks With Their Mom
If your chicks, ducklings or goslings are running with their mother outside, remember that she can’t count. A chick that isn’t keeping up is left behind and will die before morning without her protection. Usually you will be walking along and hear the “distress call” and go over and investigate.
Sometimes the baby is trapped, sometimes cold or sick, or sometimes it is wet. If it looks healthy and fine put it back with mama and hope for the best. However, I have saved many a wet duckling or cold chick just by putting it in my bra – head sticking out forward – and carried it around while I am doing chores until it dried off and/or warmed up and then put it back with mom. Or carried it home to an isolation cage and kept it warm and dry overnight.
Note: Never feed medicated chick feed to baby ducks or goslings, it will often kill them.
Tips on Raising Adolescent Chickens and Pullets
Chicks are sooo fun! I just love watching them. And once you’ve kept them alive and well for the first 5 days you generally have a break for two weeks to just enjoy them.
The chicks strike me as adolescents once the true feathers start appearing. Depending upon the breed you have purchased they will “mature” in anywhere from 6 weeks to a year – meaning that they are ready to eat or the hens will start laying as pullets defined by the breed you have chosen and then there are the versatile breeds raised for eggs and meat, and the fancy’s are a whole ‘nother game.
Within a few days however, give or take depending on the breed, of two weeks they start feathering out. That simply means they start to get their “real” feathers and go into adolescent behavior.
Three things I should give you a heads up on at this point:
- Provide a place for them to roost – get up off the ground.
- Chickens can’t swim! Okay, you may think, “Duh, why is this important?” Because I have lost a lot of chicks (and chickens) to drowning. There is a reason chicken/chick waterers are made the way they are. If you just put down a bowl or a pan, for sure the chicks will fall in and get wet and drown. FYI, a water trough for horses, cows, sheep or goats is also a death trap for adult chickens. Trying to provide a family group with a fresh water pond is a mistake – the babies will fall in and drown. Raising them with ducklings and geese who need a lot of water is also a mistake. Just let them get a little larger or provide a beach that they can climb out on.
- Provide them with a way to start dusting themselves. Sand works, but if you heat with wood, try wood ashes as they prevent lice.
Pecking Order Is a Serious Thing – Manage It Carefully
What defines adolescence? Personalities begin to emerge and bullying. Just what you expect from teenagers – they are bullying and picking/pecking (literally) on one another. In chickens, this is called “pecking order”.
Pecking is an exercise in dominance. One or more chicks will begin pecking each other and especially the weaker/less dominant chicks. They will literally peck them to death. They are even cannibalistic and will eat the dead ones – and yes they can have plenty of food and water and a balanced diet and do this.
Pecking often comes on suddenly. Morning chores and everything is fine; evening chores and you have a bloody chick. Put it in the isolation cage now!
What if you experience an all-out pecking epidemic? It happens! Six out of 25 are being pecked in various areas of the body. Can’t isolate them all. They will just start pecking each other!
I strongly recommend any kind of mechanical grease – some even have antibiotic properties if you read the labels. Petroleum jelly will work. It kind of depends on how bad it has gotten and how much time you have. Yes, you can lose 6 chicks in 24 hours to pecking if you are not watching closely.
Husbandry is critical here. You can stop most problems quickly just by observation and intervention. But hey, if you are doing chores once a day, working full time and have a family too boot, It can get away from you in 24 hours and then you are playing catchup – much less if you actually go camping for a weekend.
All through adolescence into the pullets (young hens ready to lay) your biggest problem with confined chickens will be pecking.
What can you do to help/mitigate the pecking?
-

A pecked vent is the worst, because it is so hard to keep clean. You may want to soak this hen in the sink in warm water with just a dab of soap in it. Antibiotic ointment. ISOLATON! Don’t use pine tar on this wound, just grease on top of the antibiotic ointment. Raise your chicks with their moms: Pecking is normal behavior for confined chickens, but chicks raised with their mothers (hens) normally do not go through this (and they don’t have poopy butts either!).
- Keep your flock to birds of the same breed: Mixed breed flocks have more problems with pecking than single breed flocks. Single breed chicks all raised together will peck less. That said, I dislike single breed flocks and I like to drag home hens of different breeds that I run into at poultry swaps and rummage sales. Hence, I have had a lot of pecking problems.
- Free range or tractor your chickens: Free ranging them will help decrease the pecking, and a chicken tractor will too.
- Make sure they don’t have worms: Wormy chickens are more likely to peck and be agitated and mean. Chicken worming medication is usually put into the water. If you have a flock of mixed ducks, geese, turkeys and chickens you will need to isolate the chickens as the wormer will often kill the other poultry.
- Provide a brushy “getaway” area: Providing some open brush area in the corner of the pen is a good idea in that it allows a place for the pecks hens to go get away from the flock. Depending upon how you have your pen set up, roosts both inside and outside of the house are a good idea too.
- Limit the number of new birds you introduce to the flock: Introducing new birds into the flock almost always means more pecking, especially of the new birds. Again, have an area where they can get away from the rest of the flock if needed – that is not to say that an especially aggressive hen or rooster will not chase them even with brush provided, but it is a slight deterrent.
- You can try nipping the beaks: You can nip the end of the top beak on an aggressive hen with a wire nippers back about an eighth to a quarter of an inch (depends on age and breed) to help with the pecking. Does it work? Sometimes, sometimes not.
- Isolation: For chickens with bad enough wounds, separate them from the rest of the flock and let them recover
- Peroxide/antibiotic ointment: You can use almost anything that you would use on a human, for wounds that are bad enough. This will help with infection and insects.
- Apply pine tar or a blob of mechanical grease to pecked areas: The traditional solution is PINE TAR. Dab a bit of pine tar on any pecked spots. Antibiotic properties and the other chickens don’t like the taste. As mentioned above, mechanical grease and lubricant works awesome too.

While there are certainly better and worse ways to handle pecking, nothing seems to stop it until the flock grows up and settles into their “pecking order”.
Cautions With Roosters
I will relate a little of what I have seen. A good rooster will protect the hens and stop a lot of the pecking. The hens will be happier. A happy hen “sings” a beautiful little cooing tune.
Bad roosters (and these are the majority) will rape and kill young chicks – I had one that would rape day old chicks, snap their necks and throw them to the side and go onto another, there was nothing the hen could do to stop him. His head got chopped off real quick! They will focus on one hen and do her to death. They will join in with the other hens and peck another chicken to death and then proceed to eat it. Too many roosters and you will have “cock fights” and they will kill one another, and you will have gang rapes.

An older rooster usually has more “sense” than a younger one and is not as “sexed up”. Chickens can live to be 30 years old and the best rooster I ever had was over the age of 10 and lived to 18 when he died due to an ‘possum raid on the hen house where the ‘possum just wantonly killed all the chickens – so much for wild things only killing what they need! Ask around, someone will probably give you an older rooster they respect who needs a good home – no one wants inbreeding.
Adult Chickens
Now let’s talk about the adult bird, one plus years old, and some of the issues and ailments to watch out for.
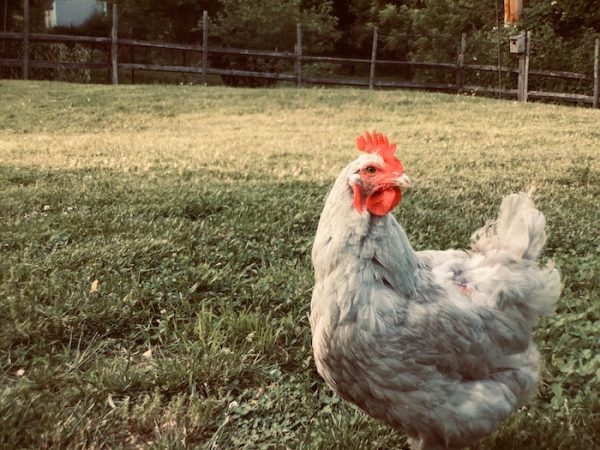
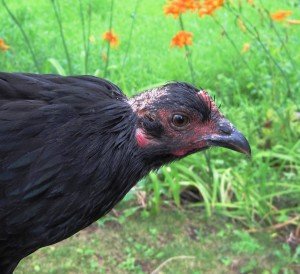
Here is a picture of a sick hen with all of the things that you should look for:

- Messy bottom
- Droopy wings
- Lethargic
- “Sleepy” sick, in pain, eyes
- Sometimes their combs and/or wattle will pale.
- First, are you practicing good chicken husbandry?
- Clean, fresh water
- Clean, dry feed (not moldy)
- Free choice oyster shells and grit
- Clean housing facilities
- Wormed (garlic and diatemacious earth will do that organically)
- De-loused (ashes will do that organically)

What To Do If a Chicken is “Egg Bound”
Most of the time with a hen that is sick out of the blue, it is caused by being egg bound. This is especially common in prolific egg layers like Red Stars and/or the fancy breeds.
Try to get some liquid calcium down her. No liquid calcium? Ladies, do you have a calcium tablet in the medicine cabinet? Pulverize it, make it into a liquid, take a syringe without the needle and gently get it into her mouth and stroke her neck so that she swallows.
Next, give her a relaxing bath in your sink. Water should be akin to bathing a baby. Add soap and if you have them, Epsom Salts. Gently hold her, massage her belly and rear. Perhaps you can feel the egg and by relaxing her in this bath it will work its way out. We are talking a relaxing spa for the hen, 20 to 30 minutes of warmth, water and massage. FYI, to show a chicken in 4-H you must bathe it. Show chickens get baths.
Now dry her in a towel. Yes, you can blow dry her, but an nice warm air dry is better. Soothing music and dim lights are all good. Lavender scented candles may help – you want her to relax. And you might as well too. :-) If you care about your hen, this is stressful for both of you.
Do not attempt to break the egg. Some people will tell you that if you can see the egg (it is crowning) you can take a needle and syringe and try to extract the yolk to make it more manageable to pass. I’ve never had an egg bound hen crown an egg without passing it, so I don’t know. Massaging the vent with baby oil may help.
She will die within 24 to 72 hours if she does not pass the egg and it is usually a 50% death rate. Some things just happen, but you will have no guilt if you do everything you can to help her.
Chickens Can Still Die of Old Age
Sometimes a hen just gets sick and slowly dies – my Red Star hen just did that, which is what got this whole Chicken Doctorin’ series going. She stopped laying two weeks before but looked okay. One day she didn’t come when called and looked very poorly. I did everything I could. After 3 days of isolation she seemed to be getting better and was fine in the flock. Then, one morning, she was just dead. Who knows…
To heal most cuts on animals, and people, and stop pecking – Gun (as in lube grease often comes for a gun – not a shooting type gun) Grease. Keeps the insects off and has antibiotic properties and tastes bad to other chickens. This one tip can save you hundreds even thousands of dollars on vet and medical bills – it works.
Separation/Isolation
Roosts are sufficiently above the ground. FYI a rat can eat a chicken’s feet right off while it is on a roost in the dark and the chicken will not move. There is no way to totally prevent rats and mice around chickens, but a high roost sure helps.
Is she the only one in the flock that is sick? Isolate her immediately. The isolation is for her benefit, so that she doesn’t have to fend off the rest of the flock and can rest and recover in peace.
I have an old fox cage for isolation. Fresh water, fresh food and a nest box or pail.
Other Issues
Broken legs you can set with popsicle sticks and vet wrap and isolate the bird and/or put it in a sling. They actually heal very fast.
Any attack that the bird lives through (Dog, cat, hawk, ‘possum, ‘coon, whatever – she got away alive.) can usually be dealt with by cleaning the wound, some antibiotic salve and isolation. If it is really bad, don’t let her suffer – just butcher her and eat her, preferably without announcing to the family that they are eating “Goldie” tonight. :-) DO NOT eat a bird that is obviously sick from an unknown source!
So, You Want To Be a Chicken Farmer?
There are obviously thousands of other issues and ailments out there, but these are the more common ones that I have dealt with in my 50 years of experience.
Please keep this in mind, what you are raising are small descendants of the dinosaurs. It ain’t always pretty, but it is real, animal behavior. If you only keep a few chickens, there is a good chance that you won’t deal with a lot of this, but if you do, it’s nice to have a reference point to come back to for ideas.
Remember, that whether on a large scale or small, part of raising chickens is about getting your hands dirty. There aren’t always perfect solutions to every situation, but you will begin to at least get familiar with birds that seem healthy, birds that don’t, and a handful of things that you can try. If you grew up in the city, a lot of this will seem foreign at first, but soon enough, you will be wrangling your birds without a second thought.
And remember, if you are dependent on your own resources for survival, chicken eggs provide so much protein that losing a bird can be threatening to your family’s survival.