• Skip to primary navigation
  • Skip to main content

SCP Survival

Best Survival Gear and Supplies

  • Download Survival Guides
  • Survival Food List
  • Download 906 Survival Guides to Your Device
Home / Your Emergency Water Plan

Emergency Water Plan

Emergency Water Plan

Water is liquid life, so it's best to have a lot of it! It's helpful to think of your emergency water plan in 3 easy parts: storage, purification, and resupply. Here's how to get started with each:

Emergency Water Storage

The first part of the water equation is just to store extra in your house. This doesn't have to be complicated. Take an old soda bottle, rinse it out, and fill it up. Boom, water storage.

Of course, hopefully you go a little bigger than that, but the point is that it doesn't have to require a lot of know-how or money to begin storing water. It's recommended to store a gallon of water a day per person, so you can use this as a starting point.

There are lots of emergency water storage containers that you can use. As described above, the easiest and cheapest water storage containers are old soda or juice bottles (never milk, they contain bacteria). In addition to that however, there are a few other good options.

Waterbob Emergency Drinking Water Storage

Waterbob Emergency Drinking Water Storage

The Waterbob is a large bladder, that's made to sit in your tub and be filled on short notice. Obviously this doesn't work for all disasters, but they are fantastic for something like a hurricane, where you have a little notice.

The Waterbob gives you a quick, easy, and relatively low-cost method of having 100 gallons of water to use at your disposal. Although it's better to have a permanent, fixed solution for water storage, it's still worth having one of these, in case you do happen to have enough notice to take advantage of it.

Waterbricks Water Storage

Waterbricks - The LEGOs of Water Storage

The Waterbrick is a clever invention that is made to be stacked in groups to make a tower or wall. Each brick is made to hold 1 - 3.5 gallons of water, and they are geometrically molded out of durable plastic, to fit tightly and support a lot of weight.

They are a simple but smart addition to your water storage, because they allow you to maximize space that otherwise might not be super usable. Stack them vertically, stash them in a horizontal row under a bed, scatter them a handful of places around the house. It's up to you.

55 Gallon Water Barrels for Emergency Water

The Ol' Trusty 55 Gallon Water Barrel

It's pretty hard to beat a straight up 55 gallon water barrel for sheer quantities of no frills water storage. They are durable, relatively inexpensive, and can be easily fitted with a hand pump when the time comes to actually use your water.

A couple words of caution on the 55 galloners:

  1. First of all, after they are filled, they are HEAVY. Be sure you know where you want it, because it might be there for a while.
  2. Second, It's important not to have the barrel sitting directly on the ground--this is actually the same for any water stored in plastic containers. Plastic can actually leech chemicals through to your water over time, so it's better to have them up off the ground (particularly concrete).
  3. Finally, make sure that your 55 gallon container is food safe. If you buy one new from a big box store or online, this likely won't be a concern, but there are several used ones floating around out there as well. If they have been used to transport something that is toxic, they are a no go.

Water Filters and Purification

After water storage, the next layer of your plan should be purification. While some folks don't realize it, there is a difference between "purification" and "filtration."

Purification could mean a lot of things, all of which make the water pure enough to drink. It could mean that you make water safe to drink by rendering inert all of the harmful contaminants that are in the water (for instance, killing all the bugs that are in it). This is what happens when you're in the woods and you boil water from a nearby stream to ensure that it's safe for drinking.

On the other hand, filtration is a particular type of purification, which happens by removing all of the contaminants from the water, whether or not they're dead. Think strainer.

As filtration is one of the cheapest, simplest, and most accessible methods of water purification, we recommend it. In particular, this means that you need to have a few different solid water filters.

Lifestraw Emergency Water Filter

The Lifestraw Water Bottles - Best for Runnin' and Gunnin'

Lifestraw has been around for several years, and is the leader in personal filtration products. The Lifestraw is durable and versatile. It can be used in a number of applications.

It is rated to filter up to 1,000 gallons of contaminated water, into clean, drinkable water.

It can be used to drink directly from contaminated water, such as from a stream, or you can scoop up the contaminated water in a bottle, and filter it as you drink on the go.

If you opt for the Lifestraw Water Bottle, you have a purpose-made water bottle and purifier that works together as one. Simply unscrew the lid, fill up the bottle, and it's filtered as you sip it through the straw. Not bad!

People have used the Lifestraw extensively to filter their water, and it has fantastic reviews. If you want even more versatility, the Aquamira Frontier Pro is another really solid filter that can be screwed onto the threads of a hose, a hot water heater, or even used with a Camelbak or other bladder.

Berkey Water Filters Emergency Water Filtration

Berkey Water Filters for Your Countertop

While the Lifestraw and Aquamira are great solutions for personal water filtration, the Berkey is as good as it gets for a family-sized, countertop water filter. It is fantastic for use as an every day filter, or in emergencies as well.

The Berkey is built to remove virtually all contaminants, with 99.99 percent of bacteria, viruses, heavy metals and more. There has been independent lab testing and years of consumer use to verify that it does indeed filter as well as it is purported to.

Berkey filters are also extremely sturdy, with the housing being constructed of stainless steel, and having good gaskets and a durable spigot as well. If you have a small family (2 adults and 2 small children), a Big Berkey is a great size. If you will have more mouths drinking from it, the Royal Berkey is the next size up, and will ensure that you have plenty of water ready to go when people want it.

Whole House Water Filtration System - Part of Your Emergency Water Plan

Do You Need a Whole House Water Filtration System?

If you are living off grid and drawing water from a well or rainwater catchment system, you will likely want to install a whole house filter. These are made to treat large quantities of water for long periods of time.

They can be several hundred dollars, and filter 100,000 gallons or more (The Aquasana whole home filter is rated to be good for 10 years and 1,000,000 gallons). Although many whole house filtration systems can be easily installed in an afternoon with some simple instructions, you can have them professionally installed if you aren't comfortable doing it.

Resupplying Your Water Supply

The third leg of your emergency water plan is resupply. Going above and beyond storage and filtration, resupply ensures that you can go long periods of time, if necessary, without depending on outside sources for your water. This is true water self sufficiency.

The primary means of resupplying your water are rain water harvesting and wells.

Rain Water Harvesting - Part of Your Emergency Water Plan

Rain Water Harvesting

Harvesting your rainwater need not be extravagant. A simple water barrel at the bottom of your rain gutter downspouts is a great place to start. There are lots of places that you can find rain barrels online or in your local hardware stores.

Rain water barrels usually have an opening at the top, as well as a nozzle with a valve at the bottom. The nozzle at the bottom can be fitted with a normal garden hose to easily direct the flow of water when you are ready to open the valve.

Most people harvest their rainwater exclusively to water their plants and animals, although you can certainly drink it if you need to. Just make sure to filter it well. And keep in mind that for the first 10-15 minutes of a rainstorm, a serious amount of nastiness is being washed off your roof. For this reason, some folks use ball valves to ensure that the dirtiest water at the beginning of a rainfall isn't being stored.

Make sure that your rain barrel(s) have a sturdy place to sit, because they will be extremely heavy once they are full of water! Also, remember that the easiest way to move water is with gravity. If it's possible, locate your rain barrel in a higher part of your property, or have it on a slightly elevated platform. This way you can easily gravity water anything that you will need to.

As your system grows, you can string together several rain barrels, and eventually, larger rain water tanks. The capacity of rain water tanks can be serious--up to 7,500 gallons if you're in the mood. That's like a small swimming pool!

However, unless you have a bigger piece of property that is ideally situated, it's likely that a tank like this will require a pump. It will definitely require some careful forethought and grading/excavation work to create a site for it.

Well Drilling - Emergency Water Plan

Drill Your Own Well

The epitome of water security is having your own well. If you have a well on your property, you have virtually guaranteed access to water.

Of course, drilling a well is no small matter--it involves a special rig to come to the site and can require that they drill to a depth of 100 or more feet. You never know exactly how far you will have to dig to hit water, in fact, it's possible that you could hire a drill rig, and never even hit water.

It's also possible that you could have a well drilled, and find later that the water contains nitrates, copper, heavy metals, bacteria or other toxins as well. So there's really no guarantee. Still, the potential upside usually more than outweighs the risks. If you can pull all the pieces together, having a well is the Holy Grail of water security.

As part of your well water system, you will need to have a pump, a storage tank, a whole house filtration system, and as mentioned above, a test kit. Getting everything installed, set up, and ready to go can be hired out to specialized contractors, or if you have some solid experience, done on your own.

Water and Hydration Preparedness for Disasters

March 29, 2024 by Seasoned Citizen Prepper

Drinking water is the single most consistently found item in every survival kit, be it short-term or long-term.  We can survive for extended periods without food and even with limited shelter.  But we are living on numbered hours if we are without a reliable water source.

So it’s well established that we should maintain a good supply of drinking water for disasters.  But there are several problems with storing water.

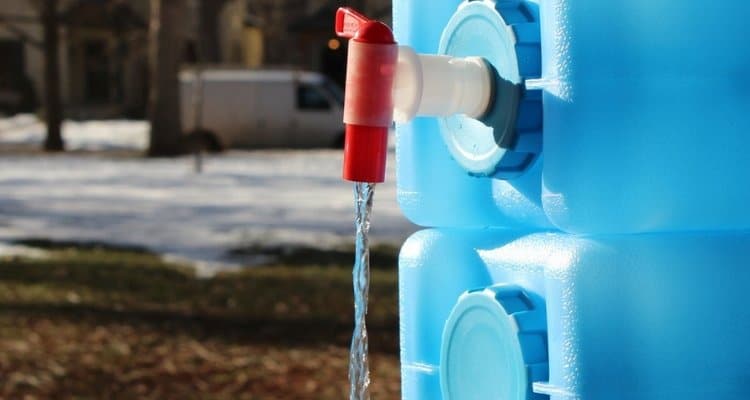
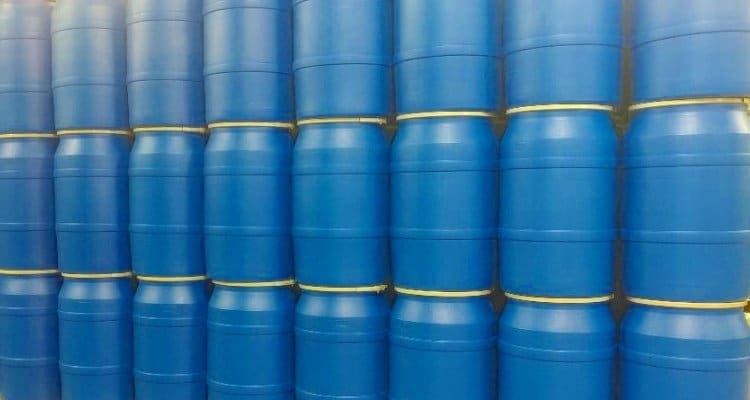
First, it’s bulky.  A gallon of water occupies 231 cubic inches, so supplying a gallon per person, per day for a family of four would gobble up almost eight cubic feet, based on two weeks’ worth of water.  The bigger the family and the longer the disaster, the more of your home is used up with water. There are solutions such as the Water Bob, that allows you to store water in a bathtub, but you need a few minutes notice in order to really take advantage of it (like a hurricane situation for instance).

Second, it does get stagnant.  Store water for up to six months before replacing it.  Even in clean containers and with a slight treatment of bleach, water can become bacteria-laden and unsafe.

So here you are, aware that there’s no city water available and having to come up with four gallons of potable water every day.  What are your options for other sources?

There are options for using water from dehumidifiers or from the condensate pump that keeps your HVAC dry and happy.  But these sources are limited and can be difficult to sanitize.  You’ll certainly want those two devices in your home to maintain proper humidity, but they’re not geared for drinking water use.

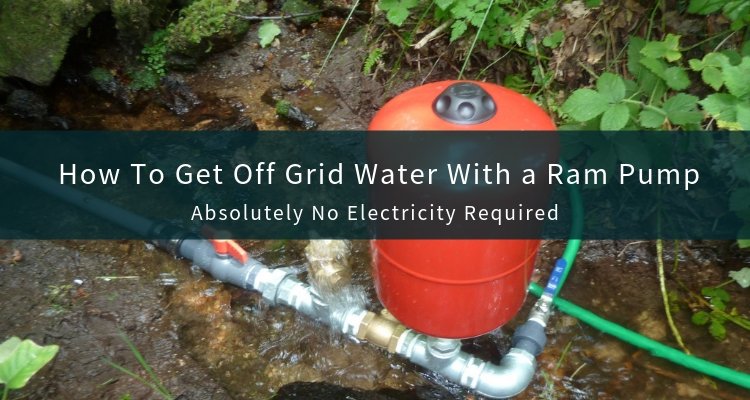
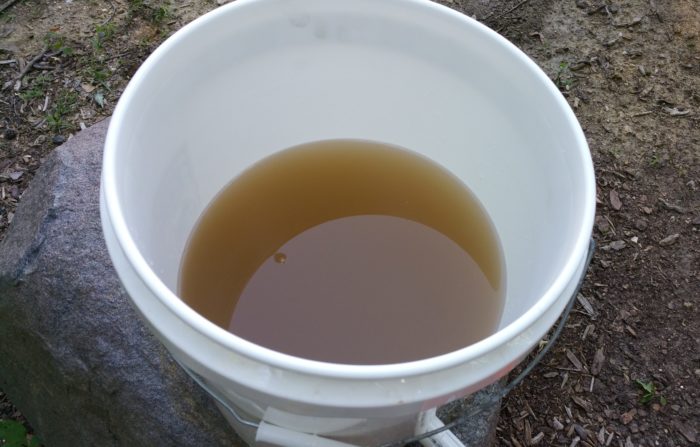
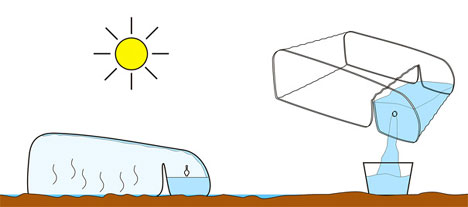
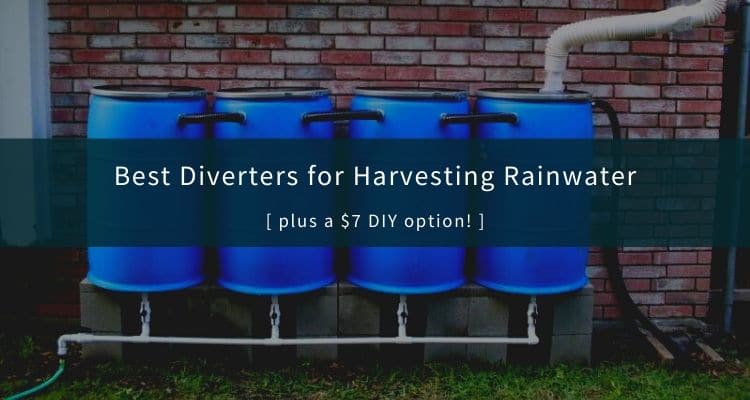
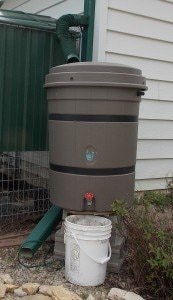
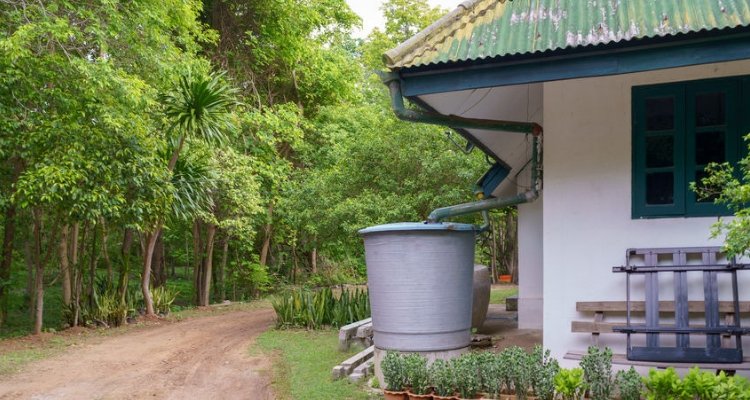
It’s actually fairly easy to establish a grid-independent water source.  The expense of a well or cistern can be prohibitive, but capturing rainwater, runoff, or water from a stream or pond can provide a source of water that will continue to exist just as long as rain can be had.

The best way to avoid the fluctuations of nature’s provision is to do your own version of what municipalities do.  Many city water systems don’t rely on a flowing water source alone.  They instead stockpile it in a reservoir or lake so that there is a backup supply if precipitation ceases.

So creating a pond, even a fairly small one, can provide a surprising amount of water for you.  Ponds are generally measured in acre-feet, a unit that denotes enough water to cover a one-acre area to a depth of one foot.  That’s 43,560 cubic feet of water, or 325,000 gallons.  So even on a small scale–perhaps even a swimming pool–that’s a phenomenal amount of water.

The major provision you need for this type of water supply is pumping capability, plus power for the pump.  There are a variety of pumps available out there, including some that can draw water down to a very low level.

And most likely, you’ve already included a generator in your plans.  It will require only small amounts of electricity, on an infrequent basis, to keep your water flowing.

So with a good plumbing job, you can shut off the water meter and backflush through an outdoor spigot to pressurize your home’s pipes with no off-site water.  That means water in all the usual places with no reliance on your municipality.

Water is critical for life.  Don’t be content with shelves full of old milk jugs brimming with stockpiled city water.  Create a sustainable source that keeps your home functional.

Filed Under: Your Emergency Water Plan

How To Get Off the Grid Water with A Ram Pump

March 23, 2024 by Seasoned Citizen Prepper

Off Grid Water with A Ram Pump

When I was a little girl we used to go visit my great-grandfather, Harry, on his farm in Trout Valley.  We would carry buckets from the fresh water spring that bubbled out of the base of the bluff to the house for drinking and cooking.

My grandmother Marge however, would tell us of a time, when she was a young girl, on the farm when the boom of the ram water pump would lull her to sleep. A time when there was no need to carry water and the spring was fenced off from the cows. Remember – if clean water is not available, use a water filter to protect against pathogens and other contaminants.

Hydraulic ram water pumps have been used for at least two hundred years to deliver water to homes, farms and even small towns bordered by small creeks or rivers.

In 1879, The People’s Cyclopedia included the hydraulic ram among the 55 most important inventions in the history of mankind. It defined the hydraulic ram as: “A simple and conveniently applied mechanism by which the weight of falling water can be made available for raising a portion of itself to a considerable height.

Generally, you need at least two feet of falling water to operate a ram pump. Most creeks and small rivers you would have access to on the homestead do not have a natural two foot drop.  The spring on Harry’s farm gently meandered down to feed a larger creek.

When Harry was a young, successful farmer however, he created a two foot drop by building up the small stream of water with rocks and mortar which created a natural pool at the base in which to sit the ram pump. Metal water lines ran a continuous stream of water to the summer kitchen of the house and to the stock tank that overflowed and created its own stream back to the stream below the pump. There was always ample water for the house, stock, and to irrigate crops if need be.

A quick and fairly easy way to create a pond/waterfall that I have used is to fall a fairly large tree across the creek and cut a V in it with a chainsaw. Instant waterfall! Silt and rocks will build up behind the log and the V focuses the water into one spot where you can put your ram pump. Or if you don’t want to pump water, just create an area where you can dip water, bathe, wash clothes, etc. the force of the water will carve out a small pond that will usually stay open even in traditional Minnesota winters. And on a hot summer day, it is a little piece of heaven to sit on the log, dangle your feet in the water and watch the kids play in the pond, jump across the V in the log and just laugh and play in the sunshine and clear water.

A solar water pump is an option if you don’t have the drop to create a narrow falls and have more money and a significant amount of sun. Any time you can get the water closer to the house, stock and garden, life becomes so much easier! This is the same principle as any electric pump, except that the power is supplied by the sun. If you pump the water into 50 gallon rain barrels and water the individual plants at their roots the water will last a lot longer than traditional overhead watering.

For more information about ram and solar pumps, a good site to access is: http://www.theramcompany.com/index.html. There are also plans on the net to make your own ram pump.

If you have water on your land, it probably slopes.  Thoughtful placement of your garden, stock pens and home can make water access as simple as a gravity feed. Create a “mouth” in the creek of PVC or some such attached to inexpensive plastic water line and you have instant water! At least until it freezes. :)

And then there is snow… also known as poor man’s fertilizer. It too can be thawed to create water for cooking, dishes and even bathing. Just so you know, the ratio is about 10 inches of snow to 1 inch of water—that is a lot of melted snow. But you do what you gotta do J and just be grateful that you have the heat to melt it with!

Water is a critical piece of the self-sufficient equation. If you haven’t thoroughly organized your water security plan, it’s time to do so now.

This post was originally published at ModernSurvivalOnline.com.

Filed Under: Your Emergency Water Plan

DIY Sawyer Gravity Filter for a Bucket

March 23, 2024 by Seasoned Citizen Prepper

Remember the days of drinking water through a garden hose in the middle of summer? Well – not all water is safe to drink.

The Sawyer water filter is awesome! It is simple to operate, reliable, and is a great value. The biggest drawback of the Sawyer is using it with multiple people. It can be done but you’re either all sucking on the same straw or using a lot of time and energy filling small bags or bottles with dirty water and squeezing through the filter. I figured there had to be a better way to use this great filter.

However, you can easily adapt the Sawyer for bucket use. Once a hole is drilled in the supply bucket the components are assembled (instructions included) – and then the Sawyer is attached. That’s it.

Here is one of my most recent trials:

#1: Started with a bucket and threw in a bunch of dirt and added a couple gallons of water.

20160515_162845

#2: Used a towel as a pre-filter to remove the larger particles.

20160515_163134

#3: Towel caught a lot of crap. A finer pre-filter for capturing more of the larger particles would be suggested (coffee filters good for this).

20160515_163415

#4: Below is the water ready to go through the Sawyer.

20160515_163502

#5: Filtering operation in progress.

20160515_163612

#6: Close up of the stream of filtered water exiting the filter.

20160515_171410

#7:  This is what the non-filtered water looked like sitting in the bucket.

20160515_163823

#8: Filtered water is crystal clear.

20160515_170526

I was pretty happy with the results. I was interested in seeing how well the water flowed from the bucket through the Sawyer as well as what the water would look like afterward. I was not surprised that the water looked crystal clear after all that is what is supposed to happen. The flow rate was excellent at around 5-6 gallons an hour.

I drank the entire glass of filtered water and found it had no off-taste and tasted like….well…..water. Granted this test was dealing really with only sediment and suspended particles in water. I have no way of knowing about potential pathogens or bacteria but I am still alive so I consider the test a success.

Remember, a solid water plan involves, storage, purification, and resupply. There are also some “just in time” solutions like the WaterBob bathtub water holder that can give you an extra 100 gallons if you have a few minutes notice to fill it. For all these ideas and more on water preparedness, check out this guide on water security.

Filed Under: Your Emergency Water Plan

How to Purify Water with The CWater Desalinator

March 17, 2024 by Seasoned Citizen Prepper

When travelers are lost, stranded or in an emergency situation, one of the most difficult parts of waiting for help to arrive is finding fresh, potable water.

Although tales abound of shipwreck victims finding novel sources of drinking water, there might be an easier way to stay alive if you ever find yourself in an emergency.

This design, called CWater, by Chinese engineer Chao Gao uses a simple solar purification method to transform just about any source of water into potable liquid. With a readily available source of fresh water, survivors have a better chance of staying alive and relatively healthy until help arrives.

The CWater is lightweight and small enough when compressed to be carried on life boats or in backpacks. Its innovative design could easily be applied to places where clean drinking water is scarce, or even used in disaster relief efforts to keep refugees and survivors healthy until permanent living situations are arranged.

The design took second place in the recent Incheon International Design Awards. The ingenious design requires only that the foldable device be placed on the ground or directly on the water. Water vapor collects in the chamber and is purified solar rays. A batch of clean, drinkable water is ready in just shy of two days.

If you haven’t fully created your emergency water plan, it’s important to do so. Remember, a solid plan includes options for water storage, purification, and resupply.

Filed Under: Your Emergency Water Plan

5 Critical Components of Our Off Grid Water System

March 13, 2024 by Seasoned Citizen Prepper

Although many people would not want to rely on the off grid water systems that we have put in place, here are the major pieces of our water around our off grid homestead:

1. Drinking Water

The primary source of water for this home is the rainwater catch cistern. However, with much of the North being in a drought since August of 2011 the cistern is not as full as it should be, along with a shortage of ice for the ice house.

For years the homeowners’ carried their drinking water from town. The land cooperative decided to spend the money and drill a deep well, with a solar assist pump, not only for drinking water, but bathing and irrigation of the gardens. Although these homeowners’ continue to use their cistern as their primary water source, they do have the option of the deep well water also.

Off Grid Hot Water
The wood cook stove is an essential component to this off-grid home. But what I want you to note is the white water reservoir to the right of the stove.

2. Hot Water, Showers and Bathing Off Grid

This is a truly ingenious system for taking a shower! The reservoir is filled with hot water from the cook stove (Or depending on how fast or how many are going to take a shower, half cold water and the rest hot water.) and gravity feeds to a shower in the basement directly below the reservoir next to the “ash catch” room.

A simple lever is used to access the heated water into the shower. And even though there are teenagers in the home, the parents note that there are no problems with long, extended showers that so many teens are prone too! The basement is also unheated, so that may be a factor as well.

Below is a picture of the upstairs “washroom”. It is located between the master bedroom and the open loft area of the children’s rooms.

A simple pitcher and wash basin are the fundamentals for face and hand washings and brushing teeth. I am not sure whether this is plumbed into a gray water system or has a five gallon bucket below the vanity curtains. That is an extra hand mirror on the side of the vanity and behind is a closet covered with more muslin curtains.

The claw food bathtub pictured above is seldom used anymore, but when the wife was pregnant she said she spent many hours in it trying to relieve the ache of back pain related to pregnancy and working in the fields. It is located kitty-corner from the wood cook stove in the kitchen. Now it just holds the laundry basket.

3. Our Water Well

Although this home is totally non-electric, solar grids on the greenhouse are used to pump drinking and cooking water from their 300’ deep well up to the house.

All other water is pumped by hand from a cistern beside the house used to collect rain water.

4. Off Grid Toilets

Beside the water room is a half-bath with a flush toilet. This is usually only used in the winter and flushed with a pail of water. Again it had the pitcher and basin for washing hands.

Note this nice rustic, traditional outhouse. It is built on a side hill and has a porch. The inside is “papered” with all kinds of pictures cut from various magazines!

5. Off Grid Laundry

This homeowner prefers to do laundry in town when they make their weekly trek to the library for homeschooling and internet access. However, they dry their clothes at home. Here is the obligatory clothes line. If this doesn’t bring back memories of wind fresh sheets, I don’t know what will.

I remember hanging clothes on the line during the winter. They freeze dried! I would bring the jeans into the house and stand them up against the wall until they thawed and finished drying over a chair. This suspended wagon wheel in the living room next to the masonry heater is for drying clothes! How charmingly inventive!

(Off grid laundry ideas and off grid washing machine recommendations here)


This is part of an off grid series, where I take you on a tour of the off-grid home without solar assist and a walk around the farm.

If you enjoyed this post, be sure to check out the other posts featuring their: home without electricity, masonry heater, gardening efforts, and homestead businesses.

My hope is that you will enjoy the experience as much as I did and perhaps learn, or remember, a bit of an older/newer lifestyle.

Filed Under: Your Emergency Water Plan

Best Downspout Diverter for Rain Barrels (plus a $7 DIY option!)

March 8, 2024 by Seasoned Citizen Prepper

Best downspout diverters for harvesting rainwater into rain barrels

Rainwater harvesting is one of the most practical water independence moves a homesteader or prepper can make — and the downspout diverter is the one piece that makes or breaks the whole system. Get it right and water flows straight from your roof into your barrels. Get it wrong and you’re mopping up overflow, or worse, directing water toward your foundation.

We’ve run rain barrels for years. The $7 DIY diverter below came out of two years of trying to solve this without cutting apart the gutters — it works on four barrels simultaneously. But we’ll walk through the three best off-the-shelf options first for anyone who’d rather buy than build, then get into the full DIY method step by step.

The 3 Best Downspout Diverters

The diverter redirects water from running out the bottom of your downspout into your barrel instead. When the barrel fills, a good diverter automatically routes overflow back down the spout. A bad one lets overflow go wherever it wants. Make sure to get one that’s easy to install and reliable — you don’t want it failing in the middle of a rainstorm.

If you don’t already have one, these are the 3 best to check out:

1. Gutterworks Inline Downspout Diverter

Gutterworks inline downspout diverter for rain barrels

The most versatile of the three. It connects directly to your existing downspout with no major modifications, and works whether your barrel sits directly below or offset to the side via a hose run. A simple lever flip switches it back to standard drainage when the barrel is full — no overflow, no mess. Available in 2×3 and 3×4 sizes and multiple colors to match your gutters. The unit is on the larger side, so measure your installation clearance before ordering.

Pros:

  • Comes in two sizes (2×3 & 3×4)
  • Multiple color options
  • Works with barrel directly below or offset via hose

Cons:

  • Larger unit — needs clearance room for installation

Best for: most homeowners with one or two barrels and a standard downspout setup.

2. Earthminded Flexfit Diverter

Earthminded Flexfit downspout diverter for rain barrels

If you’ve ever tapped a maple tree, the Flexfit install will feel familiar — a tap-in approach rather than a full splice. Built-in overflow protection and installs cleanly into new or existing downspouts. The catch: it only fits 3×4 rectangular downspouts, so check your size first. Best matched to smaller collection setups — a shed roof, a single barrel directly below the spout — where the smaller opening isn’t a limiting factor.

Pros:

  • Built-in overflow protection
  • Installs easily into new or existing downspouts

Cons:

  • Only fits 3×4 rectangular downspouts

Best for: smaller roofs, single-barrel setups, 3×4 downspouts.

3. Oatey Rainwater Diverter

Oatey rainwater downspout diverter kit

Takes a few more steps to install but leaves your existing downspout structure essentially unchanged. Four feet of hose is included, giving you flexibility in barrel placement. One honest downside: no automatic overflow protection, so you need to either monitor your barrel or make sure the barrel itself has an overflow outlet. For most people who are actively using their collected water, this isn’t a real-world problem. UV-resistant coating means you can paint it to match your trim without losing durability. Fits 2×3 rectangular downspouts only — know your size before ordering.

Pros:

  • UV coating survives painting — match it to your trim
  • Minimal changes to existing downspout

Cons:

  • No overflow protection — monitor your barrel or ensure it has its own overflow outlet
  • Only fits 2×3 rectangular downspouts

Best for: 2×3 downspouts, flexible barrel placement, painted-to-match installs.

Download 906 survival guides bundle

Downspout Extensions: Managing Overflow

Once your barrel fills, water has to go somewhere — and letting it pool at the foundation is not the answer. That’s how you get expensive structural damage over time. A downspout extension or splash block routes overflow away from the house toward a proper drainage area.

Extensions come above-ground and below-ground, permanent and roll-out, and virtually all of them are low-maintenance once installed. Some worth looking at: a flexible drain extension (can be directed around obstacles), rigid aluminum for a cleaner look, or a basic splash block as a no-fuss minimum. The right choice depends on how far from the foundation you need to move the water and how much you’re managing. Three good options to search for: Wholesale Plumbing Supply downspout extension, Flex Drain Downspout Extension, and the Lake Lite Splashblock.

Downspout Filters: Keep Debris Out

A downspout filter — also called a screen or strainer — sits where the gutter meets the downspout and keeps leaves, shingle grit, and debris out of your collection system. This matters for two reasons: clogged downspouts are a headache, and debris in your barrel degrades water quality over time.

The old knock on filters was that they didn’t work and were hard to maintain. That was largely true a decade ago. Current mesh designs do a real job and cut down dramatically on how often you need to clean gutters. If your roof sits under trees, a downspout filter is non-negotiable. If your roof is relatively clear, a basic mesh filter at the top of the downspout is sufficient insurance.

Choosing a Rain Barrel

The barrel is where the water actually lives. What you need: a spigot positioned high enough to get a watering can or bucket underneath (which is why elevating on cement blocks matters — see the DIY section below), a screened inlet to block mosquitoes and debris, UV-resistant material so the barrel doesn’t degrade in sunlight, and a built-in overflow outlet so excess water exits in a controlled direction.

The 55-gallon range is standard for most home setups — enough to make a real dent in outdoor watering, manageable enough to drain before winter. For water independence, linking multiple barrels in series is the upgrade: overflow from the first fills the second, and so on. Three worth looking at: the Upcycle 55-gallon, Mirainbarrel, and FCMP Outdoor barrel. For deeper water independence planning — storage, filtration, and what to do when the tap stops running — see our emergency water planning guides and the WaterBob review for indoor emergency storage.

Gutter Guards: Worth It If You Have Tree Cover

If large trees overhang your roof, a filter at the downspout alone won’t keep up — you need gutter guards spanning the full gutter run. Good guards mean less climbing, less cleaning, and cleaner collection water from the start. They’re an upfront investment that pays back in time and maintenance over years. If your roof is relatively clear, skip them. If you’re pulling handfuls of leaves out of gutters every fall, they’re worth the cost.

DIY: The $7 Removable Downspout Diverter

Sometimes buying a standard product doesn’t fill all the needs. This is one of those cases — none of the off-the-shelf diverters solved the problem of having four barrels, not wanting to cut apart four downspouts, and needing something that could be pulled off in 30 seconds before winter.

For less than $7 you can create a DIY downspout diverter for your rain barrel that looks good, removes in under 30 seconds in winter, and self-stores.

Ground spout components used to build a DIY downspout diverter for rain barrels

My Experience Creating a Rain Barrel Diverter

I’ve had my rain barrels for two years trying to figure out how to divert rainwater from the gutters into the barrels without breaking the bank. I didn’t want to take apart the gutters. I have four rain barrels, so that was sounding like a lot of work. After two years of thinking it through, I came up with this solution and love it.

The first one I put in was horizontal. I tested it by throwing a hose on the roof, running water into the gutter — and out the water came. That’s when I noticed I needed caulk.

These are built from the “Ground Spout,” which I bought at Menards for about $5 or $6 each. Any hardware store should carry them. They mount vertically or horizontally on a standard 4-inch downspout.

How To Make a DIY Rain Barrel Diverter

What you need: 1 Ground Spout (~$5–6), a scrap piece of vinyl flooring, clear silicone caulk, small self-tapping metal screws, cotter pins, fishing line, tin snips or a jigsaw with a metal blade, and a drill.

5 gallon bucket positioned under rain barrel spout

First, install and level your rain barrel. I used four stacked cement blocks to get the spout high enough to put a five-gallon pail underneath. I made treated plywood bases and tipped them slightly forward for drainage. If wind is an issue, put a cement block on top of the empty barrel to keep it from tipping. Note where your overflow valve is pointing before setting it permanently.

Then find a leftover piece of vinyl flooring and cut it to size. You should be able to enlarge the photos for reference if needed.

Vinyl flooring piece cut for DIY rain barrel diverter flap

Figure out where and how you want the diverter placed on the downspout — horizontal or vertical both work. Pre-drill the corners of the rectangular Ground Spout piece. Trace the inside of the rectangular piece on the downspout with a Sharpie and mark your screw holes. Drill starter holes inside the marked area, then use tin snips or a jigsaw with a metal blade to cut out the hole. Don’t stress about perfection — it won’t show much, and in winter it’s mostly covered. Mash any sharp edges down with pliers.

Tracing and drilling the downspout for the DIY diverter installation

Pre-drill your screw holes with the right bit. Run a bead of clear silicone caulk all the way around the hole. Start your screws into the plastic piece before putting it against the downspout — trust me on this one, I dropped half a dozen screws learning this the hard way. Screw the piece into the downspout.

Fold the long side of the vinyl for insertion through the hole, then push it flat against the inside of the downspout. Trim with scissors as needed. Attach the ground spout hose and clip it in — any bend and it won’t stay put.

Completed horizontal DIY downspout diverter with water flowing into rain barrel

Pre-drill a hole through the top of the rectangular piece for a cotter pin, and another through the bottom of the round spout for a second pin. Drill a couple of holes for the fishing line where needed.

Fishing line is nearly invisible, extremely weather resistant, and lets you pull the pins, stow them safely for next year, pull the vinyl out and slide it into the spout, and set it to the side until spring — all in under 30 seconds. You could use a nail or screw instead, but the fishing line is what makes this truly self-storing.

Put the spout back in place and insert the pins. If you have a sharp turn in your setup you may need one screw — try to place it somewhere reachable without a ladder for winterizing.

Done for the year!

Ready to Give it a Shot?

Go to a hundred houses with rain collection and you’ll find a hundred different setups — and most of them work fine. The fundamentals are what matter: divert the water cleanly, filter out debris, store in a UV-resistant barrel with an overflow outlet, and route that overflow away from your foundation. Everything else is details.

A single 55-gallon barrel off one downspout after a decent rain is a week of garden watering. Four barrels in series changes the math significantly — which is exactly what this system was built to handle. For the broader water independence picture, the emergency water guides cover storage, filtration, and contingency planning. The preparedness downloads page has printable water planning checklists as well.

Filed Under: Your Emergency Water Plan

  • Page 1
  • Page 2
  • Go to Next Page »

Copyright © 2026 · Genesis Sample on Genesis Framework · WordPress · Log in

  • Privacy Policy