• Skip to primary navigation
  • Skip to main content

SCP Survival

Best Survival Gear and Supplies

  • Download Survival Guides
  • Survival Food List
  • Download 906 Survival Guides to Your Device

6 Best Survival Garden Layouts [With Crop Lists & Square Footage]

March 3, 2024 by Seasoned Citizen Prepper

Anyone interested increasing their self reliance, going off-grid, or simply providing for their family when times get tough should be heavily focused on creating a productive and sustainable food source. The foundational building block for this is a survival garden.

Providing enough food to sustain your family can seem like a daunting proposition that would require several acres of land. But with a little planning and consideration, you can create a productive garden that will serve you and your family well all year long. 

A survival garden provides the nutrients and calories you need to survive.

What is a Survival Garden?

The simplest explanation would be that it is a garden capable of growing the food you and your family need to survive (or at least a large portion of it) until the next growing season.

This may seem straightforward, but when you break it down and see how many calories, vitamins, and minerals you need to replace daily to stay healthy, you realize there has to be some serious planning and consideration put into it.

Survival gardening has a critical urgency about it, and doesn’t have to be pretty.

The Martian Survival Gardening
Mark Watney, farming potatoes inside a plastic dome in the movie “The Martian.”

If you’ve seen the movie “The Martian”, you can use the example of Mark Watney, who formulates a plan to survive the harsh climate of Mars by potato farming in his own feces. Is it going to make the cover of Better Homes and Gardens? No. Did it keep him alive? Yes.

When you consider how important food security is to your family, there is no reason not to do everything in your power to make the most effective survival garden possible.

In addition to keeping you alive, there are a few other reasons why having your own garden is beneficial:

  • Health Benefits: Starting a garden for the resulting health benefits alone is worth it. Do you know what most people do when they have access to fresh, free produce? They eat tons more of it! Even if you are relatively careful with what you eat, increasing your produce consumption will always benefit you. 
  • The Money: Eating your own produce can save you some significant coin. And to top it off, you could also take it to the very same markets where you used to spend your money and make some money. You probably will not get rich, but you’ll certainly be able to offset some costs.
  • Help Feed People in Need: In times where you’re not depending on every calorie from your survival garden to feed your family, another option is to donate the surplus to a local food bank or family in need. The extra potatoes and carrots you are tired of seeing in the cellar could be the reason someone’s kid has a little more to eat.

Survival Garden Layout Examples

If you are trying to provide a chunk of your family’s calories from the homestead, then you need to be really smart about your survival garden layout.

So what do survival gardens look like? Well, that question has a lot of answers. There are many different types of gardens, each with their own corresponding perks and benefits.

It is perfectly acceptable to use a pre-established clearly defined archetype, or you could take your inspiration from several styles and create something unique to your situation and property. 

Here are some terrific and time-tested survival garden layouts to help get your wheels spinning:

Square Foot Gardening provides an efficient, space saving way to maximize yield for area.

1. Square Foot Gardening

Square foot gardening was originally devised as a way to teach growing capabilities and capacities to people in underserved areas. They can be made in nearly any size or configuration.

There are some solid reasons you might choose to follow a square foot gardening format. The planting guidelines prevent crowding while helping to maximize the space available and eliminate the wasted space of row planting. Similar plants are grown in non-linear configurations as they would in the wild so that they are not crowded out and can reach optimal size.

This same aim of efficient use of space also applies to how the garden is physically built. It is a raised bed that is visually divided by materials like wooden dowels, string, or twine tacked into a square-foot grid. This allows the cultivation of personal amounts of produce, in small areas, with little need to travel.

As they are raised beds, less bending is needed, so they are less work to maintain.

During WWII civilians were encouraged to grow ‘victory gardens’ to offset some of the need for staple foods required by troops overseas.

2. Victory Gardens

The victory garden is seeing a comeback in these uncertain and turbulent times. While it started as a way to reduce reliance on staples in order to free up rations during the second world war, it is once again enjoying a resurgence in popularity.

Victory gardens are designed to provide most of what a family of two to four people will need for much, if not all, of the year. With a high reliance on beans, drying and preservation will be crucial for maximizing the usefulness of the garden.

A keyhole garden gives the gardener the advantage of being able to stand in one place and tend the total surface area.

3. Keyhole Gardens

Keyhole gardens are perfect for hot and particularly dry climates. They consist of a wide round garden that is several feet deep and has a small radial arc of material removed.

With this material removed, the gardener can stand in the center of the garden, with the produce at approximately waist height. All areas of the garden can be reached easily by the gardener with very little strain on the back.

Since they are so deep, a key benefit of constructing keyhole gardens is their resistance to drought. Cardboard layered into the soil also helps to prevent water loss through evaporation. The center is preferred to be a compost bin with a base of rock at least the size of gravel, to facilitate drainage. As the material in the bin composts and is watered into the surrounding soil, it helps feed the crops in the garden. 

Keyhole gardens do not make especially efficient use of space, since they are often quite a bit deeper than simple raised beds, but they do offer an extremely rich substrate to grow in.

Since they are fed by the compost, as well as being primarily watered from there, keyhole gardens are perfect for root vegetables like carrots, radishes, and beets, and leafy vegetables like spinach, lettuce, chard, and herbs.

A ‘food forest’ emphasizes plant guilds and dispersed plantings to maximize production.

4. The Permaculture Food Forest

One of the hallmarks of a permaculture style “food forest” is that it’s typically not in 1 specific “garden.” Rather, the plants and trees making up a food forest are strategically scattered throughout an area, to take advantage of microclimates, optimal growing conditions, and companion plantings as much as possible. 

If you have a larger area and are looking to build an extremely diverse and naturally productive garden, creating a food forest modeled on permaculture principles might be the perfect option.

The benefits of permaculture systems are myriad. They not only focus on boosting biodiversity across the board, they also promote function stacking.

For example, a portion of the food forest may utilize clover as part of the ground cover. Clover could “stack functions” by not only preventing weeds, but also acting as a nitrogen-fixer, increasing the available nitrogen for neighboring plants. A 3rd function of a clover ground cover could be that it’s a source of pollen for important pollinators like bees and butterflies. This mentality will extend to many aspects of gardening and is the foundation for the entire permaculture model.

“The Backyard Homestead” book offers a variety of garden layouts for different sized areas, from 1/8 of an acre to 2+ acres.

5. The Backyard Homestead Layout

The concept of a “homestead” is one that feels bigger than just a vegetable garden. Instead, a homestead typically incorporates fruit trees, perennial plants like berries, animals like chickens and goats, honey bees, or any number of other things. Still, at its core, the goal of a homestead is in line with survival gardening–support and sustain the lives of the people living there. 

The Backyard Homestead Book is a popular and info-packed resource for planning maximum food production, even on postage-stamp-sized lots in the city and suburbs. It has a comprehensive walk-through of all the pertinent info you need to begin your journey towards self-sufficiency and self-reliance.

It covers the basics like garden design and crops to plant, but then it takes things a step further, by covering material on food preservation, highlighting methods like pickling, canning, even drying, and dehydration. This gem will help you through the entire food production process, from seed to snack.

In “The Self Sufficient Backyard”, Ron and Johanna Melchiore share the garden layout they have used at their off grid homesteads.

6. Self Sufficient Backyard Layout

This is one of those resources that you can keep on your bookshelf, and every time you read it you seem to find something new and useful in it.

It is written by a couple that would be considered modern-day pioneers, living a lifestyle that includes growing their own food all year, collecting water, producing natural remedies from foraged plants, and using renewable energy.

It is a great book for anyone looking to begin the transition to a more self-sufficient lifestyle, or anyone wanting to learn how to effectively use just a quarter acre to produce food and energy for their own family.

What should I grow in my survival garden?

That is a very open-ended question, but we can start to narrow it down by your growing zone and garden location. It is important to have a large variety of nutrient-dense vegetables, and ideally ones that can also be stored in some long term fashion, whether it is by canning, drying and dehydrating, pickling, or cellar storage.

Nut Trees for The Survival Garden
Nut trees supply valuable protein and calories for survival.

Proteins & Fats

You will need plenty of protein and fats in your diet. Protein is needed to build and maintain muscle mass and fats are needed as a source of energy. 

  • Nut trees: Hazelnuts, hickory nuts, walnuts, pecans, chestnuts, and so many others. The options for nut trees that will grow in the US is impressive. Nuts can provide a source for healthy unsaturated fats, as well as omega-3 and omega-6 fatty acids, and are full of vitamins and minerals.
  • Chickens: While not a vegetable, you certainly can raise chickens in your garden area. You will need to take some infrastructure precautions to ensure they do not eat your plants, but letting them free range in the area will keep your gardens largely bug free, and cut down or eliminate the need for separate feeding.
  • Beans: An important source of vegetarian protein, beans and other legumes also provide ample fiber and a robust dose of antioxidants. Even if you are growing chickens or other livestock for meat, beans will be a vital source of supplemental off-season protein.
Backyard Corn for the Survival Garden
Backyard corn is easy to grow, nutritious, tasty, and can be dried and stored.

Carbs

Carbohydrates are forms of sugars that occur in starchy or fibrous foods. They are an energy source and are broken down and metabolized into either long-term or short-term energy.

  • Potatoes: Potatoes are a fantastic and long-storing carbohydrate. It is an easily grown root vegetable that stores well and can be used in countless ways. A smart planting of potato slips can contribute hundreds of pounds of potatoes for your stores.
  • Corn: A relatively fast-growing cereal grain, corn is very versatile and can be used and stored in many ways. With minimal processing, it can also be converted to feed, flour, alcohol and fuel.
  • Beans: You thought we ran through all the benefits of beans? Nope! Beans will also fill a slot for complex cards, giving you a source for the long term, all-day energy you are going to need to keep your homestead running.
  • Squash: A plant that is incredibly nutritious and versatile, squash is another vegetable that can store easily, in its native state, for long periods. The meat is generally eaten roasted or steamed.
  • Peas: Peas are a good source of starches, like potatoes, they are great thickeners. They are high in fiber, protein, and vitamins A, B6, C, and K.
Greens and Micronutrients for Survival
In addition to critical calories, a well-rounded survival garden needs to include vitamin-rich greens and vegetables.

Vitamins and Micronutrients

Vitamins, minerals, and other nutrients help your body to function by providing essential components to support bodily processes.

  • Chard: A leafy green that is great in salads, and adds a splash of color. A common ingredient in healthy diets, both the leaves and the stalks can be eaten.
  • Spinach: A super healthy leafy green. Loaded with antioxidants and nutrients, and a great source of iron.
  • Garlic: Closely related to onions, garlic is in the same family as leeks, shallots, and chives. Garlic is a long-standing favorite and is used to season cuisines the world over.
  • Broccoli: The tiny trees that are the bane of every child’s dinner plate. One of the most versatile plants, can be eaten raw or cooked, and the leaves, stalk, and flowering head can all be eaten. Growing broccoli provides a great return on investment.
  • Cauliflower: Another relative of the mustard plant, cauliflower often resembles cheese curd but has a texture that couldn’t be more different.
  • Kale: A close relative of cabbage, kale is packed with nutrients and vitamins. Care should be exercised not to eat kale to an excess, however, as it contains a compound that can interfere with thyroid hormone synthesis.
  • Cabbage: Is a leafy green that gives a tremendous amount of leaves on each densely packed head. They can grow very large and can be stored for long periods and used as needed, like potatoes and other staples. A great source of vitamins K and C, along with significant dietary fiber. 
Medicinal Herb Garden for Survival
Medicinals herbs, such as lavender, lemon balm, and calendula are a fantastic way to add value to a survival garden.

Medicinals

You may want to consider adding a section in your garden to contain your medicinal plants. These are plants that can be used to treat common ailments like headaches, inflammation, and pain. Often made into teas, salves, or pastes. Common medicinal plants you may want to consider include:

  • Calendula: known to be an antifungal, antiseptic, healer of wounds.
  • Cilantro: Helps digestion, possibly linked to heavy metal removal from the body.
  • Lemon Balm: Relaxing effects with possible antiviral properties.
  • Peppermint: Helps with digestion if brewed in tea, and soothes aches when applied topically.
  • Rosemary: Increases oxygen to the brain, a great alternative to caffeine.
  • Mullein: Can help heal respiratory infections.
‘Victory gardens’ were simple row gardens emphasizing beans and other staple vegetables widely adopted by civilians during WWII.

How much space do I need to grow it all in?

That is probably the best part about a survival garden–there is no one single way to do it that will be best. Do what is right for you and your circumstances. This means it is extremely easy to adapt this information to your needs. From tiny urban gardens to acres of country land, there is something for everyone.

Urban gardens are growing in popularity and are becoming more widely permitted. There is a push in many urban centers for green rooftops to reduce HVAC load and provide additional food for building residents.

Agriscaping is transforming common landscapes into productive agricultural spaces. This can look like neighborhood food forests or fruit and nut trees alongside the street in place of ornamentals. Many neighborhoods have begun creating spaces that function as both food forests and community gardening space. 

All that said however, one of the early contributors to SCP Survival shared the following recommendation from her grandma who was a serious gardener at the turn of the century:

Grandma Carrie’s Rule of Thumb (how big does my garden need to be?)

Grandma Carrie grew and preserved everything that her family ate in the late 1880’s and early 1900’s short of wheat, sugar, salt and spices.  Her garden was well over a quarter acre. And she had a rule of thumb – One quart per person, per day.

Since she was feeding ten people she would need to can 3,650 quarts of fruits and vegetables.  Add to that the crops that went into the root cellar, some crops were dried and stored in burlap bags, milk and eggs were gathered year ‘round, animals were butchered as needed and the meat was stored in crocks.

To supply each member of the family with their “quart a day” you should plan approximately 1,000 to 2,500 square feet of garden space for each person.  This amount depends on soil fertility, the crops you choose to grow, methods of cultivation, and the length of your growing season. Other food sources like fruit trees and livestock also play a huge part in the amount of vegetables you need.

A 2,000 square foot garden would be a 40 foot by 50 foot section of your property. This can be a pretty significant undertaking especially if you have no experience gardening. Crops such as squash and cucumbers require significantly more space than spinach, Swiss chard, carrots, onions and beets.  Peas, tomatoes and some beans do best with a fence, cage or pole to grow UP on which decreases the square feet necessary.

Here are some rough estimates on space to yield for feeding four people for one year:

CropGarden SpacePoundsCanned or Frozen
Beans (green)300 square feet17590 quarts
Beets100 square feet7524 quarts
Broccoli100 square feet7548 quarts
Cabbage100 square feet15040 quarts
Carrots100 square feet12030 quarts
Cauliflower120 square feet6020 quarts
Corn200 square feet15040 quarts
Cucumbers24 square feet (3 X 8)5535 quarts
Onions50 square feet1305 quarts dehydrated
Peas200 square11020 quarts
Peppers50 square feet7530 quarts
Potatoes300 square feet400 – 500Store in cool, dry place
Squash24 square feet (3 X8)10020 quarts
Swiss Chard or spinach200 square feet9035 quarts
Tomatoes150 square feet500200 quarts *

*Estimate based on ½ whole and ½ sauce

This chart would be 2,018 square feet of growing space without any paths in between them. I have given the yield in quarts but to have a better idea if this would suit your family, you will probably want to consider pints (or twice as many jars half the size). For example, one pint of beets would probably be adequate for a meal for four people, a 100 foot row will yield around 48 pints which would provide enough beets for one meal a week for a year.

This chart provides 657 quarts plus potatoes, about half of Grandma Carrie’s rule of thumb. 

‘Keyhole gardens’ circular configuration benefits from central watering and composting.

What is the best location for my survival garden?

You will want to make sure you evaluate all possibilities before deciding where to put your garden. Make sure you consider the exposure to the sun, water, soil, and how easy it will be for you to access it as often as you will need to.

Most people think about the first few, but not everyone considers access. The last thing you want to do is put a big garden plot in what you think is a perfect place, only to have to lug all your gardening equipment or any tools you need, to a garden that is now quite inconvenient to get to.

When considering your garden’s placement, you will naturally have to consider the sun and water placement. If you live in the northern hemisphere, you will want to make sure your garden is south of your house, or far enough north of your house that it will not lie in its shadow. Use this same logic when plating. When possible plant so that the taller crops, like corn, on the north end of the garden bed, so that they do not cast a shadow over the other plants.

One of the principles of permaculture is the zones of use. The mindset being that you do not want to expend excess energy to get to things you use all the time, and things that are largely self-managing should be the farthest away. It also simplifies care and harvesting. The zones of use are:

  1. Zone 1 is the most visited area or areas. This zone will have things that either need daily attention or that you use daily. Examples of things to grow in zone 1 are seedlings, salad components, cooking herbs, or anything that needs daily water, like a lemon tree. Believe it or not, animals are ideally sited in Zone 1.
  2. Zone 2 are things that still need attention, but not specifically daily. If your particular setup allows for it, zone 2 is irrigated. Zone 2 is also mulched. Examples of zone 2 plants would be smaller fruiting trees and trellised fruit vines, bramble berries like blackberries, raspberries, and blueberries. This is also the zone that contains windbreaks, ponds, and barrier hedges. Plants that are only harvested once or twice per season belong here like potatoes and corn.
  3. Zone 3 is semi-managed. An example of zone 3 plants would be large and mature fruit and nut trees. It is not mulched, nor visited on any regular basis.
  4. Zone 4 is a minimally managed area for foraging wild foods and growing timber.
  5. Zone 5 is completely and entirely unmanaged. All pure native plants and wildlife. 

Keep in mind what you will eventually be planting, and be sure to plant companions together when possible. The main idea of companion planting is that you plant different crops together, they help sustain each other and ensure you have a strong and fruitful harvest.

Companions can be used for pest deterrents, balancing out nutrients, and attracting pollinators. For instance:

  • Tomatoes work very well with beans, chives, and oregano, but not with corn, dill, and potatoes.
  • If you want a successful cucumber and squash harvest, plant corn, beans, or radishes with them.
  • If you have pine trees on your property, be careful not to place your garden where the shed needles fall, since they make the soil very acidic.

For more on companion planting, check out this comprehensive guide.

Soil For Gardening
Liberal composting and adding organic matter contributes to loose, loamy soil (the ideal structure for growing vegetables).

Knowing Your Soil is Crucial

The quality of your soil is the imperative. Much more needs to be done to prepare a garden space than simply digging up the lawn. “Friability”, or easy to crumble is normally the first obstacle to overcome. Grasses can grow in clay – or cracks in asphalt for that matter but vegetables need lose, crumbly, loamy soil. Amendments need to be made in the way of compost, perhaps sand and possibly nutrients to alter the pH level.

How do you intend to water your garden? Tomatoes for example, need to be soaked 6-8 inches deep every 5-10 days depending on the heat and amount of rain you have. If the grid is down, is your water down? If you are collecting water in a rain barrel, do you intend to drip irrigate or hand water? Is one barrel enough? Do you have all the materials on hand now?

Want Some Extra Credit? Here Are Some Gardening “Force Multipliers”

The following are tools or techniques used to be more effective at reaching your objective of producing enough food to survive. They help you get the most out of your garden by helping to create ideal conditions, one way or another, for your crops.

Greenhouse for Survival Garden
A greenhouse gives you an extension of the growing season at both ends, allowing you to start sooner, and grow later.

Greenhouse

A greenhouse is one of the common things that people think of when picturing a large garden set up. A greenhouse is a large open building that is largely transparent or translucent, allowing in sunlight, but also sealed against the outside elements.

Utilizing a large amount of solar gain, greenhouses are able to trap solar energy in the form of heat, and can often be used to extend the growing season.

Greenhouses can be used to grow later into the year, in order to gain an extra harvest or two, and also to begin earlier each year, by providing a warm place to germinate seeds and give plants a head start before transplanting to the soil once the threat of frost has passed.

Cold Frame Gardening
Operating on principles similar to a greenhouse, cold frames amplify the suns rays to maximize cold weather plant growth.

Cold Frames

Cold frames use the same principles of trapping solar energy as greenhouses but on a much smaller scale. Cold frames are made from a wooden box similar to a raised bed, frequently angled toward the south. They will usually have a windowed lid, often made from an upcycled home window that is attached to the top with a hinge so that it can tilt open for easy access to the contents.

Cold frames are frequently used in the same manner as full-size greenhouses, to either continue growing past the fall frost dates or to gain an early start by germinating seeds and plant starts before they would normally be able to be put in the ground.

Row Covers for Gardening
Row covers are another way to extend the growing season and protect plants from cold weather.

Row Covers

Row covers are also known as low tunnels. A crucial force multiplier for those who utilize planting rows for their crops, row covers can protect from freezing temperatures, wind, and pests.

They are essentially tiny hoop houses that run the length of the planting rows. They are very low to the ground and often only allow around 1-2 feet of clearance for the plants they cover, and as such are only suitable for very young plants or those that grow close to the ground like root vegetables and greens. They help keep the soil in the row warm for early season starts, and for late-season harvests.

Backyard Chickens for Survival
Backyard chickens offer eggs, meat, pest control, and fertilization.

Chickens or livestock

Introducing chickens or other small livestock to your survival garden can have several benefits. Not only will they create manure that will be essential to your composting and fertilizing capabilities, but they also can help reduce pests and insects.

People do not give chickens enough credit, they are amazing little omnivores. They eat just about any organic matter you allow them to, but they will also meet you halfway on the cleanup, tilling most of their waste directly into the soil. You do need to keep an eye on them, and make sure that they aren’t sick. If so, there are a handful of DIY chicken doctoring things you can do own your own.

Guinea fowl are another valuable addition, frequently eating so many nuisance insects like ticks, that they will not need any supplemental feeding. Using livestock in conjunction with a rotating pasture system will allow you to always have perfectly fertilized and productive soil ready for planting, while your livestock always has fresh ground to work.

Compost for Garden
Composting accelerates the breakdown of organic matter to fertilize and add vital nutrients to your garden.

Composting

Generating your own compost is an incredibly valuable process for anyone seeking to grow large amounts of high-quality produce.

Composting is the breaking down of common solid organic matter by aerobic bacteria. It is used to recycle organic material into nutrient-rich material called compost that is similar to humus. It is one of the best soil amendments and can be a valuable fertilizer for self-sustaining gardeners. 

Vermicomposting for Gardening
Vermicomposting is another means of accelerating nutrient breakdown, in order to create a nutrient-rich additive to add to the garden.

Vermicomposting

Similar to composting, the goal of vermicomposting is to create a nutrient dense growing medium from discarded organic materials. The basic process is the same, the organic matter that would normally be discarded is added to the compost pile, decomposed aerobically, and turned into a usable highly fertile soil material.

The difference is that in normal composting the main agent breaking down the matter is aerobic bacteria and other organisms, and with vermicomposting that process is accelerated through the use of earthworms to break down the material faster and more thoroughly than without. 

Rainwater Harvesting
Rainwater harvesting is a low cost way to contribute to the water that your garden needs.

Rainwater harvesting

One of the most valuable resources for gardeners, water, literally falls from the sky. With a little preparation and sweat equity, a rain catchment system can quickly and easily be implemented, allowing the storage of large quantities of water for later use.

Rainwater harvesting is often done with a minimum of special equipment, generally requiring little more than a roof, a gutter with a downspout, and a rain barrel or water tank. Provided measures are taken to discard the water contained in the “first flush” which will contain debris and contaminants that should be allowed to wash away before collection begins, rainwater can easily be made potable.

Earthworks and Landforms

A very effective method of large scale gardening and permaculture resource management is to create earthworks to help control water flow and erosion. These methods can include:

Ditches spread and convey water from high to low ground, and can be designed to weave throughout your garden, maximizing surface area and contact with multiple plants.

Ditches

Ditches are essentially a trenched drainage device. Ditches are going to be fairly deep and narrow, allowing an easy way to direct high volumes of water that will also be fast-moving.

A ditch will often be used to prevent a surge of water volume from eroding other portions of the gardening or crop areas. For example, ditches may be utilized to funnel water runoff from a large rainstorm away from delicate beds of greens or herbs, and directed to a swale where it can be spread out over a larger area, slowed down, and allowing the water to settle and soak in.

Swales for Permaculture Gardening
Swales help to slow and spread water throughout the landscape to where it is needed most.

Swales

Swales are large, open, gentle depressions that follow the contour of the land, allowing stormwater runoff a place to slow down and spread out over a larger area, eventually facilitating settling and absorption.

They are broad and shallow and are only slightly depressed when compared to the surrounding area. Swales are perfect for filtering runoff, immobilizing contaminants, pollutants, and particulates by allowing them to settle and be filtered by the surrounding soil. 

Hugelkultur mounds act like a nitrogen sponge, with carbon-heavy, woody material at its core.

Hugelkultur

Often thought of as the perfect companion to swales, the hugelkultur or more simply “hugel”, is a hill or a mound for growing, that is built on a foundation of a pile of felled trees or rotten wood. It is ultra-low maintenance and drought-resistant garden and earthworks feature that will produce a fertile mound of growing medium that only gets more productive over the years as the wood continues to rot and release nutrients into the soil around it. 

While it takes a good bit of effort to physically construct the hugel, it will compound the benefits it offers over the years. For the first several years after its creation, the aerobic decomposition will have an exothermic effect on the soil, giving you a longer growing season.

In the years following that, the wood will begin to shrink and will create voids that allow a self tilling effect to take place. The rotting wood will also hold water like a sponge, retaining large amounts of water that are automatically released into the surrounding soil, combating dry conditions, and reducing or eliminating the need for separate irrigation. 

The main thing to remember with hugels is to use wood in the core that will rot and decay. Do not use any rot-resistant or allelopathic woods like cedar, black walnut, l7 or black locust. They will not rot, and will actually inhibit microbial growth, significantly reducing the desirable effects produced by the decomposition.

Preservation and Long Term Storage

While the short term goal with your garden is to feed yourself and your family, the long-term goal is to have a decent stockpile of survival foods. There are many methods that you can utilize that will allow you to save your harvest and to feed your family over a tough winter or in an emergency.

Root Cellar for Food Preservation
Root cellars are a time-honored method of extending the harvest over the winter.

Root Cellars

One of the oldest long-term storage methods, root cellars work to preserve and store food by using the cool dampness of being underground to their advantage. Root cellars are nice and cool, but still above 32°. They are also humid which allows vegetables to retain their moisture and preventing them from turning rubbery. In addition to root vegetables, cellars are great for storing nuts, seeds, and even some fruits and vegetables.

Canning Fruit and Vegetables
Fruit canning or “bottling” can be done with just a hot water bath, and extend the life of your harvest for several years.

Canning

Canning is a great way to save meats, stews, veggies, and jams for later use. With canning, you use mason jars to store and preserve your foods and either pressure or hot water method to seal them. The lids of the jar have a wax ring that seals to the rim of the jar. If left in a cool, dark place, home-canned items can be stored for a year or more.

Solar Food Dehydrator
Though not as long-lasting as food that is canned, dehydration is a low-tech, cost and energy efficient way to preserve your garden’s yield.

Dehydration

Dehydration is a fantastic way to preserve your favorite fruits, vegetables, and even herbs and meats! Some items you will want to eat in the dried form such as apple chips, others you may want to rehydrate by soaking in hot water or adding to soups and stews.

Saving Seeds for Survival Gardens
In order to complete the food production loop, seed saving gives you what you need to start again next season.

Seed Saving

While most seeds you won’t be eating, saving your seeds is an easy way to get a jump on your garden for next year. Saving the seeds from fruits and vegetables that you grew this year allows you to cut down on your gardening costs in the future. Heirloom seed preservation is also important for genetic diversity and can be traded and sold.

Getting Started

There are many articles out there inferring that preppers should buy seeds packaged for long term storage so that when the shit hits the fan they can dig up part of the lawn and grow their own food. This is a woefullly misguided notion. Remember, the time to start learning is not when you are hungry.

Once you have taken all the factors into consideration and chosen a location, it is time to plan out your garden. Make a sketch on some graph paper of your garden, and get that seed catalog handy. If you need help planning it, the Farmers Almanac has a very easy to use garden planner.

Once your garden is prepared, your layout is decided, and your seeds have arrived, you probably want to get planting, but you might be wondering when is the best time to start. The good news is, every season has things that can be planted, whether you are in spring, summer, or fall, there are plants that should be going in the ground to get ready for the upcoming growing season. 

You might think that because you weren’t ready until late August, you may have missed the summer season. And you would be right! But that’s alright, late-season brassicas do well, and fall is the perfect time to get some garlic and onions in the ground. The same goes for spring and summer, there is always something that needs to get in the ground soon in order to be ready for the upcoming season.

Winter is the perfect time of year to solidify next year’s garden plan. It is time to inventory the pantry to evaluate the most popular crops and adjust the garden space allotments accordingly. Heirloom seeds are inventoried, new seeds are ordered and indoor starts are planted. 

3 Sisters Garden Corn Beans Squash
The ‘3 Sisters’ garden is an American classic, combining corn, beans, and squash in symbiotic fashion.

Need An Easy Way To Start? Try the 3 Sisters

If you are eager to get started with an easy garden, you may want to try out a small plot with a “3 sisters garden”. This is a method that has been used for thousands of years to grow multiple crops in one place simultaneously, and is a perfect example of function stacking and utilizing natural architecture. This layout can also be adapted to nearly any type of garden.

You will plant beans (generally a pole bean), sweet corn, and squash. The rationale behind the companion plants here is that the corn provides a sturdy stalk for the beans to climb, while the squash leaves shade the soil, minimizes water loss, and prevents weeds, and the beans fix nitrogen in the soil for the corn and the squash to excel.

Filed Under: Gardening

Knives for Preparedness, Disasters and Survival

March 1, 2024 by Seasoned Citizen Prepper

My grandfather gave me my first knife and sharpening stone when I was seven (7) years old. It was a small folding blade pocket knife. He told me that one sure thing of owning a knife is that I would get cut. He also told me, if I kept my knife sharp, I would not have as many accidents as I would with a dull knife.

He was right on both accounts. My mother had a fit.

I am now sixty-three years young. Ever since my grandfather gave me that little knife, I have always carried some sort of a knife on my person every day. I now own many folding lock blade and sheath knives.

I have learned over the years, a non-lock blade knife is very dangerous. I have stopped carrying them because the blade can fold back on your fingers while using them and cut you. I learned that lesson the hard way.

Being cut by your own knife during a disaster is NOT something you need to happen. During a disaster, any medical services are usually overwhelmed or nonexistent.

I have always lived in metro New Orleans. I have weathered all of the hurricanes that have hit southeast Louisiana, including Katrina.

The day before Katrina hit, I decided to upgrade from a small folding lock blade pocket knife that I normally carry and go to a larger sheath knife. I have a Randall RAT 7 sheath knife that I use when I go in the woods and camping. I found out quickly that a large sheath knife was NOT the knife I wanted to use because every time I sat down in a chair, the knife punched me in the ribs.

I then tried a large folding lock blade, a Buck model 110 knife in a belt sheath. This knife worked well but I soon found out that it was just a knife. There were a lot of jobs that I had to stop and get just a screw driver or a pair of pliers in order to complete.

I then remembered that I had a Leatherman Wave, multi tool in my knife box. I took the Buck knife off and put on the “Leatherman”. It worked great! I used that multi tool numerous times in the days after Hurricane Katrina.

There are many companies that make good multi tools, “Gerber”, “S.O.G.”, “Leatherman” and Victorinox to name a few. There are also as many companies that make junk. Just remember, you get what you pay for. The last thing you need is anything that you use during and after a disaster to fail and possibly injure yourself.

I have been told that the military is now issuing multi tools to the troops when they go through survival training because they have more uses that just a knife.

Hollow handle, fixed blade, survival knives are NOT a viable option. They are normally weak and break at the point where the knife blade attaches to the hollow handle.

Be sure that you check with your local law enforcement before carrying any knife concealed or openly. The laws change drastically from state to state and from county to county.

Also remember, if Martial Law is declared in your area, the laws as you know them are suspended. You then need to check with the governing authority to find out what is allowed and not allowed.

Filed Under: Survival Gear

Emergency Lighting

March 1, 2024 by Seasoned Citizen Prepper

Many times the electrical power goes out, sometimes during a disaster and sometimes for other reasons. During these times, we do not have interior lighting unless you have emergency power, such as a gasoline powered generator or large solar panels. If you are like me, you cannot afford those options.

I have tried candles to illuminate the inside of my home. The problem with them is that they burn down fast, are a fire hazard and give off very little light.

Kerosene hurricane lamps also fall into the above category and have the same problems.

I have tried battery operated flashlights also. However, the batteries burn out rather quickly. Batteries are hard to find after a disaster, if you can find an open store. If you must use a flashlight, use only the ones that use LEDs to produce the light. LEDs use a lot less power, so the batteries last a lot longer.

I have tried “Crank” flash lights. Every brand that I have ever used, the crank handle breaks. This leaves the flash light useless.

One day I was in “Harbor Freight” just looking around and I found a box marked “Solar Spotlight Set”. This particular one is model number 60562. Written on the box was, “Eight (8) hour run time on a six (6) hour charge”. The lights automatically come on in the dark and go off in the light. The light has three (3) LEDs to produce the light.

It is charged by sunlight using an included “Amorphous Silicon Solar Panel”. The solar panel mounts on the top of the light making one whole unit. The back of the light unscrews and reveals two (2) AA rechargeable batteries, included. These batteries can easily be replaced if the ones that comes with the light ever go bad. They come two (2) Solar Spotlights per box. The sticker stated, Normal Price $19.99, On Sale for $14.99.

If you read any magazines that have a “Harbor Freight” advertisement in it, look closely at it. You will find a 20% off coupon which you can use on ANY purchase, including the one mentioned above.

I purchased a box of the lights. When I got home, I took one of the solar lights out of the box and mounted it outside on my wooden fence to test it. (See photo) That has been over a year ago and the light still comes on every night. Surprisingly they give off more light than what I expected.

I have since purchased three (3) more boxes of the lights. I store them with my emergency supplies.

During the next prolonged power outage, I plan to place all of the lights in the sun to charge. Then, when night falls, take them inside and place them where I need light. The next morning when I get up, I plan on placing them back in the sun to recharge, while I go about doing whatever I need to do. Then repeat the process that night.

Filed Under: Survival Gear

How To Get Rid of Mosquitoes in A Survival Situation

March 1, 2024 by Seasoned Citizen Prepper

Mosquitoes are said to cause more deaths worldwide than any other insect or animal, on an annual basis. Thus you MUST control getting bit by them not only after a disaster, but at any time of the year.

Here in Louisiana, as in other states, there is a problem with the spread of “West Nile Virus”, which is spread when mosquitoes bite you.

Because hurricanes bring lots of rain, there is a lot of standing water after one passes. Mosquitoes breed in any standing water.

The first thing people use to defeat mosquitoes is mosquito repellant. The most effective mosquito repellant is one that contains a chemical called “Deet”.

The problem with mosquito repellant is that after a disaster which is long term such as after Hurricane Katrina, there was not a lot of clean water to take a shower with. Most water was kept for drinking and cooking. If you have ever used mosquito repellant with “Deet” on your skin, you know it is not a pleasurable experience. It feels like you skin is slightly burning. Now imagine having that mosquito repellant with “Deet” on your skin twenty four (24) hours a day, seven (7) days a week, for a couple of weeks.

The Avon Company sells a skin lotion product called “Skin So Soft”. It repels mosquitoes very well. You spread it all over you skin and clothing. You just smell like hand lotion.

“Bounce” dryer sheets are also said to repel mosquitoes. You pin several sheets onto your clothing and the odor the sheets give off, keeps the mosquitoes away. You look a little weird with these small white dryer sheets pinned all over you but they do work to a certain degree.

Citronella candles are another way to repel mosquitoes. You light the candles and the odor the candles give off, repels the mosquitoes. The problem with this is, you must be downwind of the candles. The slightest varying directional breeze defeats the mosquito repelling effect. There is also Citronella oil you can buy for TiKi Torches.

Another problem with mosquitoes is they continue to bite while you attempt to sleep.

After a hurricane, the electricity usually goes out for a couple of weeks. Without electricity, sleeping inside your house is problematic at best. The heat in your home builds up during the day and just stays inside your home at night because there is no moving air. Sleeping unprotected outside is not a good idea because of the mosquitoes.

I have found pitching a tent in the back yard under a shade tree works fairly well. Tents are made with lots of screening keeping the insects out, but letting air circulate. A pop-up camper works well also. Aluminum sided travel trailers do not work as good because they hold in the heat and the air cannot circulate as well like in a tent or pop up camper.

However, with any of these options you must limit the going in and out of them because you let mosquitoes in. Always keep your tent screen door zipped up when not going in and out, not only because of allowing insects in, but snakes like to come in also.

Lastly, there is the old reliable mosquito net over your bed. I have never had much success with these but they do work. The military used them extensively during World War II in the South Pacific. They need to be draped over your bed with NO gaps around the ground. This can be a challenge if you get up to go to the bathroom a couple of times a night.

Like all disaster related supplies, you need to determine which works best for you before a disaster occurs, then stockpile them.

Filed Under: Health and Medical

How Zombies Will HELP Preppers in Natural Disasters

March 1, 2024 by Seasoned Citizen Prepper

The shambling hordes of undead near the house nestled in the forest. With a small group trapped inside and slowly turning against one another, the zombies continue their relentless assault to breach the home and feast on the humans within.

Such is the setting for George Romero’s classic zombie film, Night of the Living Dead. By today’s standards, the film is a little…dated, but it does show how a poorly prepared group of survivors can be almost as much of a hindrance as the thing they survived.

The CDC took a cue, and used the zed heads to get people thinking about preparedness in general. “Get a Kit!” the poster shouts, “Be Prepared!” we all hear these mantras, maybe we’ve even repeated these mantras to our kids or our families.

There’s some logic here. What we think of as “zombies” might not ever happen (chances are slim to nil), but we can learn a lot about a biological outbreak and how to prepare for events like natural disasters.

Fresh Water

As it turns out, one of the fundamentals that the CDC recommends teaching your kids is the importance of stored, fresh water. One of the first scenarios described in the CDC handbook talks about zombies overrunning city facilities and contaminating the water supply. With tap water now undrinkable, children are taught the importance of having a good filter, and/or a supply of bottled water available.

Maps

Natural disaster reports can inform you of the possibility of the future destruction of your home or place of business. During hurricane Katrina, citizens were directed to meet at the Superdome, which held a large group of people that banded together. This is why it is important for you to establish a zone for your family to meet up with others.

Find a hall nearby, a church where you can gather, any structure that is sturdy and where a group of you can gather. Plot these places out ahead of time, and keep a map close at hand to refer back to if roads are blocked during a disaster.

Medical Supplies

If you are taking medication that you need in order to survive, you should keep at least a 7 day supply on you at all times. In a natural disaster like hurricane Sandy, disaster relief workers were sent out to check parts of New York, looking for people who needed feed or medication. With no power, and blocked streets, medications could not be shipped in or out of New York, so things had to be delivered by hand.

Remember that it is possible to stockpile alternatives such as Fish Mox and other fish antibiotics for certain situations, but these won’t protect against everything.

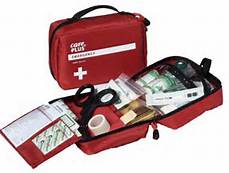
In addition, bandages and disinfectants will be crucial to staving off infection in a time when doctors are not readily available. A basic med kit is a good start, but consider alternatives depending on your needs (like medical tubing, sterile needles and other equipment).

Staying Informed

Get to know your major sources for news and information. You might not hear early reports on the news, but if you follow weather from the National Oceanic and Atmospheric Administration, you can hear about some natural hazards before they occur. You can also refer to FEMA’s database of natural disasters, which lists what to prepare for and how long the disaster might last.

Start a Conversation

The interesting thing about the CDC taking zombies seriously is that it got a lot of people to stand up and say, “cool, I’d put this in my prepper bag.” The most important thing you can do to stay prepared is to keep the conversation going.

Take up gardening and try more practical approaches to surviving that benefit your family at present. If there is one thing the zombie apocalypse can teach us, it’s that long-term survival is something few of us are prepared for, so teach skills that help live day-to-day.

Filed Under: Disasters

“Going Home” Book Review

March 1, 2024 by Seasoned Citizen Prepper

I am a book “scavenger”. Basically, I look through books for information and then move on to another. It’s a rarity that I read a book from cover to cover. Several weeks ago I downloaded Going Home onto my Kindle Fire. It’s taken awhile but I finally finished it.

What a great book!!

The basic premise of the movie revolves around “Morgan” who is traveling away from home/family and there is some kind of EMP event. His car – as well as most everyone else’s  – dies. He grabs his pack and starts walking the 200+miles……going home. Along the way, Morgan has his fair share of excitement as societies morality begins to plummet as their desperation raises.

The book does a good job creating the environment of no power, no modern conveniences. I really got into the head of Morgan who was desperate to get home to see his wife and kids. Always wondering if they were OK – Morgan had to be careful to keep his head and make minimal mistakes to stay alive.

As he travels on foot mile after mile – his experiences really got me thinking about my own situation. I work 22 miles from home and sometimes travel 150 miles or so away. What would happen if something happened and I needed to walk?  I have started to rethink my vehicle kits.

Morgan has one adventure after the other – from saving some innocent civilians from ruthless murderers to surviving a game of cat and mouse in the dark against ruthless brigands. Morgan is not a super soldier or super hero – just determined to get home.

Morgan was a prepper prior to the EMP event. He had some basic supplies in his pack to help him along the way. He also made some very important friends and picked up some supplies – including a hand-held HAM radio. His use of the HAM really intrigued me. His ability to communicate to friends (not going to give anything away) helped not only give him valuable information but also boosted his morale.

I mentioned “friends”. Morgan did not walk alone the whole way. He met up with a few people who joined him on his journey. Safety was found in numbers and they often worked to their mutual benefit – but not always. In that kind of situation as you can imagine some very close bonds could be made.

There are tons of awesome preparedness books and ebooks available. If you like adventure, a bit of intrigue, and some preparedness fiction – this book is for you. It will really get you thinking.

For more timeless survival wisdom and ideas, check out these survival guides and PDF downloads.

Filed Under: Books

  • « Go to Previous Page
  • Page 1
  • Interim pages omitted …
  • Page 48
  • Page 49
  • Page 50
  • Page 51
  • Page 52
  • Page 53
  • Go to Next Page »

Copyright © 2026 · Genesis Sample on Genesis Framework · WordPress · Log in

  • Privacy Policy