• Skip to primary navigation
  • Skip to main content

SCP Survival

Best Survival Gear and Supplies

  • Download Survival Guides
  • Survival Food List
  • Download 906 Survival Guides to Your Device
Home / Survival Food / Page 13

Survival Food

Tater Tot Hamburger Casserole [Recipe]

March 8, 2024 by Seasoned Citizen Prepper

Tater Tot Hamburger Casserole

Sometimes everyday preparedness is having a meal that is easy to prepare. And if you have the standard preparedness pantry, you have ample cans of cream of mushroom and cream of chicken soup on hand – staples for building any hot dish, I believe it is casserole for the rest of the world.

You Will Need:

  • A bag of tater tots
  • A can of cream of mushroom or chicken
  • A can of green beans or ?
  • Hamburger, or a pound or whatever.

Optional:

  • Onion if available.
  • Cheese to sprinkle on top.
  • Salt, pepper, or season to taste – garlic salt, etc.

Directions:

  1. Brown hamburger, mix with soup of choice and vegetable.
  2. Put tater tots on bottom and top.
  3. Bake for 45 minutes or so.

This is easy to make, even when the electric is out. I’ve done it on a cast iron pot on a Deadwood Stove. Or a regular camp stove. Or after browning the meat, bank your coals and put the pot in the coals.

There is nothing like a hot meal to make life look better!
Filed Under: Recipes

How Food Storage Can Get You Out of Debt

March 8, 2024 by Seasoned Citizen Prepper

We have to have money to survive. Period.

As much as we wish that that could change, it won’t. Money is a necessity for all of us to maintain or improve our current lifestyles. Unfortunately, it’s not so easy to come across an abundance of greenbacks, nowadays. A lot of the cause for the dollar difficulty, is debt.

With the economy being the way it is, surviving in this financial nightmare has become increasingly difficult. Making any monetary progress has seemed nigh unto impossible. With debt eating up hundreds, sometimes even thousands of dollars on your monthly budget, is it even possible to save money, anymore?

Fear not, my friends, for there are plenty of ways to save your bank account. One of them isn’t a very common one, however.

Although the idea of food storage is popular, rarely do we see the thought carried out into action. It can end up saving you a lot of money, too.

Some people don’t know how to start a food storage. Some people don’t have the desire. Other people don’t think it’s necessary. But what if there’s a natural disaster that hits your area? What if the economy drops, again? In the unlucky case that one of those things happens, you’ll be ready, and you’ll have a full belly, as well.

In the event that a huge disaster strikes, food can, and probably will be exchanged almost like it were currency. It’s very important to have a food storage, not only for the betterment of your finances, but for your emergency preparedness, as well.

Getting a food storage started isn’t as difficult as many people think it is, either. Every time you go to the store, you can grab a can of imperishable food, or two, and by the time you know it you’re going to be needing a huge pantry for your loads of food. You can also go a little more aggressive while you’re building up your food storage, too. Get three or four cans of food at a time, beans, etc. and you’re going to have the best food storage on the block. If you need help getting going, check out our complete survival food list for ideas.

Part of how a food storage will save you money, though, is by using it. Instead of going to get fast food every night (Which could cost somewhere between $7-$42 normally, depending on the size of your family), you can use a can of beans, which costs less than a dollar, and some type of dehydrated fruit or meat to feed your family. You’re saving a lot of dough, by buying and using your food storage.

By building and using your food storage, you’re going to be financially able to do so many other things. Instead of spending the big bucks on dining out, save it, build a food storage, and use the money you’ve saved to pay off your debts. It’s simple, easy, and it’s fun to be creative with the dishes you can create with your food storage. It’ll help you and your family get on the right financial track, again, too.

Filed Under: Survival Food

How To Can Meat (Beef, Chicken, and Fish)

March 8, 2024 by Seasoned Citizen Prepper

Just when you thought it was safe to put those canners away…no, indeed! Canning is not a “season”. Look for sales on your favorite meats, and don’t worry about freezer space or power out situations.

Let’s get canning!

Remember: ANY FOOD THAT CONTAINS ANY AMOUNT OF MEAT MUST BE PROCESSED AS MEAT, REGARDLESS HOW MUCH OF ANYTHING ELSE IT CONTAINS.

It is possible, of course, to cold pack meats, but I do not recommend it and do not practice such. It is important, IMHO, that meat be at least partially cooked because you don’t want some of that “gunk” that will cook out of meat in your canned food products; you want them ready to eat. This “gunk” also frequently gets under the cap while processing and prevents a seal. It’s also safer practice to hot pack meat than it is to raw pack meat, so, let’s practice “safe canning”!

I use a dial gauge pressure canner. The other type is a weighted gauge. All canning instructions are given using metal caps and rings, not Tattlers.

Even pre-cooked meat will expand while processing. Keep that in mind when packing jars.

When using commercial products, watch for MSG (Monosodium Glutamate) in these mixes  and broths folks – they’ve love to put ‘em there! I use only brands that do not add MSG. You do not want neurotoxic food, not now and certainly not post-IHTF!

How about some ready to eat chicken or chicken soup? My idea of fast food!

There are two or three ways I like to can chicken. You will do it your way, as you should, based on what you like, but here’s how I do it.

Chicken Soup

For soup, allow one large or two small chicken breasts (about one pound meat) per quart, half of that per pint.

You can never have too much home-made chicken soup on hand. Sometimes, it just tastes good; but when you or someone you love is sick, this is just what you need to give the healing process a helping hand.

We like mostly just white meat, so I usually buy breasts on sale and remove the skins and excess fat.

Here’s how I can it:

  1. While you’re prepping meat, CHECK YOUR JARS – run a finger lightly around the lip, making sure there are no “fleabites” or damage.
  2. Then, put jars in dishwasher (if you have one) and wash; keep in dishwasher to keep hot. Or, wash by hand in hot, soapy water, rinse in hot water, and keep on cookie trays in 250 deg. F (121 deg. C) oven to keep jars hot and clean until ready to pack. Always prepare at least two extra jars – “stuff happens”!
  3. OK, so, I’ve removed all the skin from my chicken, trimmed any excess fat, and placed it all in a big, deep pot.
  4. Now I add my “Cajun Trinity” – chopped celery, onion, and garlic galore! Never too much garlic! It’s very healing – a super food, “anti-inflammatory”. Also chopped carrots (2 large will do – or several small ones) and 3 large bay leaves.  Iodized sea salt (iodine is an important nutrient to the human body, and we are losing it) and cracked pepper to taste. Cover with good clean, water, and bring to a boil.
  5. When chicken starts boiling, turn heat down to medium and cook, covered, until chicken is tender – at least an hour for a pot this large.
  6. Remove lid; allow chicken to cool a bit. Remove bay leaves before packing jars.
  7. Remove meat from broth; allow meat to cool and hand-pick bones.
  8. If you have pets, cook (you can pressure cook them) those picked out chicken bones until they are super soft; allow to cool; grind up or mash (they’ve very soft by now) and feed to pets. It is an excellent source of calcium to strengthen their bones, but, never, ever give just the chicken bones to a pet – they will splinter in their intestines and cause serious health problems, leading to surgery or death. People can eat this, too, BTW, as a ground form, only (for the same reasons).
  9. Strain liquid to remove “gunky stuff”. Use this liquid for hot packing after filling jars with meat but always have extra broth standing by, just in case.
  10. Break, tear or cut meat into bite-size pieces and drop back in hot liquid.
  11. Have a medium pot of water boiling at this point for caps and rings.
  12. Start heating water in pressure canner, but keep heat on low for now.
  13. Hot pack in pint or quart jars. Wipe lids twice: the first time with a piece of fresh, clean paper towel dipped in hot water (kitchen gloves recommended!); the second time with clean paper towel and white vinegar (to remove any lurking fat residue).
  14. Boil caps 30 seconds and place; boil rings 30 seconds and place. Boiling much longer may result in loosening or boiling off of rubber liner to caps, no matter what you see on blog sites, and now they will not seal.
  15. Tighten lids, then check to make sure they aren’t too tight (a common cause of losing liquid in processing jars).
  16. Place hot jars down inside hot water of pressure canner, but remember, temps can’t vary too much (temp of jars and water in canner), else you’ll get thermal shock breakage.
  17. Put lid on canner; on medium heat, cook until the steam spews out of vent pipe; as soon as it starts to spew out at a noticeable rate, time for ten (10) minutes; this is the important  “10 minute tornado”. This will remove excess air from pressure canner, allowing it to reach and maintain proper internal temp for safe food canning. If you are using a weighted gauge (such as a Mirro with only 5/10/15 lb. increments), this is not necessary, as it will vent out while cooking. It is ALWAYS necessary with a dial gauge.
  18. After 10 minutes, place your weight on vent pipe. Bring to temp over medium to medium-high heat (I don’t know your stove or how hot it cooks) and hold it there; start timing as soon as it reaches proper pressure. If at any time it drops below the required pressure, bring it back by turning up heat just slightly, and start timing again. Just watch it so it doesn’t have opportunity to drop below temp for very long. You don’t want food cooked to mush. If you get too much pressure, GENTLY release a little using the weight (move it slightly to release pressure) until it reads correctly. Do not get in a hurry in releasing pressure – this can result in extreme temp fluctuations, which forces liquids out of jars.
  19. Process jars 10 lbs. pressure 75 minutes for pints, 90 minutes for quarts, if under 1000 ft. altitude; over, add 2 lbs. pressure to 2000 ft; over that, add 2 more lbs. pressure (14 lbs.) and use same processing times for pints/quarts.
  20. Allow canner to cool on its own (pressure drops to zero on gauge). Remove lid. Wait 5 minutes. Using jar lift tool, remove jars and place on baking racks with towels underneath to cool. When completely cooled (at least 2 hours) test lids for seal (tap outer edges of metal for sound). If any do not seal, refrigerate and use within 7-10 days, or reprocess, cleaning mouth of jar thoroughly and using a NEW boiled metal cap.
  21. When jars are cooled, remove rings, wash in hot, soapy water and rinse in hot water. Return to racks to air dry, but I like to dry top of caps off with paper toweling to prevent water rings on cap. When dry, mark contents and date, replace rings (optional, but I do it) and store away.

Give yourself a “Well done!”

DO NOT add any kind of starch (noodles, rice, etc.) until you are ready to serve. Cook starches –  noodles, rice etc. separately, while you are heating up soup; add pre-cooked starch food (while still hot) to heated soup and simmer together on low heat 10 minutes; then serve. Starch (noodles, rice, etc.) will turn to paste in processing!

Roasted Chicken

Canned, roasted chicken has a better flavor than merely “boiled” and is more versatile or recipes.

Allow about three (3) large chicken breasts per quart jar; half of that for pints.

I have an 18 quart Nesco Roaster/Oven. I like to use it because you can cook a large amount of food in it at one time and it does not use as much “fossil fuel” as some other methods of cooking.

I have discovered that I can roast up to 40 lbs. of chicken breast at one time, stacked in two layers, in this roaster; I just have to remember to put a wire rack between the layers; the rack actually lays directly on the bottom layer, but it still does the job.

Set roaster to 350 deg. F (moderate temp). If I did the math correctly, that should equal 177 deg. Celsius (350 – 32 = 318 x 5 = 1590 divided by 9 = 176.66 (177) C – for our international readers.

If you don’t have one of these Nesco roasters, just use your oven.

  1. Put a small amount of water in bottom of roaster. Put bottom rack in place (must use the rack to prevent meat from cooking to bottom of roaster); remove all skins and place first layer of chicken.
  2. Season meat to taste. I like to combine granulated roasted garlic with iodized sea salt and a bit of fresh cracked peppercorn mélange (combined colors of peppercorns), and just a bit of paprika.
  3. Place middle rack on top of this layer of chicken, and place second layer of chicken breasts, skins removed, of course. Season this layer of meat, also.
  4. Place lid. If you have two holes on top (I do), I like to plug them. I use two aluminum baking potato stakes, one dropped into each; they don’t seal completely, but, close enough; I do not want liquids evaporating from cooker.
  5. I will cook these breasts until tender, about 2 hours, depending on size of chicken pieces, how packed the cooker is, etc.
  6. While you’re prepping meat, put jars in dishwasher (if you have one) and wash; keep in dishwasher to keep hot. Or, wash by hand in hot, soapy water, rinse in hot water, and keep on cookie trays in 250 deg. F (121 deg. C) oven to keep jars hot and clean until ready to pack.
  7. Allow meat to cool; strain liquid; add more water, as needed, and use this wonderful, seasoned broth to pack your chicken. Also have prepared chicken broth standing by, in case you don’t have enough from roaster.
  8. Heat water in medium saucepan for boiling caps and rings; start heat under pressure canner, but keep heat low for now.
  9. Pack meat into hot jars, leaving 1 plus 1/2 inch (1 1/2 inch)  MINIMUM head space. I know – most books and sites tell you one inch. Even pre-cooked meat will expand while processing. Trust me. Allow 1 plus 1/2 inch or better for ALL meats.
  10. Now add broth to just over top of meat (one-half inch). You should NOW have one inch headspace from the top of the broth to the top rim of the canning jar.
  11. Clean the rims of your jars twice: first with hot water, then with white vinegar and a piece of clean paper towel for each swipe – you do not want to transfer fat or meat bits, and, using the same towel for all jars could do this.
  12. Place your boiled caps (30 second boil). Place your boiled rings. Tighten rings and then loosen a bit, if too tight. Remember: lids screwed too tightly are a common cause of loss of liquid in canning. But you don’t want them too loose, either.
  13. Place hot jars in hot water, but watch that temps are not too far apart: thermal shock breakage issue.
  14. Put lid on canner; on medium heat, cook until the steam spews out of vent pipe; as soon as it starts to spew out at a noticeable rate, time for ten (10) minutes; this is the important  “10 minute tornado”. This will remove excess air from pressure canner, allowing it to reach and maintain proper internal temp for safe food canning. FAILURE TO TAKE THIS STEP CAN LEAD TO IMPROPERLY CANNED FOOD. If you are using a weighted gauge (such as a Mirro with 5/10/15 lb. increments), this is not necessary, as it will vent out while cooking. It is ALWAYS necessary with a dial gauge, no matter what you are canning.
  15. After 10 minutes, place your weight on vent pipe. Bring to temp over medium to medium-high heat (I don’t know your stove or how hot it cooks) and hold it there; start timing as soon as it reaches proper pressure. If at any time it drops below the required pressure, bring it back by turning up heat just slightly, and start timing again. Just watch it so it doesn’t have opportunity to drop below temp for very long. You don’t want food cooked to mush. If you get too much pressure, GENTLY release a little using the weight (move it slightly to release pressure) until it reads correctly. Do not get in a hurry in releasing pressure – this can result in extreme temp fluctuations, which forces liquids out of jars.
  16. If pints, process at 10 lbs. pressure 75 minutes if under 1000 ft. altitude.  If over 1000 ft. altitude, process @ 12 lbs. pressure for 75 minutes for PINTS. If QUARTS, process at 10 lbs. for 90 minutes below 1000 ft; 12 lbs. for 90 minutes above. Over 2000, add 2 more lbs. pressure, same timing.
  17. ALWAYS allow your pressure canner to drop back to “zero” on its own. Don’t try to force it. When completely cooled (gauge reads zero), open canner; wait 5 minutes before removing jars (that water is still very, very hot and you don’t want to disturb jars just yet).
  18. After 5 minutes, remove jars from canner, allow jars to cool thoroughly.
  19. Check for seal when cooled (at least 2 hours in most environments).
  20. Remove metal rings when cool; wash jars and rings in hot, soapy water and rinse thoroughly in hot water. Return to racks and let air dry completely – several hours or even overnight. Replace metal rings. I like to wipe lids dry with paper towel after washing, rinsing, and returning to cooling racks – this prevents water rings from forming on caps, which makes it harder to write on them.
  21. Write contents and date on top of metal lids. Pack and store. Give yourself a “Well done!”.

Roasted chicken is highly versatile and you can do many things with it! My boys love “Chicken Enchilada Casserole”, which I have posted under recipes, over at the Forum.

Beef

There’s just not much better than popping open a jar of sliced, seasoned sirloin tip and turning it into a quick Po’Boy, or Manhattan, or whatever you like…and chuck roast, ground beef,  or roast beef have so many uses, where to start?!

Do have extra beef broth standing by, in case you don’t make enough for all jars in the cooking process.

Sirloin Tip Roast

For sirloin tip roast, I simply roast it as always, so it is “ready to eat”. I prefer to slow roast, and very often use my big Nesco roaster, as it uses a lot less energy and doesn’t heat up the kitchen as much as my big oven.

Once it is roasted to suit me, I simply slice it, pack it to 1and 1/2 (1 1/2) inches headspace, add liquid/gravy to cover, leaving one inch headspace, clean jar lips thoroughly, cap and process.

I use the liquid created in cooking, which I filter, then add my favorite ready-to-use gravy mix and water. You don’t even need to cook the gravy mix addition – just add it to jars; it will cook and thicken during processing, after which it’s just “heat and eat”!!

I usually buy a 10-12 roast, serve a meal with it, and can the leftovers; I usually get about 5 quarts leftover.

Watch for MSG (Monosodium Glutamate) in these mixes and broths folks – they’ve love to put ‘em there! I use only brands that do not add MSG.

Ground Beef

  1. Allow about 2 pounds raw ground beef per quart; 1 pound per pint (m/l). I always pre-cook ground beef; if you tried to pack this raw and then process it, you would have one big clump and would have trouble getting it out of the jar, I do believe.
  2. Brown your ground chuck in a skillet and drain fat off.  Some people can ground beef with no liquid; I prefer to pack mine in beef broth; this broth can be used later as a gravy base or saved for another project, or just cooked down, as in taco meat. I personally do not like dry meat, so, I use the wet-pack method.
  3. Process like any other beef.

Chuck roast

  1. Allow about 2.5 pounds raw chuck per quart, about half that per pint. I like to cut it up into bite-size pieces, cover with water, bring to boil. Cook JUST until it is just browned throughout – no pink left in the meat. It will finish cooking during processing.
  2. While you’re prepping meat, put jars in dishwasher (if you have one) and wash; keep in dishwasher to keep hot. Or, wash by hand in hot, soapy water, rinse in hot water, and keep on cookie trays in 250 deg. F (121 deg. C) oven to keep jars hot and clean until ready to pack.
  3. Skim that gunky mess of the top – DO NOT can without removing this first. This stuff will get in between the rim and the cap and prevent seal on many of your jars – trust me when I tell you this. Strain broth before packing. Besides, you’ll never win a blue ribbon at the fair with that mess in your jars! ; )
  4. After straining the liquid – assuming you have not yet seasoned it (which you could, if you want), season to taste (or, add seasonings to jars, if you prefer) and pack your meats. Meat packs to within 1 and 1/2 (1 1/2) inches of jar top (headspace); now add your strained liquids that you made when boiling to cover meat by one-half (1/2) inch, which should give you the prerequisite one inch (1 inch) headspace.
  5. Clean your jars twice: once with a piece of clean paper towel dipped in hot water; and the second time with a piece of clean paper towel with white vinegar. If there is any fat residue on the lid, the white vinegar will get it.
  6. Place your boiled caps and boiled rings (30 second boil is sufficient) on jars – remember: this boil is not to sterilize – that will happen in the pressure canner – this boil is to make sure your caps and rings are clean and have no residue that might prevent a seal; place your jars (which are hot) down in water of pressure canner that should also be about the same temperature hot (remember what I taught you about thermal shock breakage? There cannot be a great difference between temp of jars and temp of water you set them down in).
  7. Put lid on canner; on medium heat, cook until the steam spews out of vent pipe; as soon as it starts to spew out at a noticeable rate, time for ten (10) minutes; this is the important  “10 minute tornado”. This will remove excess air from pressure canner, allowing it to reach and maintain proper internal temp for safe food canning. FAILURE TO TAKE THIS STEP CAN LEAD TO IMPROPERLY CANNED FOOD. If you are using a weighted gauge (such as a Mirro with only 5/10/15 lb. increments), this is not necessary, as it will vent out while cooking. It is ALWAYS necessary with a dial gauge, no matter what you are canning.
  8. After 10 minutes, place your weight on vent pipe. Bring to temp over medium to medium-high heat (I don’t know your stove or how hot it cooks) and hold it there; start timing as soon as it reaches proper pressure. If at any time it drops below the required pressure, bring it back by turning up heat just slightly, and start timing again. Just watch it so it doesn’t have opportunity to drop below temp for very long. You don’t want food cooked to mush. If you get too much pressure, GENTLY release a little using the weight (move it slightly to release pressure) until it reads correctly. Do not get in a hurry in releasing pressure – this can result in extreme temp fluctuations, which forces liquids out of jars.
  9. Process like any other meat: pints 75 minutes if 1000 ft. altitude or below @ 10 lbs. pressure; 12 lbs. if over 1000 and less than 2000; over 2000, 14 lbs. pressure for 75 minutes. Quarts: 90 minutes using same pressure guidelines.
  10. Allow canner to cool on its own. Remove lid. Wait 5 minutes. Transfer jars to cooling racks on towels (to catch mess). When completely cool (at least 2 hours) test lids: remember – tap metal lids around outside edges – NOT in centers as many web sites tell you. Remember why? I mentioned that in earlier teachings.
  11. If some did not seal, refrigerate and use within a few days (7-10). Or, reprocess them, cleaning jar lids thoroughly and a NEW metal cap. Never reuse a metal cap, other than for storing dry goods.
  12. Wash your jars; allow to dry. Mark lids with contents and date and store away!

Give yourself another  “Well done!”. You’ve earned it!

Fish

It is possible to can just about any meat. Some will, however, give better results than others.

For our fishermen and fisherwomen, here are instructions for canning fish:

Canning Fish (Unsmoked):

  1. Cut fish into jar length pieces, LEAVING SKINS ON.
  2. Soak your fish in a salty brine for 1 hour. 1 cup of salt to 1 gallon of water.
  3. While fish is soaking gather all materials needed. Start your water heating in your canner.
  4. Drain fish for 10 minutes. You want to be sure it is well drained.
  5. Pack fish into hot jars,(pints or half pints) skin sides out next to the glass.
  6. Leave a 1 inch head space. Do not add liquid.
  7. Process using same directions as any other meat, for the altitude where you are canning. Not less than 10 lbs. pressures for 90 minutes quarts, 75 minutes pints. Adjust for higher altitudes.

Canning Smoked Fish

The only difference between canning regular fish and smoked fish is that you will need to add more water to your canner – make sure it has at least four (4) quarts water before beginning the canning process (in other words, smoked fish needs to be nearly submerged for canning). I suppose this is because it is smoked, and, therefore, already a bit dried out.

A FINAL NOTE:  Even if you are not going to do a lot of canning NOW, get everything you need: knowledge (“how to”), at least one good book (Ball Blue Book of Canning); pressure canner; water bath canner; jar lifter (more than one!); jars, caps, rings, etc. Be ready for the day when you MUST preserve your own food without electricity.

Filed Under: Food Preservation

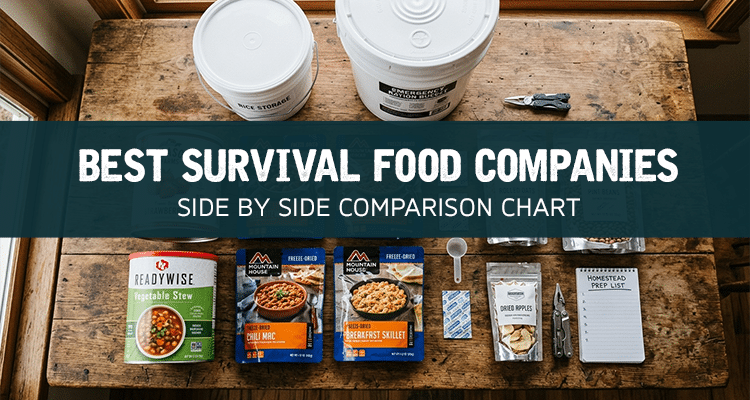
Best Survival Food Companies

March 5, 2024 by SCPadmin

Short answer: If you want the best value and quality food storage for a family of 4 and want to be done with it, the Augason Farms 1-Year Food Storage for 4 People is our top pick. It has the most transparent calorie labeling in the industry and the lowest cost per 2,000 calories of any major commercial option. Search for it on Amazon or the Augason Farms website for current pricing.

Augason Farms 1 year food storage supply

Commercially manufactured survival food is a legitimate option — shelf-stable for years or decades, requires no prep beyond a bucket and a closet, and removes a lot of the friction from getting started. The honest caveat: pre-packaged emergency food is more expensive per calorie than bulk staples. Some of that premium pays for quality freeze-drying and real shelf life. Some of it pays for marketing.

The smartest way to cut through the fog is to compare on a single objective metric: cost per 2,000 calories. Every company uses different language — “servings,” “pouches,” “entrees,” “meals,” “days.” None of those mean anything without knowing the actual calorie count behind the label. Calories are honest. Everything else is marketing.

Cut through the marketing: compare by calories

Before comparing companies, take a look at the actual total calorie count on whatever you’re buying — not the serving count. A “60-serving” bucket from one company might deliver 1,800 calories per day for one person. The same description from another company might deliver 900. The only number that tells you how much food you’re actually buying is total calories.

We also recommend calculating “cost per 2,000 calories” — because some packages are larger than others, and buying two smaller packages sometimes beats one large one on value. Here’s the comparison table across the major 1-year supply options. Note: prices below were gathered at time of original research — verify current pricing before purchasing, as survival food costs fluctuate. The calorie figures and cost-per-calorie rankings are the more durable reference point.

CompanyPrice (verify current)Total CaloriesCost Per 2,000 Cal
Augason Farms~$3,5001,932,950$3.62 ✅ Best value
Saratoga Farms~$2,713735,243$7.38
E Foods Direct~$2,887720,480$8.01
Mountain House~$5,000724,890$13.80
Valley Food Storage~$2,209299,665$14.74
Daily Bread~$6,103720,672$16.94
Emergency Essentials~$6,000679,530$17.66
Survival Cave Food~$6,8181,387,920$9.82
Legacy~$8,7901,698,720$10.35
My Food Storage~$8,1641,590,620$10.27
Lindon Farms~$3,899730,000$10.68
Backpacker’s Pantry~$47,0802,467,860$38.15

Two things this table makes clear immediately: Augason Farms is in a different value category than everyone else at $3.62 per 2,000 calories. And Backpacker’s Pantry, while excellent freeze-dried food for actual backpacking, is not a cost-rational choice for emergency food storage at $38.15 per 2,000 calories.

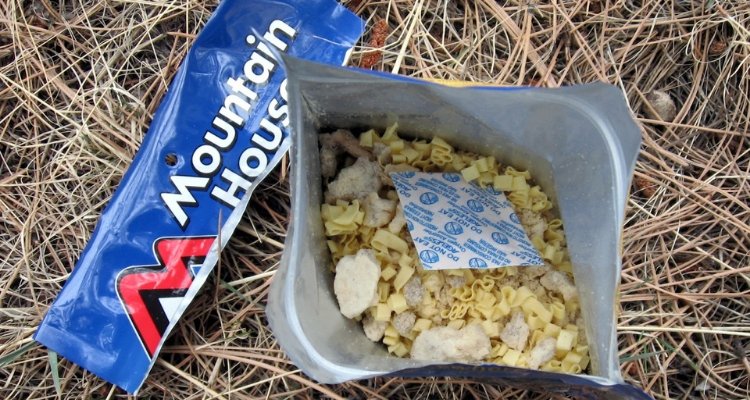
Mountain House freeze dried food pouches for emergency food storage

1. Mountain House

Mountain House is the pioneer — started in 1969, originally making freeze-dried food for outdoor enthusiasts who needed real nutrition in the backcountry. They have the longest track record and consistently the best reviews on taste. People are genuinely surprised that freeze-dried food can taste this good; Mountain House has built its reputation almost entirely on that one differentiator.

Over time Mountain House expanded into prepper and emergency lines, offered in 2-day through 14-day supplies and larger emergency kits. The kits are more portable than buckets, which makes them attractive as a bug-out food option rather than just a stay-in-place storage solution.

The honest tradeoff: Mountain House is not the value play. At ~$13.80 per 2,000 calories for a 1-year kit, you’re paying a significant premium for that taste quality and brand trust. If taste during an emergency matters a lot to your household — and for morale, it genuinely does — Mountain House is worth the cost. If you’re optimizing purely for calories per dollar, it isn’t. For a deeper look at the individual meals see our Mountain House meals review.


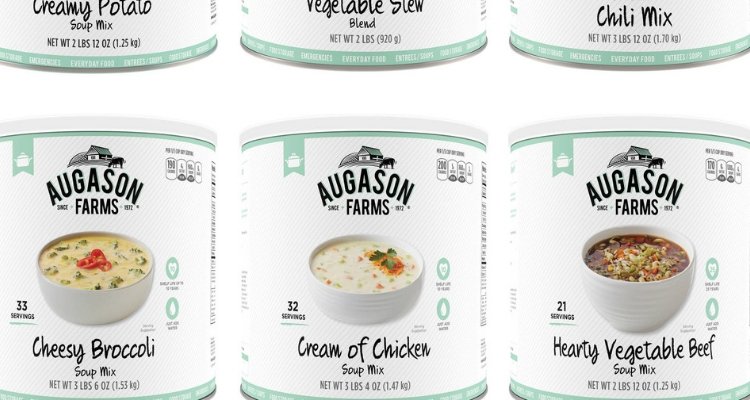
Augason Farms food storage cans and buckets

2. Augason Farms

Augason Farms is our overall recommendation, and the calorie table explains why. At $3.62 per 2,000 calories they offer roughly twice the calorie value of most competitors at comparable price points. Their best-known products are #10 cans of individual freeze-dried and dehydrated ingredients — scrambled eggs, apples, bananas, potato slices — plus complete entree meals and month-long bucket options.

The packaging philosophy is notable: larger serving sizes rather than single-serve pouches. A 7-serving bag of macaroni, for example. This is better suited to home kitchen use than backcountry cooking, which is how most emergency food gets eaten anyway. It also makes Augason a better fit for family use than for solo hiking.

Taste reviews are solid but not glowing — people generally say it’s good and they’re happy with it, without the enthusiasm Mountain House gets. The transparency on total calories is genuinely appreciated and unusual in this industry. Most companies make you do math; Augason tells you exactly what you’re buying. That alone makes comparison shopping easier.


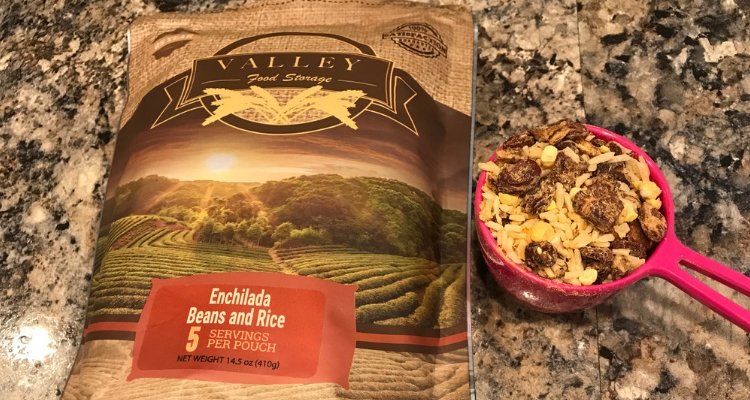
Valley Food Storage emergency food supply — no MSG, no preservatives

3. Valley Food Storage

Valley Food Storage’s differentiator is ingredients: no MSG, no artificial preservatives, no cheap filler ingredients. They’re the “clean label” option in a category that doesn’t always prioritize that. If your household reads ingredient labels on everyday food, you’ll appreciate that Valley Food Storage extends that standard to emergency food as well.

They offer 1, 3, 6, and 12-month storage options plus shorter-term kits. Satisfaction guarantee and generally strong customer service reputation. The honest numbers: at $14.74 per 2,000 calories, clean ingredients cost more. Whether that tradeoff makes sense is a household decision — the food quality and ingredient standards are real, but you’re paying nearly four times Augason’s per-calorie rate for them. Good first choice for households with specific dietary concerns or strong preferences about food quality; less competitive for pure calorie-storage value.


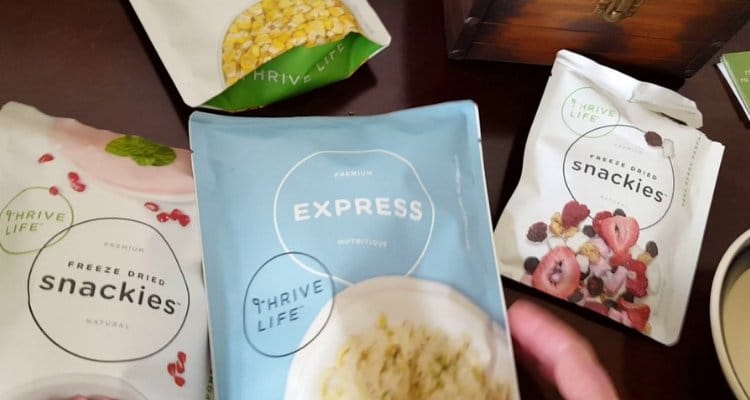
Thrive Life freeze dried food cans for long term storage

4. Thrive Life

Thrive Life — originally called Shelf Reliance, a company that made rotating food storage shelving systems before moving into food — is best known for its #10 cans of individual freeze-dried ingredients. Fruits, vegetables, grains, meats, sauces: the range is genuinely broad. If you want to build a custom food storage program from individual ingredients rather than pre-assembled meal buckets, Thrive gives you more granular options than most.

One thing worth knowing: Thrive operates partly through a network marketing model. You can buy directly online, but you can also sign up as a distributor if that’s your thing. For most people this is irrelevant — the food stands on its own merits. The MLM structure just means you may encounter Thrive through a distributor contact rather than a store, which can affect pricing depending on how you buy.


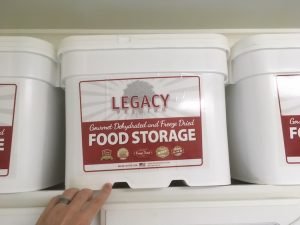
Legacy emergency food storage buckets stacked

5. Legacy Emergency Food

Legacy long term freeze dried emergency food buckets stored stacked on shelves
Legacy buckets have molded grooves along the bottom for stable stacking — we store ours on top of the laundry room cupboards.

Legacy markets itself on lowest cost per pound, though by our cost-per-2,000-calorie metric they come in at $10.35 — better than Mountain House and Valley Food but behind Augason and ReadyWise. Where Legacy genuinely stands out is portion sizes: reviewers consistently mention that Legacy portions are larger than most competitors, which matters for actual satiety and for how many days a supply realistically lasts.

The buckets feature molded plastic grooves on the bottom for stable stacking — a practical design detail if you’re storing multiples. Legacy maintains a 4.4/5 rating on Amazon across a large review base. As a well-reviewed, mid-priced option with better-than-average portion sizes, Legacy is a solid pick especially for families prioritizing fullness per meal over the lowest per-calorie cost.


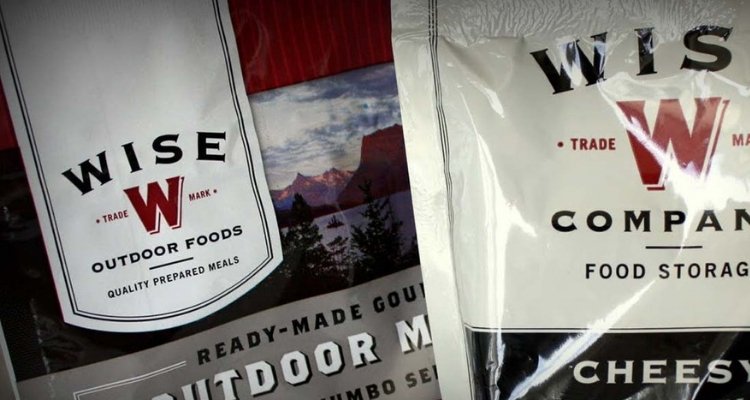
ReadyWise formerly Wise Food Storage — subject of class action lawsuit over misleading calorie claims

A Note on ReadyWise (formerly Wise Food Storage)

You will likely encounter ReadyWise in your research — it is widely sold and heavily marketed, so it deserves a direct explanation of why we do not recommend it.

Wise Food Storage (now rebranded as ReadyWise) was the subject of a federal class action lawsuit filed in 2017: Miller v. Wise Company Inc., U.S. District Court, Central District of California, Case No. 5:17-cv-00616-JAK-PLA. The lawsuit alleged that the company deceptively marketed its long-term food kits as sufficient to sustain a specific number of people for a specific period of time — when in reality, the kits did not provide adequate calories to do so. Plaintiffs argued the calorie shortfall was severe enough that someone relying solely on these kits in a genuine emergency could face adverse health effects and starvation.

Wise settled the lawsuit. As part of the settlement, the company paid class members between $15 and $1,400 per product, and — critically — agreed to stop claiming its kits would sustain a person for a specific number of days unless the kits actually provided at least 2,000 calories per day. That the settlement required this change confirms the core allegation: their marketing overstated what the food would actually do for you in a survival situation.

The company subsequently rebranded to ReadyWise and has made changes to its packaging and marketing. Independent reviewers have noted improved calorie counts post-settlement. But the underlying company is the same, and the nature of what they were sued for — misrepresenting how long their food would sustain you in an emergency — is the exact failure that matters most in this category. We do not feel comfortable recommending a company with that track record to readers who may one day depend on what they store.

If you already own ReadyWise products, check the actual calorie count on the label against your household’s daily needs — 2,000 calories per person per day is the standard planning benchmark — and verify the kit covers what you think it covers. Do not take the serving count or day count on the label at face value without doing that math yourself.


Survival Recipe Vault — hundreds of survival recipes to download

Free Emergency Food Samples: Try Before You Commit

If you’re on the fence about which company to go with, several will send out a free sample — usually you just cover shipping. This matters more than it sounds: buying several months of food storage only to learn your family won’t eat it is an expensive mistake. Try a meal or two first.

Your best bet is going directly to the company’s website rather than Amazon — free samples are usually not listed on third-party marketplaces. Look for a “free sample” link in the website menu or on the homepage. Here are companies that have offered free samples — verify each is still active before ordering, as these programs change:

  • Augason Farms free sample
  • Valley Food Storage free sample
  • Daily Bread free sample
  • Survival Cave Food — check homepage for current sample offer
  • Harvest Right free sample

Once you’ve tried a few, the best price on most of these companies’ products is usually found on Amazon or direct from the company website during a sale. Check both before buying in bulk.

Survival Food Storage FAQ

How much does a year’s worth of food cost?

Using Augason Farms as the benchmark (best calorie value in the table), a year’s supply for a family of four running 2,000 calories per person per day costs roughly $5,000–$5,500 at current pricing. That number shifts based on whether you have young children vs. four adults, how much of the supply is commercial vs. bulk staples, and what’s on sale when you buy. A more detailed breakdown of what a real year supply actually requires — including the calorie math most commercial marketing skips — is in our survival food list guide.

How much rice do I need for a year’s supply?

Rice is one of the best staples to store — cheap, with a 25–30 year shelf life when properly sealed in Mylar with oxygen absorbers. Store at least 300 pounds of grains per person per year, of which 25–60 pounds should be rice. That gives you a solid calorie base to build around. Store white, Basmati, or Jasmine rice — brown rice’s oils go rancid within a year or two, making it a poor long-term storage choice.

How much does freeze-dried food cost per serving?

Because of the processing involved, freeze-dried food carries a premium. The range in our table runs from $3.62 to $38.15 per 2,000 calories — a tenfold spread. Most of the reputable mid-tier companies land between $8 and $14 per 2,000 calories. Anything significantly above $15 per 2,000 calories is a specialty product (clean-label, gourmet, backpacking-focused) where you’re paying for something beyond basic calorie storage.

How do you store food for a disaster?

Commercial emergency food comes pre-packaged for long-term storage — most companies claim 25-year shelf life under proper conditions. The keys are cool temperatures (below 70°F, cooler is better), dark storage, low humidity, and airtight containers. For bulk staples you pack yourself (rice, beans, wheat), sealed #10 cans or 5-gallon buckets lined with Mylar bags and oxygen absorbers are the standard — the same method we cover in detail in the survival food list. Heat is the enemy: every 10°F drop in storage temperature roughly doubles your effective shelf life.

Is commercial survival food worth the cost vs. packing your own?

Depends on what you’re optimizing for. Packing your own bulk staples (rice, beans, oats, wheat, oil) gives you the lowest cost per calorie by a significant margin — our food storage guide shows how to do this for roughly $900–$1,500 for a family of four for a year. Commercial survival food costs 3–10x more per calorie but saves you the packing work, gives you meal variety right out of the bucket, and stores in a more organized, portable format. The smart approach for most families is a mix: bulk staples as the calorie base, commercial freeze-dried meals for variety, morale, and easy grab-and-go options.

Filed Under: Food Storage

How To Make Yogurt in a Thermos [Recipe]

March 4, 2024 by Seasoned Citizen Prepper

There are many ways to “make” yogurt. We will focus on one: thermos yogurt, as it is easy and cost-effective. If you don’t already own a thermos or two, they are usually not hard to find in second hand shops, but you will need a WIDE-MOUTH thermos for this project. You could probably use regular one, but, it will be harder to get the yogurt out.

A thermos is an excellent heat retainer; this will provide the even, slow heat needed to ferment your yogurt.

Yogurt is nothing more than milk that has been fermented by special strains of beneficial bacteria. It is a FERMENTED food, which IS, in and of itself, “probiotic”; it is not necessary to buy a “brand” to get a probiotic; all yogurt (as is true of all fermented foods) are “probiotic”.

Yogurt can be made from any kind of milk, whether raw or pasteurized (let’s not even get into that argument right now!); it can be cow’s milk, goat’s milk, yak milk, whatever you have. I have not tried yak milk, but the point is, you should be able to make yogurt from any kind of milk. You can make yogurt from skim, whole, or any fat content milk.

You will need a “starter” for your yogurt. The simplest thing to do, as long as it is available, is to buy a ready-made yogurt at the grocery. Don’t skimp on quality here; there are many makers of yogurt and, without question, some are healthier than others; read the labels; know what you’re buying before you buy it. For starter, buy only plain yogurt. You can add your fruits, etc., later.

As a rule: use one-half cup (1/2 cup) yogurt to each quart of milk; stir well, to make sure there are no lumps.

Try to use only glass bowls, glass or stainless steel pots, and stainless steel tools for preparing your yogurt. Avoid plastic, wood, and other materials that might “taint” your finished product.

First, heat milk to “almost boiling” (but do not actually boil it – just look for bubbles around the outside edges of your pan, then, let it cool. How much milk? First, determine how much your thermos will hold; then, use the formula given above, adjusting as needed.

Rinse your thermos out with very warm (not hot) water just before the next step.

When the milk has cooled to “luke warm”, add yogurt to milk. Now pour this mixture into your pre-heated wide-mouth thermos, and place the lid. Allow to set 4-6 hours before refrigerating. Leave it alone during this time.

Properly made yogurt is rich and custard-like, with a creamy, slightly tart taste. Homemade yogurt tends to be sweeter than store bought.

If, after refrigerating, you see “waterish” stuff on top, this is whey. You find this in store-bought yogurt, too. Don’t discard it! Stir it back in or drink it – it is rich in vitamin B12 and minerals!

Tips and Tricks for Yogurt Success:

  1. Do not disturb the milk while “brewing”; even small movements can cause whey separation, which will change your results;
  2. Don’t overheat the milk (don’t boil it); don’t allow it to cool completely, either; either will cause the retardation of the bacteria, and the yogurt will not ferment properly;
  3. Do not use old starter; it may not do its job well; On the other hand, a culture that is too “new” (fresh) will not do its job well, either – so if you make your own starters, allow it to age a bit before using (at least 24 hours).
  4. When you make a fresh batch, save some for your next starter; starter should be used within five (5) days.

Yogurt will keep well for about 8 days under refrigeration and properly packed in an air-tight container. It can also be frozen for several months (who doesn’t love frozen yogurt?)!!

Filed Under: Recipes

What Preppers Need to Know About Small Game Hunting

March 4, 2024 by Seasoned Citizen Prepper

To survive in the wild when SHTF, you have to learn to hunt the most abundant forms of game. This includes rabbits, squirrels, quail, turtle and even the occasional chipmunk, if pickings are slim. One thing is certain: When things start to get ugly, you will need to be able to take whatever game you can, if you expect to be well-fed.

To maximize the benefits of the hunt, here are few things to keep in mind.

Small Game vs. Large Game

Stalking is one of the most effective ways to get squirrel and other small game. Normally, the best time to hunt both is in the early morning, although late evening is good too. Unlike big deer, who will bolt at the slightest noise, small game will hang around a second or two longer. Be ready, though, because they are much faster at the getaway once they decide to take off.

The Best Kill Shot

Unless you want to use the brains for food, the best kill shot for a small animal is a headshot. There are a few good reasons for this.

First, a head shot is a direct kill and won’t damage the hide. Squirrel and rabbit hides can be tanned extremely soft, and they are excellent for boot liners and children’s clothing.

The second reason: It maximizes the amount of usable meat you can harvest from the animal. This also keeps a majority of the long bones in tact. If preserved correctly, the long bones can be used for sewing needles and awls, fish hooks and a variety of other tools preppers need living in the wilderness.

Know What to Keep and What to Discard

Small animals are more susceptible to rabies and other forms of parasites. When you gut the animal, be on the lookout for any indication of illness or disease. If you see anything that looks suspicious, don’t keep the meat. Bury it with the rest of the entrails and make sure it won’t be able to be dug up by another animal looking for food.

If the hide and bones are in good shape, clean them exceptionally well before using them or preserving them.

Do Not Over Harvest

Limit the number of animals you take from one area. One of the best ways to do that is by trapping. Not only does trapping allow you to conserve your ammunition, it also makes sure you take animals from different areas at different times. Set your traps and go about your business.

After a few hours, make your rounds and harvest your rewards. A properly set and bated trap will net animals on a regular basis, if you continue to move and cover them frequently.

Common Sense Rules

No matter where you are or where you hunt, always be aware of your surroundings. Now is the time to take a hunters safety course online so you have a good, working understanding of what is expected of you while you are out in the woods.

A smart hunter knows where to find his prey, but he also knows where his competition is. Make sure you have the advantage by keeping your weapons and traps at the ready.

Filed Under: Survival Food

  • « Go to Previous Page
  • Page 1
  • Interim pages omitted …
  • Page 11
  • Page 12
  • Page 13
  • Page 14
  • Go to Next Page »

Copyright © 2026 · Genesis Sample on Genesis Framework · WordPress · Log in

  • Privacy Policy