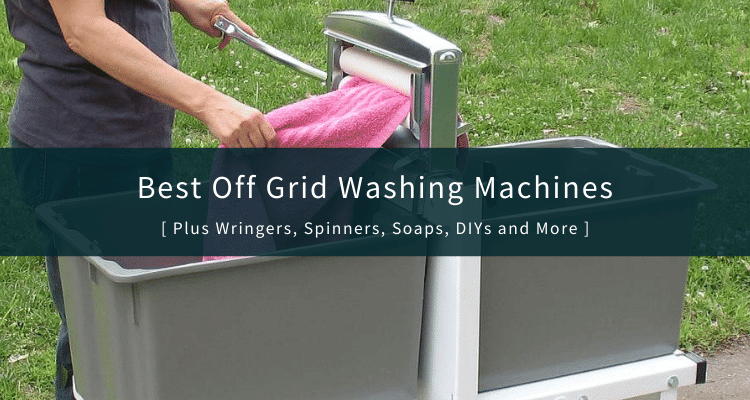
Off-grid laundry comes up for two reasons: people who want real independence from the electrical and water grids, and people who want to cut costs. Both are legitimate — and the options today are genuinely good, ranging from a $50 hand-crank you can use anywhere to compact electric units that run on 310 watts of solar power.
An off-grid washing machine is a necessity for anyone spending significant time away from conventional infrastructure, whether that’s a cabin, an RV, a homestead, or an emergency situation where the grid is down. Here are the seven worth your attention, followed by what to look for when choosing, a DIY section, and honest answers to the most common questions.
The Short Answer
1. Giantex Full-Automatic Washing Machine
- 10 programs and 8 water levels
- 9.9-pound capacity
- Child lock function
- Automatic load balancer

The Giantex Full-Automatic is a solid first pick for cabin, camper, or RV use where you have power available. Full control over washing functions, water levels, and delays through an LCD display. The child lock is a genuine daily-use feature — it locks all buttons and alarms if the lid opens, useful with kids underfoot. The clear lid lets you watch the wash progress and catch an unbalanced load before it becomes a problem.
The cabinet is only 33.6″ x 19.8″ x 19.7″ and fits in nearly any nook of a cabin, boat, or camper. Hook the water inlet to a faucet, position the drain hose, and set your program. The auto-balance feature pauses the cycle and redistributes an unbalanced load rather than shaking itself to pieces.
Other Great Off-Grid Washing Machines
2. Panda PAN6320W
- 10 programs and 5 water levels
- Built-in drain pump for quick discharge
- Quick-connect adapters for standard faucets
- 10-pound capacity, 310W

The Panda PAN6320W is one of the more capable electric portables: a built-in drain pump (not just gravity drain) means you can position it at floor level and run the hose up to a sink rather than needing the drain outlet level with wherever the water goes. The 55-inch drain hose and included faucet adapters make it genuinely plug-and-run in most setups. Casters mean you can move it without lifting.
One honest update since this article was first published: the Panda PAN6320W has shifted into the $235–$340 price range, a significant increase from where it launched. It remains a well-built machine, but at that price point you should comparison-shop the current Giantex lineup, which offers comparable performance at lower cost. The Panda’s 310W draw is gentle on a solar battery bank — that remains a genuine advantage for off-grid electric use.
3. Giantex Portable Mini Compact Twin Tub Washing Machine
- 11-pound wash capacity, 6.6-pound spin-dry capacity
- Dual water inlets
- Separate wash and spin timers
- 260W wash / 140W spin, gravity drain

The twin-tub design does something the single-tub automatics don’t: you can wash in one tub and spin-dry in the other simultaneously, which speeds up your laundry workflow considerably. The dual water inlet lets you add a small rinse to the spin side to get residual soap out of clothes while they spin dry. At just under 30 inches tall it fits under most counters and tables — a real storage win in a small cabin or camper.
4. KUPPET Compact Twin Tub Portable Mini Washing Machine
- 18-pound wash capacity — the largest in this list
- Pump drain, 56″ drain hose
- 1300 RPM spin dry
- 280W wash / 140W dry

If you’re doing laundry for more than two people, the KUPPET’s 18-pound capacity is the practical answer. Most portables top out at 10–11 pounds — the KUPPET nearly doubles that without a dramatically larger footprint (33.4″ x 27.9″ x 17.3″). Three simple dials for wash timer, wash selector, and spin timer. The pump drain with a 56-inch hose means you set it up once and drain to wherever you want without repositioning the machine. For a family off-grid or in an extended emergency, this is the workhorse pick.
5. SUPER DEAL Portable Compact Mini Twin Tub Washing Machine
- 8-pound wash / 5-pound dry capacity
- Dual water inlets, gravity drain
- Spin-tub cover plate
- 26 lbs — lightest electric option here

At 26 pounds and 26″ x 13″ x 12″, this is the most portable of the electric options — light enough to pick up and move, small enough to store just about anywhere. The pulsator agitates without bunching and throwing the tub off balance. Fill the washer side, run the 15-minute timer, transfer to the spin side with a small rinse water addition, spin dry. The cover plate on the spin tub is a small but practical touch — it keeps nearly-dry clothes inside during the spin and cuts down on splashing. Quiet when balanced.
6. Wonder Wash Compact Washing Machine
- 5-pound capacity
- Fully non-electric — hand crank only
- Uses ~90% less water than a standard washer
- Lever latch lid, gravity drain, ~$45–65

The Wonder Wash is the one fully non-electric option most people have heard of, and for good reason — it actually works. A slow hand-crank tumbles the drum and agitates the clothes. The 5-pound capacity is small, but a 2–5 minute wash cycle means you can do several loads in an hour without the fatigue of hand-wringing everything. No electricity, no hookup, no moving parts that require maintenance. The lever-lock lid replaced the old screw-on design and is genuinely faster to use.
At ~$45–65, this is the lowest-cost entry point on the list, and it’s the right answer for solo use, for situations with no power at all, or as a dedicated “delicates and small loads” companion to a larger setup. Uses zero electricity and nearly 90% less water than a standard washer.
7. Lavario Portable Clothes Washer
- Fully non-electric
- Push-pull Powerflow agitation
- 5 gallons per fill, gravity drain
- Made in the USA, ~$80–100

The Lavario is the manual alternative that handles heavier loads — it’s the only fully non-electric washer here that can genuinely clean jeans and sweatshirts, not just delicates. A clothes basket sits in a water bucket; lifting and plunging activates Powerflow Technology, forcing water through the fabric on both the push and pull strokes. Gravity and buoyancy do most of the work, so arm fatigue is lower than it sounds.
A typical load runs less than 20 minutes start to finish. Lightweight, portable, no electricity needed. Made in the USA. At around $80–100 it’s more expensive than the Wonder Wash, but it handles bigger and dirtier loads. For RVs, boats, cabins, or extended camping without power, this is the most capable manual option on the market.

Before You Get Started: Practical Reminders
- If you live in a four-season climate, winter air-drying is brutal. Clothes turn to ice on the line in freezing temps with little sun. Plan for indoor drying, a spinner, or a heat source.
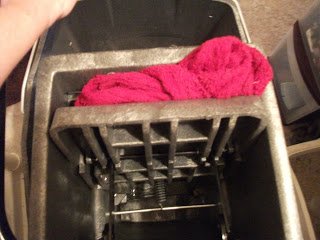
- If you use a wringer, buttons and zippers will struggle and can break. Zip-tie a thin sponge around either end of the rollers — enough give to protect hardware, still enough pressure to wring. Turn clothing inside-out for zippers.
- Watch fingers, hair, and clothing near the wringer. This sounds obvious until it isn’t.
What To Look For
Size
Storage space is at a premium off-grid. Electric units need a dedicated nook — under-counter, in a closet, under a table. Manual non-electric units store almost anywhere, including a broom closet. The size vs. capacity tradeoff matters most for families: a household with multiple people will want the 10–18 lb capacity range, which justifies a larger footprint. A single person or couple can manage fine with a 5–8 lb unit and multiple small loads per session.
Power
This is often the deciding factor. With power available (cabin, RV hookup, generator, established solar), the electric models are far more convenient. The Giantex and KUPPET both run on 120V standard outlets and are conservative enough on wattage (260–310W) that a mid-sized solar battery bank handles them without stress.
Without reliable power — early solar setup without a large battery bank, extended camping, boat use, or a grid-down emergency — the Wonder Wash or Lavario are the answer. They require zero electricity and deliver genuinely clean clothes. A backup generator can also bridge the gap for electric units in an extended outage.
Capacity
Capacity is listed in pounds of dry laundry. A useful rule of thumb: one person generates roughly 7–10 lbs of laundry per week. A couple, 12–16 lbs. A family of four, 20–30 lbs weekly. Match capacity to your situation — undersizing means doing many small loads; oversizing wastes space and money. The 10–11 lb units in the middle of this list hit the sweet spot for one to two people.
Drying
Even the best spin-dry tubs won’t get clothes fully dry — they’ll be damp, not wet, which cuts line-drying time substantially. For anything beyond that, you’re hanging clothes or adding a standalone spin dryer. A dedicated spin dryer (separate from the washer) can cut drying time by half, which matters enormously in cold or humid conditions. The Charming Spinner (Amish-built, runs on battery or standard electric) gets high marks from homesteaders for exactly this reason — if you’ve had experience with one, let us know in the comments.
Gravity or Pump Drain
Gravity drain requires the drain port to be above your discharge point — meaning you usually need the machine elevated to drain into a bucket or low-clearance hose run. Pump drain lets the machine sit on the floor and push water upward to a sink or window. If you’re in a small or awkward space, a pump drain is worth paying for. Pump drain units require electricity, so manual-only setups are always gravity drain — plan your barrel or bucket placement accordingly.
DIY Washing Setups
The Windmill Washer
I live on the edge of the prairie, with several great wind farms within 10 miles. I’ve had a hankering to try building a wind-driven washing machine for a while — just as an experiment to see if I have enough consistent wind to make it work. My property sits in a valley with an old railroad truss blocking the west wind, which is what got me back thinking about laundry in the first place.

The 3-Bucket Rinse and Wring Setup
One of the cleverest low-cost setups I’ve come across: three 5 or 6-gallon buckets stacked. The bottom bucket catches and holds grey water for garden reuse. The middle bucket has holes drilled throughout — you press clothes against it to squeeze water out. The top bucket has a lid, and you sit on it to apply pressure for rinsing. Simple, nearly free, and genuinely effective.

And on the drying side — the Charming Spinner. Amish-built (or at least Amish-sold), works on an off-grid battery setup or regular electric. No such thing as an energy-efficient dryer, but this spinner reportedly cuts drying time in half. Grey water is reusable. I save about $75 a year hanging clothes out in summer, but winter requires a dryer — I think the Charming Spinner would pay for itself in about two years. If you’ve used one, leave a comment — I’d love to know your experience.

The Industrial Mop Bucket
A janitor’s mop bucket with a built-in wringer works as a clothes wringer in a pinch — accessible, cheap at any janitorial supply, and the wringer mechanism handles the squeeze work so you don’t have to. Pair it with a plunger-style agitator in a bucket for a complete no-electricity wash setup that costs under $30 total.
FAQs
How do I do laundry off-grid?
The process is more similar to conventional laundry than most people expect. You need a water source (pressurized faucet for the electric units, or manual fill for non-electric), detergent, and the washer. Electric models handle filling, washing, and draining with minimal intervention. Manual models require you to agitate — cranking the Wonder Wash, or pushing and pulling the Lavario basket — then drain and refill for a rinse cycle.
One important habit: discharge your wash water to a greywater collection if you’re conserving. Laundry greywater (with biodegradable soap) can go directly on garden beds or landscaping rather than down a drain. Over the course of a season, that adds up to meaningful water savings.
How do I use an off-grid washing machine?
For manual washers: fill, add detergent, agitate (2–5 minutes of cranking or plunging), drain, refill without detergent, agitate to rinse, drain. Heavily soiled clothes may need a second wash cycle. Wringing before hanging dramatically cuts line-dry time because manual washers have no spin cycle to remove excess water.
For electric models: load clothes, connect water inlet, position drain hose, select program and water level, start. Most will handle the wash-drain-rinse sequence automatically. Check mid-cycle on the first few loads to confirm the balance and water level are right for your setup.
How do I power my off-grid washing machine?
Electric units run on standard 120V — from a generator, a solar battery bank with inverter, or a wind setup. The 260–310W draw of the units on this list is manageable for a mid-sized solar array; a basic 400W panel and 100Ah lithium battery can handle a few loads per day. The price of solar and lithium has dropped significantly in the last few years, making this more accessible than it was. For full grid independence without power, the Wonder Wash and Lavario require nothing but effort.
What soap or detergent do I need?
All the units on this list accept standard HE detergent, homemade dry detergent mixes, or bar soap shavings. Unlike modern residential washers, none of these have delicate sensors that get gummed up by “wrong” detergents. Simple motors, simple pumps — they’re not picky. Use less than you think you need; smaller tubs mean less water and less detergent than your standard machine. A tablespoon of liquid HE detergent per load is usually sufficient.
What’s the difference between washers, wringers, and spinners?
Wringers send clothes through two rollers that squeeze most of the water out mechanically. They’re slower (one garment at a time) and require care around buttons and zippers, but they work without electricity.
Spinners use centrifugal force — same principle as the spin cycle at the end of a conventional wash — to pull water out of a whole load simultaneously. Faster, less effort, and they tend to remove more water than a wringer. You can do a full load in one spin rather than feeding pieces through one at a time. On the whole, spinners are the better practical choice when you have the option.
Both are sold as standalone units separate from the washer, so you can combine any washer from this list with a dedicated spinner or wringer for a faster overall laundry workflow. For more on off-grid energy systems to power any of the electric options, see our dual-fuel generator guide and the broader off-grid living resources.
The Bottom Line
There’s no single right answer — it depends entirely on your power situation, your space, and how many people you’re washing for. Here’s the honest summary as of 2026:
- Have power, want maximum convenience: Giantex Full-Automatic or the KUPPET Twin Tub for larger households. Both are well-priced relative to their capability.
- Have power, need a large capacity: KUPPET at 18 lbs is the standout for families.
- No power, solo or couple use: Wonder Wash. Cheap, simple, zero electricity, gets clothes genuinely clean in 2–5 minutes.
- No power, heavier loads or bigger items: Lavario. The only non-electric washer that handles jeans and sweatshirts, not just delicates. US-made and worth the extra cost.
- Budget is tight: Wonder Wash at ~$50 is the entry point. Pair it with a used wringer from an antique store or yard sale and you have a complete off-grid laundry setup for under $100.