For those that live off-grid, most of the year is spent making sure that there’s plenty of food, wood, and other supplies to last through the winter so that much of it can be spent indoors, warm, and relaxed.
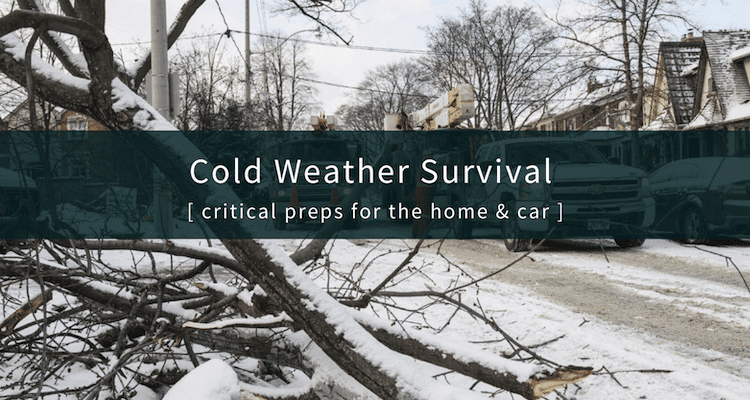
People of all walks of life seem to spend most of their year enjoying all of the hobbies and activities they can before winter makes everyone slow down, bundle up, and stay in. Many people find winter to be one of the most beautiful times of the year, but it can also be one of the most dangerous.
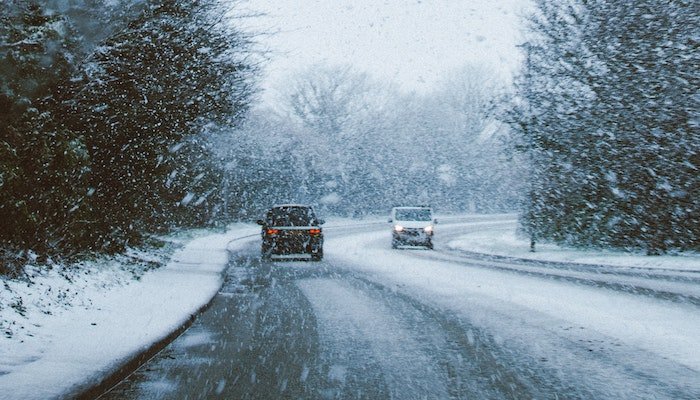
The cold and precipitation of the dark months bring their own unique challenges. Winter is harsher on your home and harsher on your vehicle than the other seasons. It can wreak havoc on your home and public utilities, while winter storms, arctic bursts, “Nor’easters”, and more can cause massive pile-ups and highway travel shutdowns.
Since emergencies in winter can often put your safety in danger much more easily than at other times of the year, so it makes sense to take some precautions that may end up saving your life. Having a few basic preparations in your home and car can help get you safely through a dangerous situation or stranding.
Power Outages And Workarounds
One of the most common things to happen during winter storms is power outages. They can happen for a multitude of reasons and can last for days in some cases. Ice build-up can take down power transmission lines, and car accidents can take down poles, either of which take hours to repair.
Broken water mains can require power shutdowns for blocks until the flooding is repaired. More serious issues can affect substations and more. Power can be out for several days in some cases.
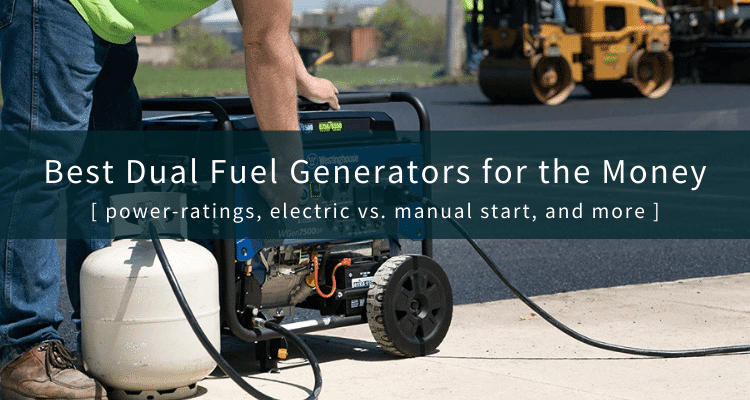
If you have never lost power for more than a day or so at a time, then you might want to consider getting a small inverter. They offer a long run time, steady voltage for your electronics and appliances, and will run a lot of the conveniences of modern life while the grid power is down. If you need a bit more power, some can be run in parallel, doubling the available running wattage.
If there is the possibility that you might lose power for longer periods, between one and three days for example, then a robust dual fuel generator might be a great option for you. They can run for ten to fifteen hours in some cases and have the muscle to push juice to pretty much anything you would need to run on an emergency basis in the winter. They will run on either gasoline or propane, making them an ideal solution for rural residents especially those who may use propane for home heating.
What To Do If Your Heat Goes Out
If the power goes out, you may lose the ability to use certain gas-fired appliances that rely on electric ignition or similar functions. This means you might lose heat. In this case, there are a pair of options that may help you keep your family warm in an emergency.
- The first is indoor ventless propane heaters. Often available in two styles, convective and infrared, they both heat well in different ways. They are specifically designed for indoor use and do not need to be vented to the outside.
- Convective or flame style heaters heat the air, handy for large areas that have air circulation aids like fans (think: Mr. Buddy type heaters).
- Infrared heaters use a large ceramic element that is heated and projects infrared heat, warming objects that then store the heat and transfer it to the air and other nearby objects. These will be more expensive than an electric heater, but they will put out significantly more heat into a larger area.
- The second option is using electric space heaters with emergency power generation. This is not going to be as effective in heating large areas but is more effective at zone heating. For example, if you need to warm just a living room and perhaps the pipes under the sink, you might find a pair of electric space heaters to be more efficient and cheaper than their propane counterparts.
Preparations Before Winter Arrives
One of the best ways to prepare for emergencies like loss of power or heat is to be proactive in a bid to avoid the emergency in the first place. This means taking a few minutes each season to give your home and seasonal appliances a once-over to make sure they are ready for the winter. Seal up any drafts and insulate where possible, so you can keep the cold out, and the heat in, as much as possible.
Insulating Windows with A Window Kit
Windows are a frequent site of air and thermal exchange. Even the most well-sealed windows can benefit from a plastic window insulation kit.
These are super simple to use, you simply clean the window frame, attach the two-sided tape, then press the plastic sheeting on to seal it. Run a blow dryer over it to basically heat-shrink it and take the slack plastic out. This provides an air barrier that resists thermal change and helps your home retain as much heat as possible.
Wrap Exterior and Perimeter Pipes
A burst water pipe in the winter can be disastrous. If it breaks because your heat goes out, it can be the worst, since all of the resultant water will begin to freeze on the ground. Before temperatures get too consistently low, wrap exposed lengths of pipe on perimeter walls with insulation wrap or tape.
This is a cheap way to make sure that your pipes don’t flash freeze during a cold snap. If an extremely cold day is expected, open a sink faucet or two just the smallest bit, so that they run at the slightest trickle, this can help prevent lines from freezing as well.
Get Your Furnace Inspected
Make sure you get a pre-season checkup for your furnace to avoid any potential mid-season part failures. Check all the regular functions like the thermostat, thermocouple, blower motor, and so on. Generally, you can have an HVAC company come do a checkup for a nominal fee and it only takes a few minutes.
Winter Survival Supplies For the Home
Most modest guidelines say to keep between 3 and 5 days of supplies on hand for most emergencies that would happen in the winter. Some items to keep on hand for the cold months, and the winter season in general include:
1 Gallon of Water Per Person, Per Day
This is crucial since water supplies can often be cut off in a winter emergency. You should plan to have a bare minimum of one gallon per day per person, for drinking and hygiene. This means if you have a family of three, and you want to keep 3 days’ supplies on hand, you will need 9 gallons of water.
3 Days Worth of Food
Keep at least 3 days’ worth of shelf-stable, canned, or other non-perishable food stored. You should plan on having supplies sufficient to make all meals for your family for the duration of the emergency. An emergency may mean no power for refrigeration or electric cooking, so make sure you plan around that. Don’t stock up on pasta if you won’t be able to cook it without electricity (more ideas on our family survival food list).
Home First Aid Kit
This should include bandages, gauze, tape, antiseptic and antibacterial wipes, and over the counter pain killers. Most common commercial kits will be fine, and residential kits will be a bit more extensive than auto kits.
Battery Powered Lights Or Lanterns
In the event that you lose power, you may want electric light since it is much safer and longer-lasting than candlelight. Avoid using candles if at all possible. LEDs will last longer than conventional bulbs.
Plenty Of Spare Batteries
Your lights will need batteries, particularly if the power will be out for some time. Be sure to keep a variety of sizes, the next ones to go dead will be the ones you don’t have on hand, guaranteed.
Chargers For Digital Devices
With our digital devices being our lifeline for many functions, keeping a power bank or two charged up and on hand can be a wise move. This way you don’t need to worry about keeping your phone or tablet charged so you can keep apprised of the details surrounding your emergency.
Stay connected, find out when your power will be coming back on, and communicate with friends or family to let them know your situation.
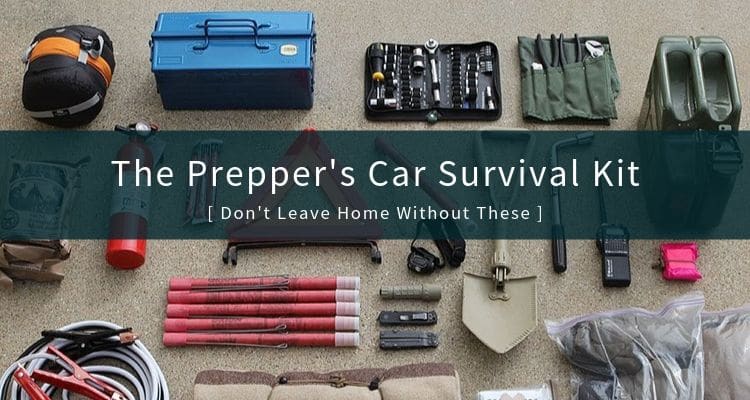
Winter Survival Supplies For The Car
Wet roads can be dangerous enough, but colder weather brings snow and ice that can cause any number of unexpected situations. Clear out a section of your trunk for these essential emergency items this winter.
No matter what causes your breakdown or stranding situation, the following is a brief list of some gear that will help keep you safe and warm until you get help or are able to get going otherwise:
Extra Blankets
In the event that you are stuck on the side of the road and your vehicle is not able to run periodically to keep you warm, you should be ready. Make sure you have a blanket or two, as well as gloves and extra socks.
Flashlight & Batteries
This is a good combo to have in your vehicle regardless of the season. If you are stuck somewhere and it’s after dark, you may need portable task lighting that your vehicle cannot provide.
Emergency Radio
For areas that have sudden weather changes, or large snowstorms that come in suddenly, like areas near the Rockies and the Great Lakes, an emergency radio with a hand crank, solar, or battery back up is another essential piece of gear that can save your life.
Jumper Cables
Winter is a battery assassin. Nearly everyone has gone to start their car at some point and heard that that slow, angry refusal to put enough juice to the starter. Even though most people have been in this situation, many of them still don’t carry cables. If you get stuck and someone is willing and able to give you a jump, one of you is going to need cables, so you might as well have a set ready.
First-Aid Kit
Most commercial first aid kits will be just fine for most peoples’ needs. Make sure there are the basics, such as bandages, gauze, tape, aspirin or ibuprofen, and sterilizing agents like iodine or alcohol wipes.
Water & Food
Obviously, you won’t need several days’ worth of food and water unless you are in a particularly isolated area. The best things to have on hand are some emergency food bars (or some combination of protein bars and granola bars), and bottled water.
You basically just need what would amount to emergency rations for about 24 hours. Again, unless you are traveling in an extremely isolated area, you should not be on the side of the road for more than a day.
Emergency Vehicle Recovery Supplies
Many people live in an area with lots of traffic or a higher population, in which case these emergency vehicle supplies may be superfluous. If you live in a more rural area, or even on the outskirts of town where you may not see as much traffic or have as high of a chance of someone driving by that may be able to help.
Sometimes, you might even be driving from one place to another and driving through a rural area instead of an expressway or more populated route. In situations like this, you may want to consider carrying some of these with you in case you need to effect a self-recovery.
Sand Or Kitty Litter
These can serve a dual purpose. Primarily, you can use either as a traction aid when stuck in snow or on ice. Additionally, both are sold in quantities large enough that they can be used to add weight above a drive axle. Sand can frequently be found in large bags or tubes, and kitty litter can be found in bags and large heavy pails or buckets. While sand will be cheaper to buy large quantities of, kitty litter is often a coarser texture which is more effective in gaining traction.
Snow Shovel
This basic piece of winter equipment will save you some cold, wet hands now, and possibly some frostbite down the road. While most folks don’t have the space for a standard size snow shovel, a small shovel or even a collapsible model is perfect for digging out a couple of tires to get some traction.
Tire Chains
If your state allows tire chains, these are a great way to help give your vehicle extra traction on ice, in snow, and even in slush and mud. Not only that, but you can store them and throw them on if you get stuck, or anticipate getting stuck, and they can be worth their weight in gold.
Tow Straps & Come-along
These are easy substitutes for a winch or a tow truck in a majority of situations. Not only will you be ready with straps if someone happens by and is able to help, but if not, you have the come-along and can ratchet yourself out of a ditch a few inches at a time. Cheaper than a winch or a tow, and they tuck into a corner of the trunk or other storage area.