• Skip to primary navigation
  • Skip to main content

SCP Survival

Best Survival Gear and Supplies

  • Download Survival Guides
  • Survival Food List
  • Download 906 Survival Guides to Your Device

12 Lies That Preppers Tell About Bug Out Bags

March 6, 2024 by SCPadmin

REAL Bug Out Bags

By this time everybody has heard the term “bug out bag.” You know, the bag that holds all your supplies and gear for when the shit hits the fan (SHTF)?

You’ve probably also heard bug out bags called by any of their many synonyms too:

  • Bail out bag
  • Survival kit
  • 72-hour kit
  • Go bag
  • Go kit
  • GOOD bag (Get Out of Dodge)

But no matter what you call it, bug out bags have been the subject of a lot of talk in recent years. And unfortunately, due to the increasing number of marketers and manufacturers entering the space, there’s a cesspool of bad information too (that’s right, I said “cesspool”).

If you go to Google, a search for “bug out bag” or “survival kit” will usually yield you results that fall into 2 categories:

  1. Ecommerce stores selling prepackaged $100 kits (these always have photo studio images and lots of plastic
  2. Bloggers pimping high priced bug out backpacks (but not really talking much about what should go in them)

In each flavor, you’ll find the exact kind of bad information and “fakeness” that I’m talking about. Exorbitant prices, shock and fear tactics, generic stock images of products that might not exist, or from people that have never actually held them in their hands. In some cases, the fakeness is minor, but in others, we’re talking downright, wild-ass fiction.

So, in an effort to set the record straight, here are the most common, most untrue lies that are being told to you about bug out bags:

Lie #1: Your Bug Out Bag Needs to Sustain You “Off The Grid.”

As cool and fun as it seems, you’re not going to run up into mountains with your rifle and live in a tent with your family because a wildfire is getting close. You’ll be heading to your aunt Teresa’s house to spend a couple nights until it passes. You’re going to be sitting in traffic on a freeway. You’ll be at a hotel an hour and a half away.

Accordingly, your bug out bag doesn’t need to have snares and giant fixed-blade survival knives. It needs charging devices and cash. It needs backup documents, and prescription medication. In the same way that you shouldn’t bug out if you can “bug in”, you’re not going to run into the woods if you there’s a town an hour away that’s safe. Leave the woods for Red Dawn.

Lie #2: You Will Be Carrying Your Bug Out Bag On Foot

The truth is, if you’re in the United States, you will probably be bugging out in your car. How do I know? A little something called history.

Take a look at the majority of evacuations that have happened in the last few decades. Hurricanes Katrina and Sandy. The 2020 wildfires in the western states. Winter Nor’easters and Mt. St. Helens. The east coast power outage of 2003. And yes, even people fleeing riots and civil unrest. People aren’t running out their front door on foot. And neither will you. We’ll be in our cars, with our bug out bags sitting comfortably in the back.

Remember, cars can:

  • go further
  • shelter you from the elements
  • provide more comfort
  • double as accommodations for a few nights if needed

Lie #3: The Backpack is the Most Important Part of Your Bug Out Bag

What a load of marketing crap! There’s WAY too much attention and money going towards the backpack portion of your bug out bag.

Here is the honest truth–you should NOT have a nice, new, fancy backpack for your bug out bag. Why not? Because if you do, you’ll be tempted to use it for other stuff–hiking, camping, traveling, ski trips, and a hundred different things. And one of the most important tenets of a solid bug out bag is that it’s allowed to be left alone, and never “borrowed” from.

A bug out bag backpack doesn’t need to be uber-tactical, have lots of Molly webbing, D-rings, or dozens of fasteners. It doesn’t need to have a hydration bladder compartment, self healing YKK zippers, special back panels, tons of padding or suspension, or be made of some fancy ballistic nylon. It doesn’t need to be an assault pack, or something that sounds like it could beat you up. It honestly doesn’t even need to have the absolute perfect, down to the milimeter fit. 

The other reason it doesn’t need to be new and fancy is that a bug out bag is something that you will MAYBE use once every five to seven years for a few days–IF THAT.

It should be sturdy, and it should be comfortable enough to walk in, but likely not going to be hiking through the mountains for days on end. Also, you want to blend in and not call too much attention. Having a super tactical backpack that’s covered in camouflage or a lot of MOLLE webbing on the outside runs counter to that. 

Lie #4: Lots of Cheap Plastic Crap is Better Than a Few High Quality Items

If you’ve done a single search for “survival kit”, I guarantee you’ve seen ads for the the 192,000-piece bags full of Aqua Blox, tissues, an orange plastic container for matches with a “signal mirror” inside, a whistle on one end, and something that looks like a pencil lead, that’s supposed to be a fire starter.

These kits always make sure to have a nice ball of plastic rope and a tin foil sleeping bag for if it’s cold. You’ll get a few different sizes of cheap carabiners, a dynamo flashlight that gives 9 seconds of light for a minute and a half of cranking, a first aid kit with lots of latex gloves, a plastic rain poncho, a wad of plastic triage flags, and if you’re really lucky, you’ll get a 32-function Swiss Army knife knockoff.

Plastic, plastic, and more plastic. Cheap, cheap, and more cheap.

Yet people have bought these in droves for the last couple decades, because they offer the promise of being “prepared” (read: “done”) for $100 or less.

Far better to put together a kit with fewer, higher quality items that you actually know how to use.

Lie #5: Your Bug Out Bag Doesn’t Need to Have a Change of Clothes

Spoiler: it does.

Protection from the elements is critical, and your clothing is your first line of defense. Anybody that’s heard of the rule of 3’s, knows that exposure to the elements can kill you faster than dehydration or famine (3 hours, 3 days, and 3 weeks respectively). If your clothing gets wet or ripped, or if you need another layer to keep warm, it’s not something you should be without.

And perhaps even more important, you need to have a sturdy pair of shoes. If the moment comes to grab your bug out bag and go, and you happen to be wearing sandals or high heels, you could be in a world of hurt. Rather than being stuck with them for the next week, wouldn’t it be a life-saver if you had a comfortable pair in your pack?

Yet again and again, you see posts on the internet without a single word mentioned of extra clothing or shoes.

Lie #6: Hygiene and Sanitation are Second-Tier Considerations in Your Bug Out Bag

In most bug out bag chatter, there is very little (if any) mention of hygiene and sanitation.

But the truth is, soap, wipes, hand sanitizer, toothbrushes and fresh socks and undies can mean the difference between sick and healthy, and they make a GIANT difference in how you feel. Toilet paper, butt wipes, and a sanitary means of taking a dump and disposing of it, are likewise, HUGELY important (hint: plastic bags are a good place to start).

The COVID-19 pandemic has got people thinking (overreacting) a bit about sanitation, but it’s still a fairly pronounced blind spot in most bug out bags.

The straight truth is that human beings are animals covered in bacteria. Some of it doesn’t hurt anything, some of it smells like hell, and some of it can be downright dangerous. But managing sanitation is a big ingredient to staying alive. Over the history of the world, many more people have died from infection than wars or accidents (on that note, if you are looking for antibiotics you can stock up, fish antibiotics make a perfect substitute–no lie).

And can I just re-emphasize 1 more time… WIPES. Such a simple, and life changing thing. Rather than have to get to water or use some of the water you’re carrying, get clean with a wipe that you can use and get rid of.

Lie #7: A Tin Foil Emergency Blanket in Your Bug Out Bag is Good Enough

Without exception, every pre-packaged survival kit on the market will include some version of a reflective emergency blanket. You know, those single use things that crinkle like crazy when you unfold them?

These things are pure junk. I know because I’ve slept in them multiple times And if you have slept in one too, you’re nodding your head right now.

What’s not to like? Let me count the ways:

  • they’re not warm
  • they’re not comfortable
  • they don’t breathe (so you get a layer of condensation all over the inside)
  • they snag and rip easily

If you haven’t ever slept in one of these things, it can be really easy to pass over it with a broad brush stroke, and think that it “checks the box” for your emergency sleeping solution. But it doesn’t.

Manufacturers and others will agree that these aren’t perfect, but they’ll explain that for a stopgap, “just keep you alive” situation, it’s a good solution. For many things in your bug out kit, this is a true, valid way of thinking. But not for sleeping.

You need something real and substantial for sleeping–either a sleeping bag that you can dedicate to your BOB, or a couple of warm blankets. Yes, it will cost more. And yes, it will take up more space in your pack. But when you’re tired, freezing and shaky, it will give you a truly comfortable “safe place”, where you can shelter for the night and regroup. And a space blanket will not.

Note: I mentioned that I’ve spent multiple nights in these things, which is true. What I didn’t say however, was that 3 of the times I slept in these reflective emergency sleeping bags I was in San Diego. I was freezing, shivering, and barely slept. If you’re in Michigan in the winter you’re really screwed!

Lie #8: You’ll Be Bugging Out Because of a War or Societal Collapse

Sensationalists love to talk about the fighting, the riots, the “us against them” parts of survival, and bugging out is no exception. In these scenarios, it’s you and your bug out bag against the bad guys.

As you move swiftly through the city, you have to make sure that your “grey man” disguise goes undetected, or the bad guys will get you. You’ll have your primary firearm, your sidearm, and body armor, so that when it’s time to start face shooting each other, you’re not going down.

After the director yells “Cut!” however, here’s the reality: you’ll be bugging out because of a storm, fire, or flood. Look at history–these are the emergencies that people leave their homes for. And this is what your bug out bag should be packed for.

Lie #9: Important Documents Are Second-Tier Considerations in Your Bug Out Bag

If you are trying to prepare yourself for emergencies and live more self-sufficiently, you will likely have come across people talking about their “emergency binder.” The concept is simple: combine all the most important information in your life in one place. This includes phone numbers, medical information, insurance information, etc.

Some people choose to include copies of actual certificates, licenses, and titles as well. Think birth certificates, marriage certificates, passports, vehicle titles and more.

Having access to critical information ensures that if your life does get wildly disrupted in an emergency, you can more quickly and easily pick up the pieces afterwards.

  • Need to file an insurance claim after your house gets ruined by a flood or burns down in a fire? Your insurance information is right there.
  • Need to prove that everybody in your vehicle is your family? No problem–you have your birth certificates and IDs.
  • Need to get a prescription filled? You have it with you at all times.

There is a some dispute about exactly how much sensitive information to include in something like this, because it could potentially fall into the wrong hands.

I actually recommend that people store scanned images of this information on an encrypted USB drive on their keychain. If you really want to go above and beyond, you can opt to add a small external hard drive to your bug out bag, with both emergency info, survivalist handbooks, and photos you want to make sure not to lose. Although in an emergency where you don’t have access to a computer or electricity, USB drives and hard drives become unusable.

Regardless of how many documents you choose to include or in what form, make SURE to include emergency information as part of your bug out bag. This is something that almost nobody in the hardcore bug out bag is talking about, but critically important.

Lie #10: It Doesn’t Matter if Your Pack is Small

When you’re scanning the internet, frequently you’ll see smaller style backpacks being used as a bug out bag. If you want to do your bug out bag for real though, these are a bad choice.

With a quick reference to Lies #5 and #7 above, you’ll remember that your bug out bag needs to hold a change of clothing and a sleeping bag or blankets. On their own, these take up a fair amount of space. But then if you add in a first aid kit, water, any kind of tools, and everything else, you’re out of space in a hurry.

Remember that as you’re getting ready to leave your house, you’ll probably be grabbing your laptop, charging cables, a hard drive, perhaps some important mail or documents, your camera, stuff for the dog, and any other valuables or last minute odds and ends.

Like I mentioned earlier, you will almost certainly be bugging out in your car, so it is possible to throw boxes or loose stuff in the back, but if you have the space in your pack, you will definitely use it.

Ever see a homeless person with a tiny little purse? Granted, this is a different situation, but you get the point.

Lie #11: It’s OK To Use Your Bug Out Bag Gear for Camping

To be fair, I’m not sure if anybody is actually preaching this from the pulpit, but it’s something that happens all too frequently.

You’re headed out for a camping trip, but you need a flashlight, so you go get the one from your bug out bag. Or a sleeping bag. Or lighters, Or any of 100 different things that are earmarked as ‘survival gear‘ and put in your bug out bag.

Then, you forget to return it when you get back. Or it gets broken or lost. Or you put it on the ground right next to the bag, but you don’t actually put it in. Or you eat the Mountain House meals you had in your kit, and don’t replenish it with anything new.

There are lots of different scenarios where this kind of thing is happening, but the upshot is, it undermines your bug out bag.

Your bug out bag is sacrosanct. Let it live untouched except for emergencies. That’s why it’s a bad idea to get a bunch of new gear or a shiny new pack to use for it. You’ll be too tempted to use it in other situations.

The solution?

Get nicer, nicer camping gear, and buy older or less-expensive stuff for your survival kit. This is why I recommend getting used stuff so much. With a little diligence, you can find deals on Facebook Marketplace or Craigslist, for high-quality stuff that still has plenty of life in it.

Lie #12: You’ll Be Living Out of Your Bug Out Bag, Like It’s Your Suitcase

One of the common misbeliefs is that during a disaster, you’re going to be living out of your backpack like you would a suitcase.

In reality however, think about your survival kit more as a grab bag of things you may need to use once, rather than a suitcase you’ll be continuously living out of during some period known as “survival.” There’s not really a survival time period, with a start and finish. Things happen little by little (either fast or slow), but not all at once.

And in the same way that we’re not going to be running around in the woods shooting wild animals when there’s grocery stores the next town over, we’re not going to all of a sudden be relegated to only the supplies in our kits.

Like lots of other prepper fallacies, this is predicated on worst-case, ‘all or nothing’ scenario. But in reality, it’s not as much about the complete breakdown of society, as it is needing to retreat elsewhere for a few days.

Maybe you’re riding out a storm in a local shelter or church. You don’t really need to build a cookfire or use a flashlight because they already have food and electricity for you. But having your own sleeping bag or blankets is super handy. Boom–bug out bag.

Don’t get married to the idea that you’re going to use your pack like you do when you’re camping or backpacking. If you end up using 3 or 4 things out of your bug out bag, awesome.

FAQs

To go along with the words of wisdom above, here are a handful of related considerations and frequently asked questions that are important to keep in mind:

Is it better to create my own bug out bag, or buy a preassembled one?

Create your own. Less money, higher quality stuff, more personalized to your needs, more beneficial planning and thought process while you’re putting it together.

Where should I bug out to?

Great question. Lots of survivalists talk about having a “bug out location” (“BOL”), usually some off grid cabin in the middle of nowhere, that they plan to go to if things get bad. Most of us will never do that though.

What I recommend is that you set up a reciprocal agreement with a couple friends and family members that will let you and your family come stay for a few days or weeks if needed. In turn, if they need to bug out of their home, they have permission to come crash at your place.

If you go this route, I recommend that you:

  • Choose somebody that is 2-5 hours away. This puts their location far enough away from you that you probably won’t be experiencing the same regional threats at the same time.
  • Actually call or email these people and make it official. There are a lot of offers thrown around in loose terms during the good times, but things can change quickly when an emergency hits. Even a well-meaning friend might turn you down if you wait to ask about coming to stay until something cataclysmic happens. It might be that he’s had 4 other similar phone calls from relatives or friends, and doesn’t have the space to put you up.

I still don’t think I know enough to get going–Where can I got to research this more?

If you think back over your life, there are people that you know that are “analyzers.” They read specs and how-to manuals, ask a lot of questions, compare, watch YouTube videos, and learn a lot, but do little.

On the other hand, you’ll find people that excel at their “thing” but are missing some of the terminology, or don’t know the full history. But while the analyzers are on the sidelines, they are taking action, having fun, and getting better much faster than the analyzers.

When it comes to your bug out kit–don’t be a perennial researcher. Manufacturers and affiliate marketers make money on specs, and product models, and comparing, so it’s in their interest to dive into the weeds and make a big deal out of things that don’t need to be.

Get started with what you know first, and keep sourcing ideas along the way.

Owning Does Not Equal Becoming

In truth, a lot of the most unrealistic things about bug out bags reflect similarly unrealistic ideas and attitudes about what survival situations will be like in general.

One of the most seductive and false beliefs that people latch onto in life is the idea that owning something equals becoming something.

But buying a gym membership does not make you fit. Buying a guitar does not make you a guitarist, and buying a bug out bag does not make you prepared for emergencies.

A solid bug out bag is about 65% thought and time, and probably only 35% gear and products. So if you really want to become prepared, you can’t shortcut it by swiping your credit card once and then getting on with life. Spend the time, think it through, and enjoy the feeling that comes from honestly accounting with yourself and knowing that you’ve done what you can.
Filed Under: Survival Kits

Best Survival Food Companies

March 5, 2024 by SCPadmin

Short answer: If you want the best value and quality food storage for a family of 4 and want to be done with it, the Augason Farms 1-Year Food Storage for 4 People is our top pick. It has the most transparent calorie labeling in the industry and the lowest cost per 2,000 calories of any major commercial option. Search for it on Amazon or the Augason Farms website for current pricing.

Augason Farms 1 year food storage supply

Commercially manufactured survival food is a legitimate option — shelf-stable for years or decades, requires no prep beyond a bucket and a closet, and removes a lot of the friction from getting started. The honest caveat: pre-packaged emergency food is more expensive per calorie than bulk staples. Some of that premium pays for quality freeze-drying and real shelf life. Some of it pays for marketing.

The smartest way to cut through the fog is to compare on a single objective metric: cost per 2,000 calories. Every company uses different language — “servings,” “pouches,” “entrees,” “meals,” “days.” None of those mean anything without knowing the actual calorie count behind the label. Calories are honest. Everything else is marketing.

Cut through the marketing: compare by calories

Before comparing companies, take a look at the actual total calorie count on whatever you’re buying — not the serving count. A “60-serving” bucket from one company might deliver 1,800 calories per day for one person. The same description from another company might deliver 900. The only number that tells you how much food you’re actually buying is total calories.

We also recommend calculating “cost per 2,000 calories” — because some packages are larger than others, and buying two smaller packages sometimes beats one large one on value. Here’s the comparison table across the major 1-year supply options. Note: prices below were gathered at time of original research — verify current pricing before purchasing, as survival food costs fluctuate. The calorie figures and cost-per-calorie rankings are the more durable reference point.

CompanyPrice (verify current)Total CaloriesCost Per 2,000 Cal
Augason Farms~$3,5001,932,950$3.62 ✅ Best value
Saratoga Farms~$2,713735,243$7.38
E Foods Direct~$2,887720,480$8.01
Mountain House~$5,000724,890$13.80
Valley Food Storage~$2,209299,665$14.74
Daily Bread~$6,103720,672$16.94
Emergency Essentials~$6,000679,530$17.66
Survival Cave Food~$6,8181,387,920$9.82
Legacy~$8,7901,698,720$10.35
My Food Storage~$8,1641,590,620$10.27
Lindon Farms~$3,899730,000$10.68
Backpacker’s Pantry~$47,0802,467,860$38.15

Two things this table makes clear immediately: Augason Farms is in a different value category than everyone else at $3.62 per 2,000 calories. And Backpacker’s Pantry, while excellent freeze-dried food for actual backpacking, is not a cost-rational choice for emergency food storage at $38.15 per 2,000 calories.

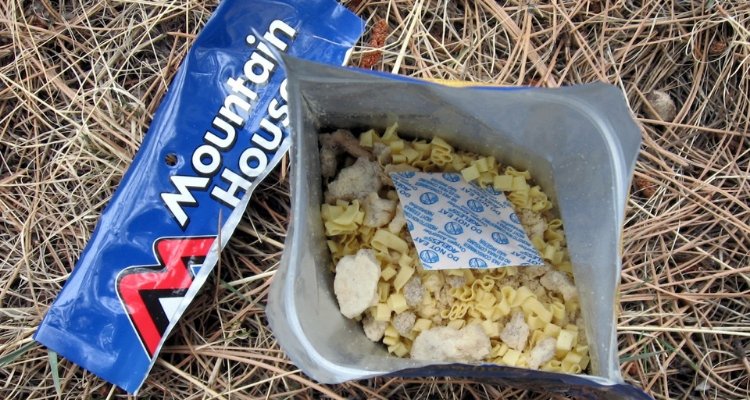
Mountain House freeze dried food pouches for emergency food storage

1. Mountain House

Mountain House is the pioneer — started in 1969, originally making freeze-dried food for outdoor enthusiasts who needed real nutrition in the backcountry. They have the longest track record and consistently the best reviews on taste. People are genuinely surprised that freeze-dried food can taste this good; Mountain House has built its reputation almost entirely on that one differentiator.

Over time Mountain House expanded into prepper and emergency lines, offered in 2-day through 14-day supplies and larger emergency kits. The kits are more portable than buckets, which makes them attractive as a bug-out food option rather than just a stay-in-place storage solution.

The honest tradeoff: Mountain House is not the value play. At ~$13.80 per 2,000 calories for a 1-year kit, you’re paying a significant premium for that taste quality and brand trust. If taste during an emergency matters a lot to your household — and for morale, it genuinely does — Mountain House is worth the cost. If you’re optimizing purely for calories per dollar, it isn’t. For a deeper look at the individual meals see our Mountain House meals review.


Augason Farms food storage cans and buckets

2. Augason Farms

Augason Farms is our overall recommendation, and the calorie table explains why. At $3.62 per 2,000 calories they offer roughly twice the calorie value of most competitors at comparable price points. Their best-known products are #10 cans of individual freeze-dried and dehydrated ingredients — scrambled eggs, apples, bananas, potato slices — plus complete entree meals and month-long bucket options.

The packaging philosophy is notable: larger serving sizes rather than single-serve pouches. A 7-serving bag of macaroni, for example. This is better suited to home kitchen use than backcountry cooking, which is how most emergency food gets eaten anyway. It also makes Augason a better fit for family use than for solo hiking.

Taste reviews are solid but not glowing — people generally say it’s good and they’re happy with it, without the enthusiasm Mountain House gets. The transparency on total calories is genuinely appreciated and unusual in this industry. Most companies make you do math; Augason tells you exactly what you’re buying. That alone makes comparison shopping easier.


Valley Food Storage emergency food supply — no MSG, no preservatives

3. Valley Food Storage

Valley Food Storage’s differentiator is ingredients: no MSG, no artificial preservatives, no cheap filler ingredients. They’re the “clean label” option in a category that doesn’t always prioritize that. If your household reads ingredient labels on everyday food, you’ll appreciate that Valley Food Storage extends that standard to emergency food as well.

They offer 1, 3, 6, and 12-month storage options plus shorter-term kits. Satisfaction guarantee and generally strong customer service reputation. The honest numbers: at $14.74 per 2,000 calories, clean ingredients cost more. Whether that tradeoff makes sense is a household decision — the food quality and ingredient standards are real, but you’re paying nearly four times Augason’s per-calorie rate for them. Good first choice for households with specific dietary concerns or strong preferences about food quality; less competitive for pure calorie-storage value.


Thrive Life freeze dried food cans for long term storage

4. Thrive Life

Thrive Life — originally called Shelf Reliance, a company that made rotating food storage shelving systems before moving into food — is best known for its #10 cans of individual freeze-dried ingredients. Fruits, vegetables, grains, meats, sauces: the range is genuinely broad. If you want to build a custom food storage program from individual ingredients rather than pre-assembled meal buckets, Thrive gives you more granular options than most.

One thing worth knowing: Thrive operates partly through a network marketing model. You can buy directly online, but you can also sign up as a distributor if that’s your thing. For most people this is irrelevant — the food stands on its own merits. The MLM structure just means you may encounter Thrive through a distributor contact rather than a store, which can affect pricing depending on how you buy.


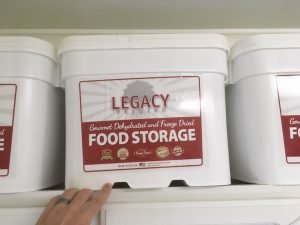
Legacy emergency food storage buckets stacked

5. Legacy Emergency Food

Legacy long term freeze dried emergency food buckets stored stacked on shelves
Legacy buckets have molded grooves along the bottom for stable stacking — we store ours on top of the laundry room cupboards.

Legacy markets itself on lowest cost per pound, though by our cost-per-2,000-calorie metric they come in at $10.35 — better than Mountain House and Valley Food but behind Augason and ReadyWise. Where Legacy genuinely stands out is portion sizes: reviewers consistently mention that Legacy portions are larger than most competitors, which matters for actual satiety and for how many days a supply realistically lasts.

The buckets feature molded plastic grooves on the bottom for stable stacking — a practical design detail if you’re storing multiples. Legacy maintains a 4.4/5 rating on Amazon across a large review base. As a well-reviewed, mid-priced option with better-than-average portion sizes, Legacy is a solid pick especially for families prioritizing fullness per meal over the lowest per-calorie cost.


ReadyWise formerly Wise Food Storage — subject of class action lawsuit over misleading calorie claims

A Note on ReadyWise (formerly Wise Food Storage)

You will likely encounter ReadyWise in your research — it is widely sold and heavily marketed, so it deserves a direct explanation of why we do not recommend it.

Wise Food Storage (now rebranded as ReadyWise) was the subject of a federal class action lawsuit filed in 2017: Miller v. Wise Company Inc., U.S. District Court, Central District of California, Case No. 5:17-cv-00616-JAK-PLA. The lawsuit alleged that the company deceptively marketed its long-term food kits as sufficient to sustain a specific number of people for a specific period of time — when in reality, the kits did not provide adequate calories to do so. Plaintiffs argued the calorie shortfall was severe enough that someone relying solely on these kits in a genuine emergency could face adverse health effects and starvation.

Wise settled the lawsuit. As part of the settlement, the company paid class members between $15 and $1,400 per product, and — critically — agreed to stop claiming its kits would sustain a person for a specific number of days unless the kits actually provided at least 2,000 calories per day. That the settlement required this change confirms the core allegation: their marketing overstated what the food would actually do for you in a survival situation.

The company subsequently rebranded to ReadyWise and has made changes to its packaging and marketing. Independent reviewers have noted improved calorie counts post-settlement. But the underlying company is the same, and the nature of what they were sued for — misrepresenting how long their food would sustain you in an emergency — is the exact failure that matters most in this category. We do not feel comfortable recommending a company with that track record to readers who may one day depend on what they store.

If you already own ReadyWise products, check the actual calorie count on the label against your household’s daily needs — 2,000 calories per person per day is the standard planning benchmark — and verify the kit covers what you think it covers. Do not take the serving count or day count on the label at face value without doing that math yourself.


Survival Recipe Vault — hundreds of survival recipes to download

Free Emergency Food Samples: Try Before You Commit

If you’re on the fence about which company to go with, several will send out a free sample — usually you just cover shipping. This matters more than it sounds: buying several months of food storage only to learn your family won’t eat it is an expensive mistake. Try a meal or two first.

Your best bet is going directly to the company’s website rather than Amazon — free samples are usually not listed on third-party marketplaces. Look for a “free sample” link in the website menu or on the homepage. Here are companies that have offered free samples — verify each is still active before ordering, as these programs change:

  • Augason Farms free sample
  • Valley Food Storage free sample
  • Daily Bread free sample
  • Survival Cave Food — check homepage for current sample offer
  • Harvest Right free sample

Once you’ve tried a few, the best price on most of these companies’ products is usually found on Amazon or direct from the company website during a sale. Check both before buying in bulk.

Survival Food Storage FAQ

How much does a year’s worth of food cost?

Using Augason Farms as the benchmark (best calorie value in the table), a year’s supply for a family of four running 2,000 calories per person per day costs roughly $5,000–$5,500 at current pricing. That number shifts based on whether you have young children vs. four adults, how much of the supply is commercial vs. bulk staples, and what’s on sale when you buy. A more detailed breakdown of what a real year supply actually requires — including the calorie math most commercial marketing skips — is in our survival food list guide.

How much rice do I need for a year’s supply?

Rice is one of the best staples to store — cheap, with a 25–30 year shelf life when properly sealed in Mylar with oxygen absorbers. Store at least 300 pounds of grains per person per year, of which 25–60 pounds should be rice. That gives you a solid calorie base to build around. Store white, Basmati, or Jasmine rice — brown rice’s oils go rancid within a year or two, making it a poor long-term storage choice.

How much does freeze-dried food cost per serving?

Because of the processing involved, freeze-dried food carries a premium. The range in our table runs from $3.62 to $38.15 per 2,000 calories — a tenfold spread. Most of the reputable mid-tier companies land between $8 and $14 per 2,000 calories. Anything significantly above $15 per 2,000 calories is a specialty product (clean-label, gourmet, backpacking-focused) where you’re paying for something beyond basic calorie storage.

How do you store food for a disaster?

Commercial emergency food comes pre-packaged for long-term storage — most companies claim 25-year shelf life under proper conditions. The keys are cool temperatures (below 70°F, cooler is better), dark storage, low humidity, and airtight containers. For bulk staples you pack yourself (rice, beans, wheat), sealed #10 cans or 5-gallon buckets lined with Mylar bags and oxygen absorbers are the standard — the same method we cover in detail in the survival food list. Heat is the enemy: every 10°F drop in storage temperature roughly doubles your effective shelf life.

Is commercial survival food worth the cost vs. packing your own?

Depends on what you’re optimizing for. Packing your own bulk staples (rice, beans, oats, wheat, oil) gives you the lowest cost per calorie by a significant margin — our food storage guide shows how to do this for roughly $900–$1,500 for a family of four for a year. Commercial survival food costs 3–10x more per calorie but saves you the packing work, gives you meal variety right out of the bucket, and stores in a more organized, portable format. The smart approach for most families is a mix: bulk staples as the calorie base, commercial freeze-dried meals for variety, morale, and easy grab-and-go options.

Filed Under: Food Storage

How I Got Gasoline After Hurricane Katrina [disclaimer: not 100% legal]

March 4, 2024 by Seasoned Citizen Prepper

I was advised by my boss to report to work on the Sunday before Hurricane Katrina hit New Orleans. I did not leave work until the Tuesday after Hurricane Katrina hit. However, I was then required to work 12 hour shifts daily for the next month.

I lived in the suburbs of New Orleans but worked in the central business district. I had to travel approximately 18 miles, one way to work, then 12 hours later, return home. There was NO electricity and everyone had evacuated. Since no gas stations were open, I was running very low on gas in my truck after only a few days with NO way of obtaining more gas by conventional means.

As I was leaving my residence one day, I noticed that most people in my neighborhood had taken only one of their vehicles when they evacuated and left another one or two vehicles in their driveway.

Since I knew most of the people that lived on my half of the block, I siphoned gas from my neighbor’s vehicles that had evacuated their residence.

I siphoned the gas into five (5) gallon gas cans. I wrote I.O.U.s, with the amount of gas I had siphoned from their vehicle along with my name, address and phone number. I placed the I.O.U. in a zip lock food storage bag and placed them under the windshield wiper of the vehicle I took the gas from. I then poured the gasoline from the five (5) gallon gas cans into my truck.

One day I observed a City Police Officer and advised him of what I had been doing to obtain gasoline for my truck. He advised me that he did not see a problem if I had left an IOU and intended to replace the gasoline.

As gas stations started to open in the area, I purchased gas and placed it in my five (5) gallon gas cans. I replaced all of the gas that I had borrowed before any of my neighbors’ returned home. As I replaced the gas, I recovered the IOUs that I had left on their windshields.

When my neighbors returned home, I told each one of them what I had done and why. I spoke to my neighbors because I did not want to take the chance that someone had witnessed me taking the gas and might tell my neighbors that I had stolen from them.

Everyone that I had spoken to told me that it was a smart thing to do. Also, they told me that they did not mind as long as I had replaced the gas in their cars.

Filed Under: Disasters

Technology and Home Defense

March 4, 2024 by Seasoned Citizen Prepper

Let’s go into defending your home turf, if everything goes bad. There’s no doubt that there will be those that will want to take what you have. How that will happen, will depend very much on the situation. You can bet that the first confrontation will be an attempt to see if you are easy pickings. After that, things will likely get tougher. What goes bump in the night could be deadly!

Home Security Transmitter Alarms for the Perimeter

Placing coils of barb wire around your perimeter is a very good low tech solution. On the high tech side, there are government surplus seismic sensors (TRC-3a) that can be placed up to a half mile away, and signal you of any ground vibrations such as people walking, or vehicles (On their highest settings they will pick up raindrops, thunder, small animals, and even breeze blowing in the trees! So there is a potential for false alarms if they are not set correctly).

Each set has four transmitters and a receiver. There are different set frequencies available as well. Each of the four transmitters emits a series of beeps dependent on which transmitter it is. Each transmitter has a probe that is placed in the ground to pick up vibrations, and has raised bumps like Braille that show how many beeps it transmits.

The antenna on the transmitters is made to look like a blade of grass, and they are waterproof too. From time to time you can find them for sale on Ebay, as a set, or sometimes individual units. For a receiver, an airplane frequency radio will work, or a programmable scanner.

The drawback is that these require 9 volt batteries, but they do last for a very long time in the units.

Night Vision for Home Security

Night Vision will also give you a definite edge. In today’s world it is becoming more commonplace, so one almost needs it to stay even with what your adversary might have! Lots of stuff came back from Iraq and Afghanistan with the returning troops.

The generation 1 stuff is lower priced, but not a good choice, as you only see part of what’s out there in the dark. If you’re thinking of buying night vision, save your money until you can afford generation 2 or 3 units. You’ll be glad you did!

The ultimate for detecting intruders, in my opinion, is a thermal viewer or scope. They are pricey, but worth the cost. It’s hard to hide from them, but it can be done. For example they can’t see through glass or walls. The government likely has ones that will, but what you can buy won’t. If there’s something around that’s live, it will glow like a ghost. Having one on a rifle stacks the deck big time in your favor!

All of the high tech stuff does require batteries, so a good supply of them would be a must. Rechargeable and a way to charge them (solar?) is also something to consider.

I know that these are pricey solutions, but each person must decide on what they can afford for assurance and well being. There are low tech solutions that will likely work to a degree, but I prefer to stack the deck in my favor, whenever I can!

Filed Under: Security

6 Steps to Stockpiling Medicine and Prescriptions

March 4, 2024 by Seasoned Citizen Prepper

So you are a “Prepper”. You have stockpiled water, food, firearms, ammunition, silver, gold, emergency medical supplies and whatever else that you want, for whatever time period you deemed necessary, 3 months, 6 months a year, more.

However, if you are like most “Preppers”, you never have enough of everything you think you will need. But have you forgotten something that will limit how long you will live in a teotwawki situation.

There is an saying amongst “Preppers”. You can live for 3 minutes without air, 3 days without water and three weeks without food. So what if more important than food and water? What about your daily prescription medicines?

After Hurricane Katrina, there were NO pharmacies open that I could find, in the New Orleans metro area for three (3) months. After any national disaster, how long would it take for the pharmaceutical companies to start to make the drugs that you take? Then they would have to be transported to the pharmacies so you could buy them. Could they even make all of the different medications that you take? Which medications would they make first? Would the government decide where and who gets those drugs first?

You can be the most prepared “Prepper” in the world but if you have a major medical condition such as Diabetes, a Heart Condition, Epilepsy, etc. and have not stockpiled your vital medicines that you need to take on a daily basis, you will only live as long as you have you medicines.

So, you spend a lot of money on other items so that you can survive whatever disaster you are planning for but you do not want to spend $300 or $400 for an extra bottle of medication that you need to keep you living. You had better rethink your strategy.

There is no reason to have a 6 months’ supply of water, food, weapons and ammo but only have a month or two of medication you need to take on a daily basis. Why? If you die or become none functional from not having all of the medications that you need to take on a daily basis, what is the use in having water, food, etc. for longer than the amount of medications you have.

In addition, you then become a liability on the persons in your family or group that now have to take care of you or no longer have you to help them.

First, make a list of all of the medicines that you take on a daily basis.

Second, go talk to the pharmacist that fills your prescriptions.  Determine how much each prescription will cost you if you buy them without using your medical insurance. If you cannot afford to purchase a full months’ worth of medication that you need, ask the pharmacist if you can fill a partial prescription? Can you buy a weeks’ worth of your medicine instead of a full months’ worth?

Third, if you do buy partial prescriptions, as you buy them, keep them in the bottles with the labels that they came with. Most pharmacies print the expiration date on the bottles label. This is important. I have been told that some prescriptions can be toxic after their expiration dates.

Fourth, make a large zip lock bag up and as you buy your medicines, place one (1) months’ supply of you medications in that zip lock bag. When you have a full months’ worth of medications that you take, label the bag with the month and year that you purchased them in. I use a Sharpe’. As you start to obtain multiple months of your medications, place the bags in a small box.

Fifth, keep you surplus medications in a dark and cool place. Heat decreases the amount of time your medicine is good.

Sixth, be sure that you rotate them and use those stored medications well before their expiration dates.

Finally, remember that in a pinch, you may be able to use alternatives like Fish Mox or other fish antibiotics in place of prescription antibiotics that you might normally need.

Filed Under: Health and Medical

What Preppers Need to Know About Small Game Hunting

March 4, 2024 by Seasoned Citizen Prepper

To survive in the wild when SHTF, you have to learn to hunt the most abundant forms of game. This includes rabbits, squirrels, quail, turtle and even the occasional chipmunk, if pickings are slim. One thing is certain: When things start to get ugly, you will need to be able to take whatever game you can, if you expect to be well-fed.

To maximize the benefits of the hunt, here are few things to keep in mind.

Small Game vs. Large Game

Stalking is one of the most effective ways to get squirrel and other small game. Normally, the best time to hunt both is in the early morning, although late evening is good too. Unlike big deer, who will bolt at the slightest noise, small game will hang around a second or two longer. Be ready, though, because they are much faster at the getaway once they decide to take off.

The Best Kill Shot

Unless you want to use the brains for food, the best kill shot for a small animal is a headshot. There are a few good reasons for this.

First, a head shot is a direct kill and won’t damage the hide. Squirrel and rabbit hides can be tanned extremely soft, and they are excellent for boot liners and children’s clothing.

The second reason: It maximizes the amount of usable meat you can harvest from the animal. This also keeps a majority of the long bones in tact. If preserved correctly, the long bones can be used for sewing needles and awls, fish hooks and a variety of other tools preppers need living in the wilderness.

Know What to Keep and What to Discard

Small animals are more susceptible to rabies and other forms of parasites. When you gut the animal, be on the lookout for any indication of illness or disease. If you see anything that looks suspicious, don’t keep the meat. Bury it with the rest of the entrails and make sure it won’t be able to be dug up by another animal looking for food.

If the hide and bones are in good shape, clean them exceptionally well before using them or preserving them.

Do Not Over Harvest

Limit the number of animals you take from one area. One of the best ways to do that is by trapping. Not only does trapping allow you to conserve your ammunition, it also makes sure you take animals from different areas at different times. Set your traps and go about your business.

After a few hours, make your rounds and harvest your rewards. A properly set and bated trap will net animals on a regular basis, if you continue to move and cover them frequently.

Common Sense Rules

No matter where you are or where you hunt, always be aware of your surroundings. Now is the time to take a hunters safety course online so you have a good, working understanding of what is expected of you while you are out in the woods.

A smart hunter knows where to find his prey, but he also knows where his competition is. Make sure you have the advantage by keeping your weapons and traps at the ready.

Filed Under: Survival Food

  • « Go to Previous Page
  • Page 1
  • Interim pages omitted …
  • Page 53
  • Page 54
  • Page 55
  • Page 56
  • Page 57
  • Interim pages omitted …
  • Page 60
  • Go to Next Page »

Copyright © 2026 · Genesis Sample on Genesis Framework · WordPress · Log in

  • Privacy Policy